EasyManuals Logo
Home>HIKVISION>Security Camera>DS-2CD4012F-A

HIKVISION DS-2CD4012F-A Installation Manual

HIKVISION DS-2CD4012F-A
131 pages
To Next Page IconTo Next Page
To Previous Page IconTo Previous Page
Page #62 background imageLoading...
Page #62 background image
Installation Manual of Network Camera
61
Name
Description
LANPoE
10M/100M Self-adaptive Ethernet Port(PoE
Supported)
AUDIO OUT/IN
Audio Out/In
CVBSGND
Auxiliary video output
1A1B
Alarm Out
D+D-
RS-485 Interface
INGND
ALARM IN
DC12V
Power Supply Interface12 VDC
Press RESET about 10s when the camera is powering on or rebooting to restore the default settings,
including the user name, password, IP address, port No., etc.
3.7.2 Installation
Steps:
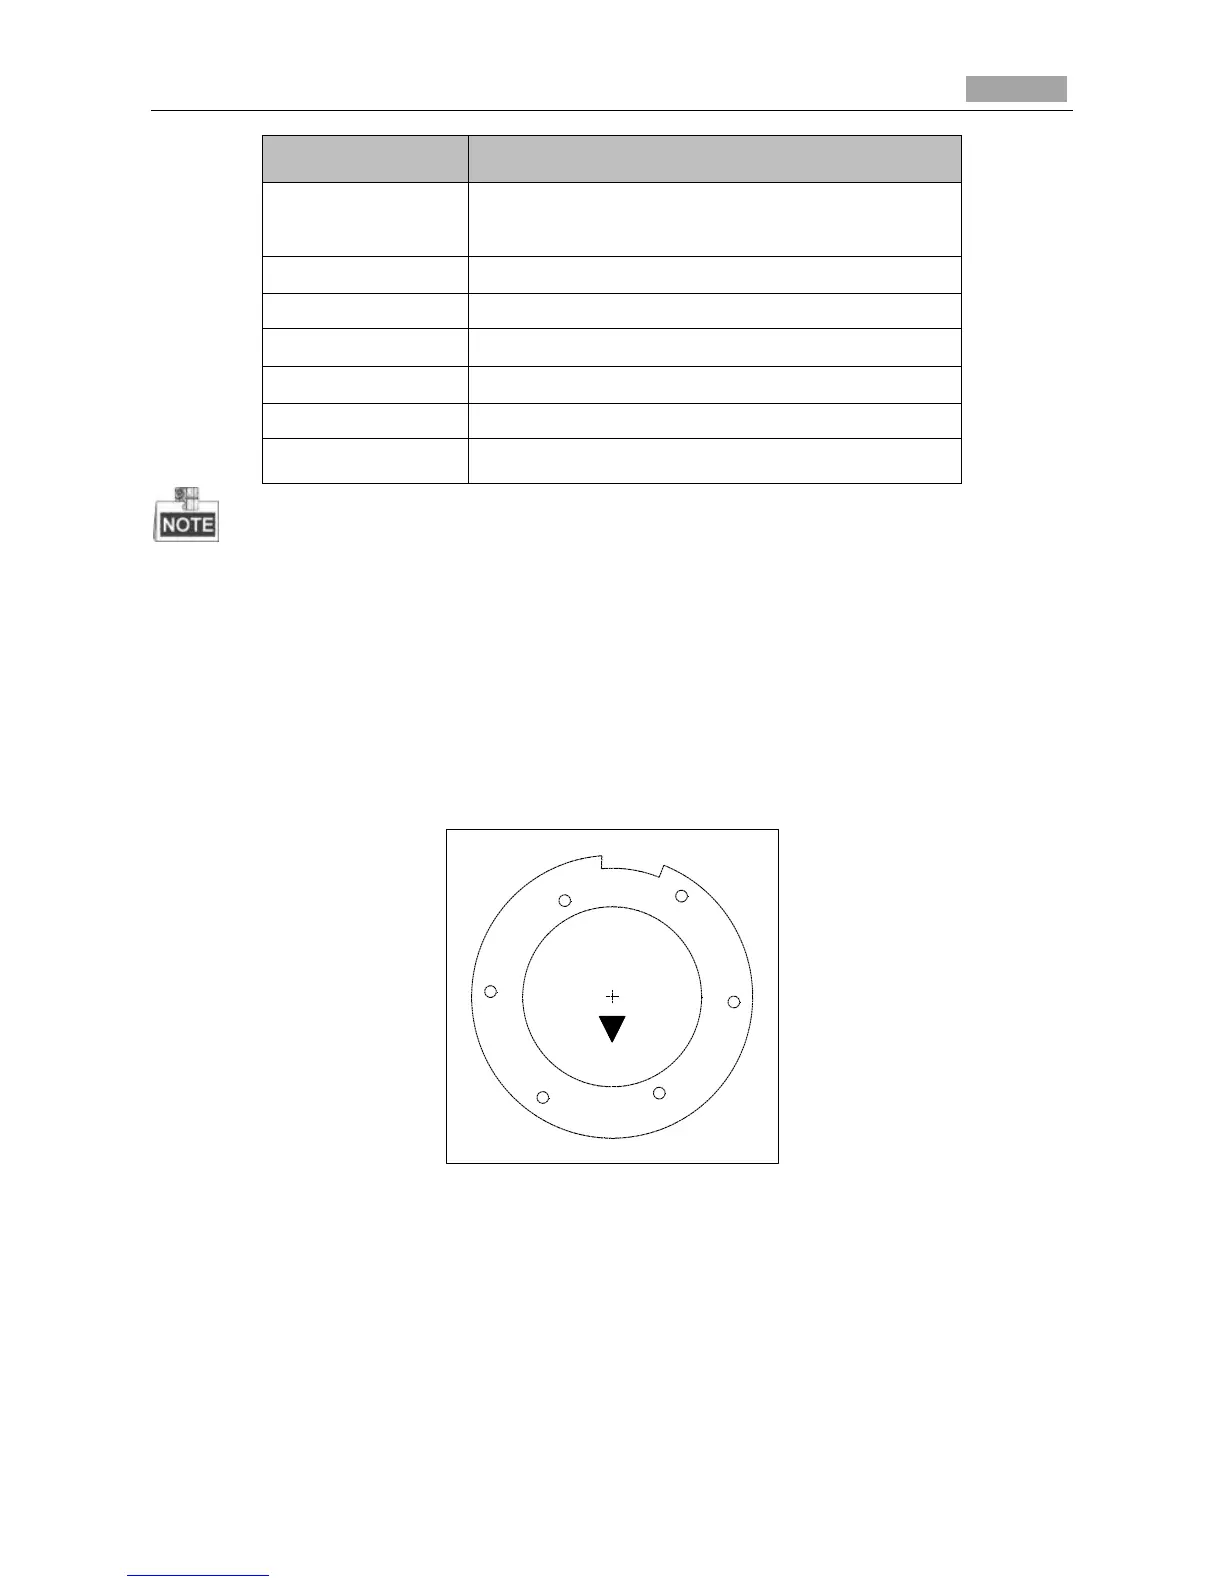
1. Drill the screw holes and the cable hole according to the supplied drill template.
BOTTOM
Hole
2
2
1
1
1
1
Figure 3-81 Drill Template
(Optional)Routing the cable from the side outlet instead of the cable hole drilled on the ceiling is
supported. Use a plier to remove the part shown in the figure below, and you can route the cables
from the side outlet.
Lo-Call 1890 866 900
www.cctvireland.ie
shop@cctvireland.ie

Table of Contents

Other manuals for HIKVISION DS-2CD4012F-A

Questions and Answers:

Question and Answer IconNeed help?

Do you have a question about the HIKVISION DS-2CD4012F-A and is the answer not in the manual?

HIKVISION DS-2CD4012F-A Specifications

General IconGeneral
BrandHIKVISION
ModelDS-2CD4012F-A
CategorySecurity Camera
LanguageEnglish

Related product manuals