UM ColorVu DS-2CExxHFT-Fxx 122919NA 11
2.3 Installation of Type III Camera
2.3.1 Ceiling/Wall Mounting without Junction Box
Before You Start
Ceiling mounting and wall mounting are similar. The
following uses ceiling mounting as an example.
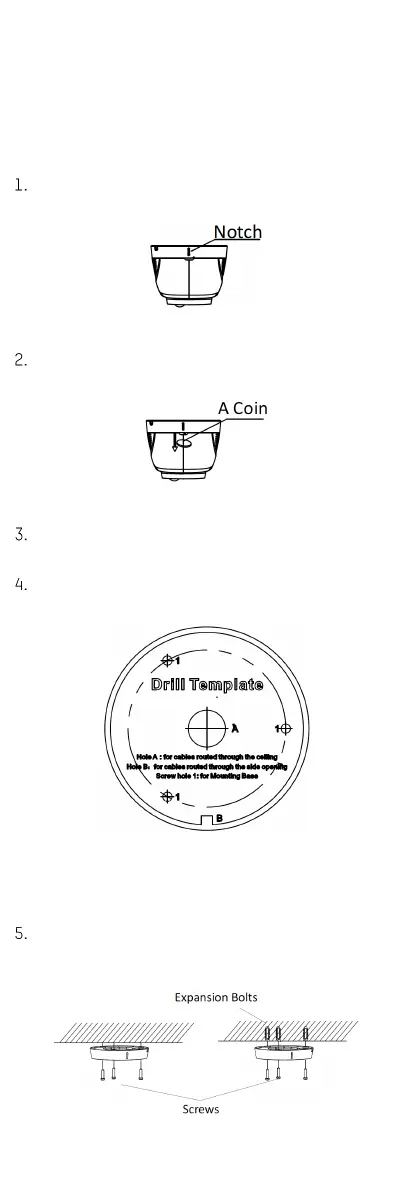
Disassemble the camera by rotating it to align the
notch to one of the lines, as shown below.
Figure 14, Dissemble the Camera
Pry the mounting base open with a flat object (for
example, a coin).
Figure 15, Pry the Mounting Base
Paste the drill template (supplied) to where you want
to install the camera.
Drill the screw holes and the cable hole (optional)
according to the drill template.
Figure 16, Drill Template
NOTE: Drill a cable hole when using the ceiling outlet
to route the cable.
Attach the mounting base to the ceiling, and secure
it with supplied screws. For a concrete ceiling, you
need to install the expansion bolts first.
Figure 17, Attach Mounting Base to Ceiling

 Loading...