50
Installation RS20/22/30/32/40
Release
05
12/2015
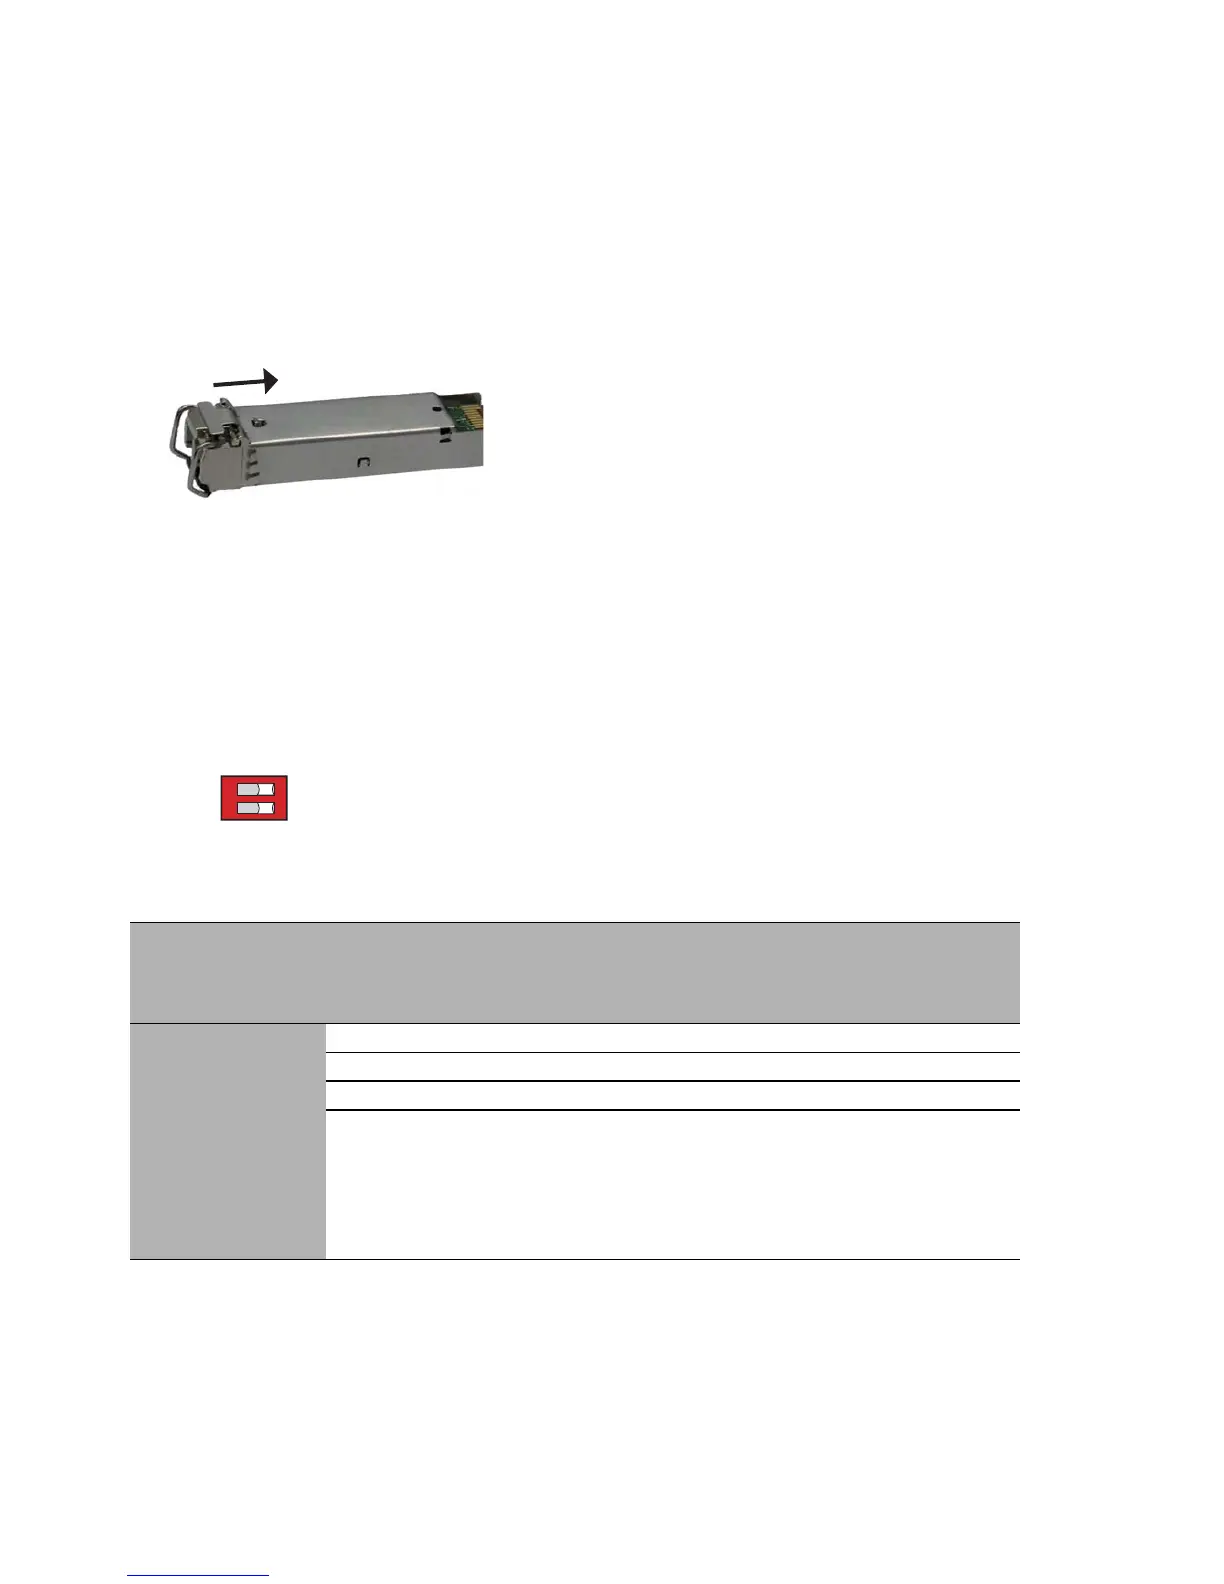
2.3 Installing an SFP transceiver (optional)
Use only Hirschmann SFP transceivers which are suitable for usage with the
device.
See “Accessories” on page 75.
Proceed as follows:
Remove the protection cap from the SFP transceiver.
Push the transceiver with the lock closed into the slot until it latches in.
2.4 Adjust DIP switch settings
The 2-pin DIP switch on the front panel of the device gives you the following
options:
Figure 17: 2-pin DIP switch
Delivery state: both DIP switches “ON”.
Before starting operation of the device, check whether the default settings
of the DIP switch correspond to your requirements.
Switch
RM
Position
Switch
Stand-by
Position
Ring
redun
dancy
Coupli
ng
switch
Ring
manager
Coupli
ng
manag
er
Ring
port
Contro
l port
Coupl
ing
port
Software
configuratio
n
OFF OFF an an aus aus 1 + 2
ON OFF on on on off 1 + 2
OFF ON on on off on 1 + 2 3 4
ON ON SW
configuration
has priority
over DIP
switch
configuration
 Loading...