6
• Follow the steps in the order below, only if they apply to your
situation.
• Adjust the screen using the mount bracket until it’s parallel
with the screen.
• Use the wrench to rotate the feet with an overlooking view, and
don’t look directly at the lens when the console is on because
the laser light may damage your eyes.
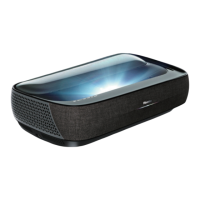
STEP 3 Adjust the projected image and the console
If the bottom of the image is lower on the left(right) and high on
the right(left) rotate the console counterclockwise(clockwise)
until the bottom of the image is parallel with the screen.
PARALLEL THE BOTTOM OF THE IMAGE WITH THE SCREEN
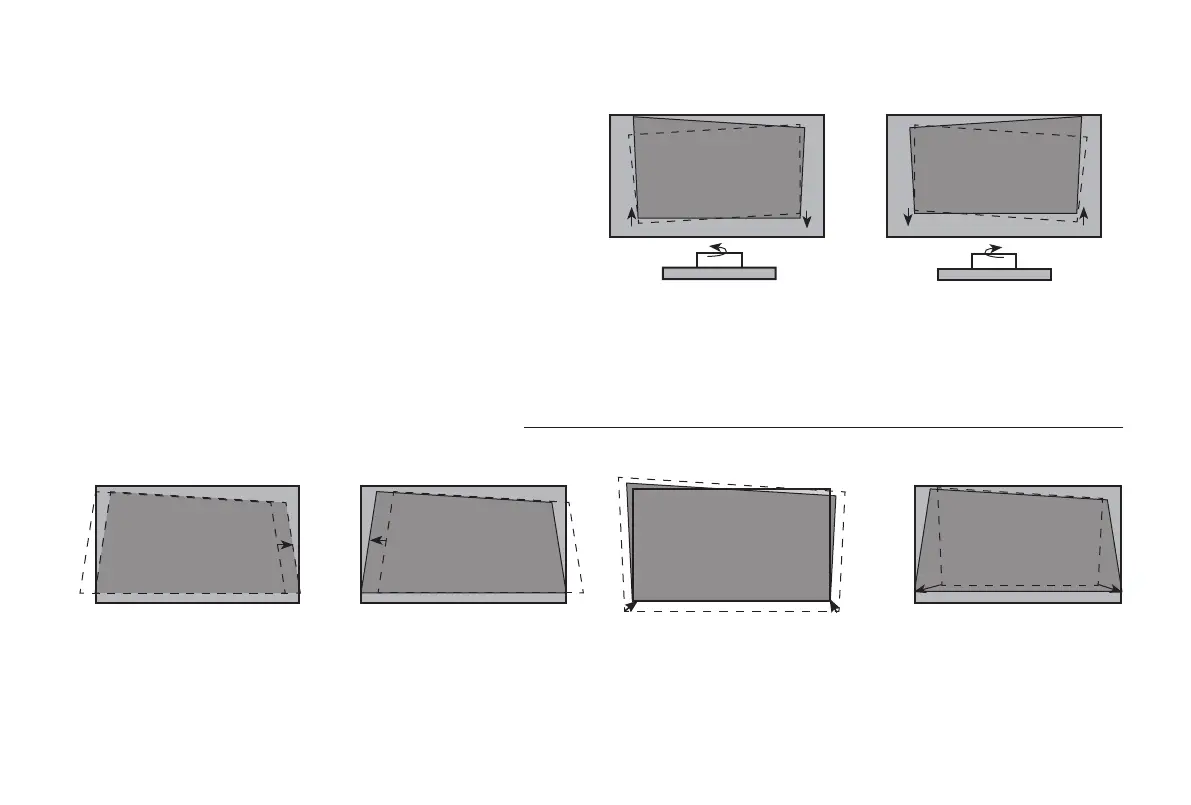
FIT THE BOTTOM OF THE IMAGE TO THE SCREEN
Move the console to the right Move the console to the left Move the console closer to the
screen
Move the console farther from
the screen
 Loading...