1
Table of Contents
Accessories List 1
Laser TV Diagram 2
STEP 1. Mount the Screen 2
STEP 2. Install the Laser TV 2
STEP 3. Adjust the Display Image and the Screen 6
STEP 4. Use Your Remote 8
STEP 5. Proceed through the Screen Setup Menu 10
Maintenance & Quick Problem-Solving Tips 11
Product Specications 13
Recycling / Licenses 14
Congratulations on the purchase of your new Laser TV! This Guide will walk you through a few easy steps to set up
your Laser TV.
Please visit Hisense ofcial website for more details.
Product image is only for reference, actual product may vary in
appearance.
Parts of the software function changes with the system upgrade.
NOTE: The accessories may be different from the list above
due to different models, countries/regions. Please refer to the
actual accessory bag.
Accessories List
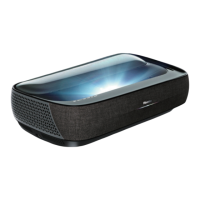
• Laser TV × 1
• Remote control × 1
• AA or AAA batteries × 2
• Gloves for handling the Laser TV × 2
• Power cord × 1
• Wrench to adjust the bottom of the Laser TV × 1
• USB extension cable × 1
• Laser TV Quick Setup Guide × 1
• Laser TV Warranty Card × 1
• Cleaning kit for the lens × 1
• C-shape blocks × 2
• C-shaped Block Installing Instruction × 1
Additional items that come with the
Laser TV
in a
separate package
• A Display Screen (optional equipment)*
• A set of Wall Mount Brackets (optional equipment)*
* Additional items you receive will be based upon your order.
 Loading...