12
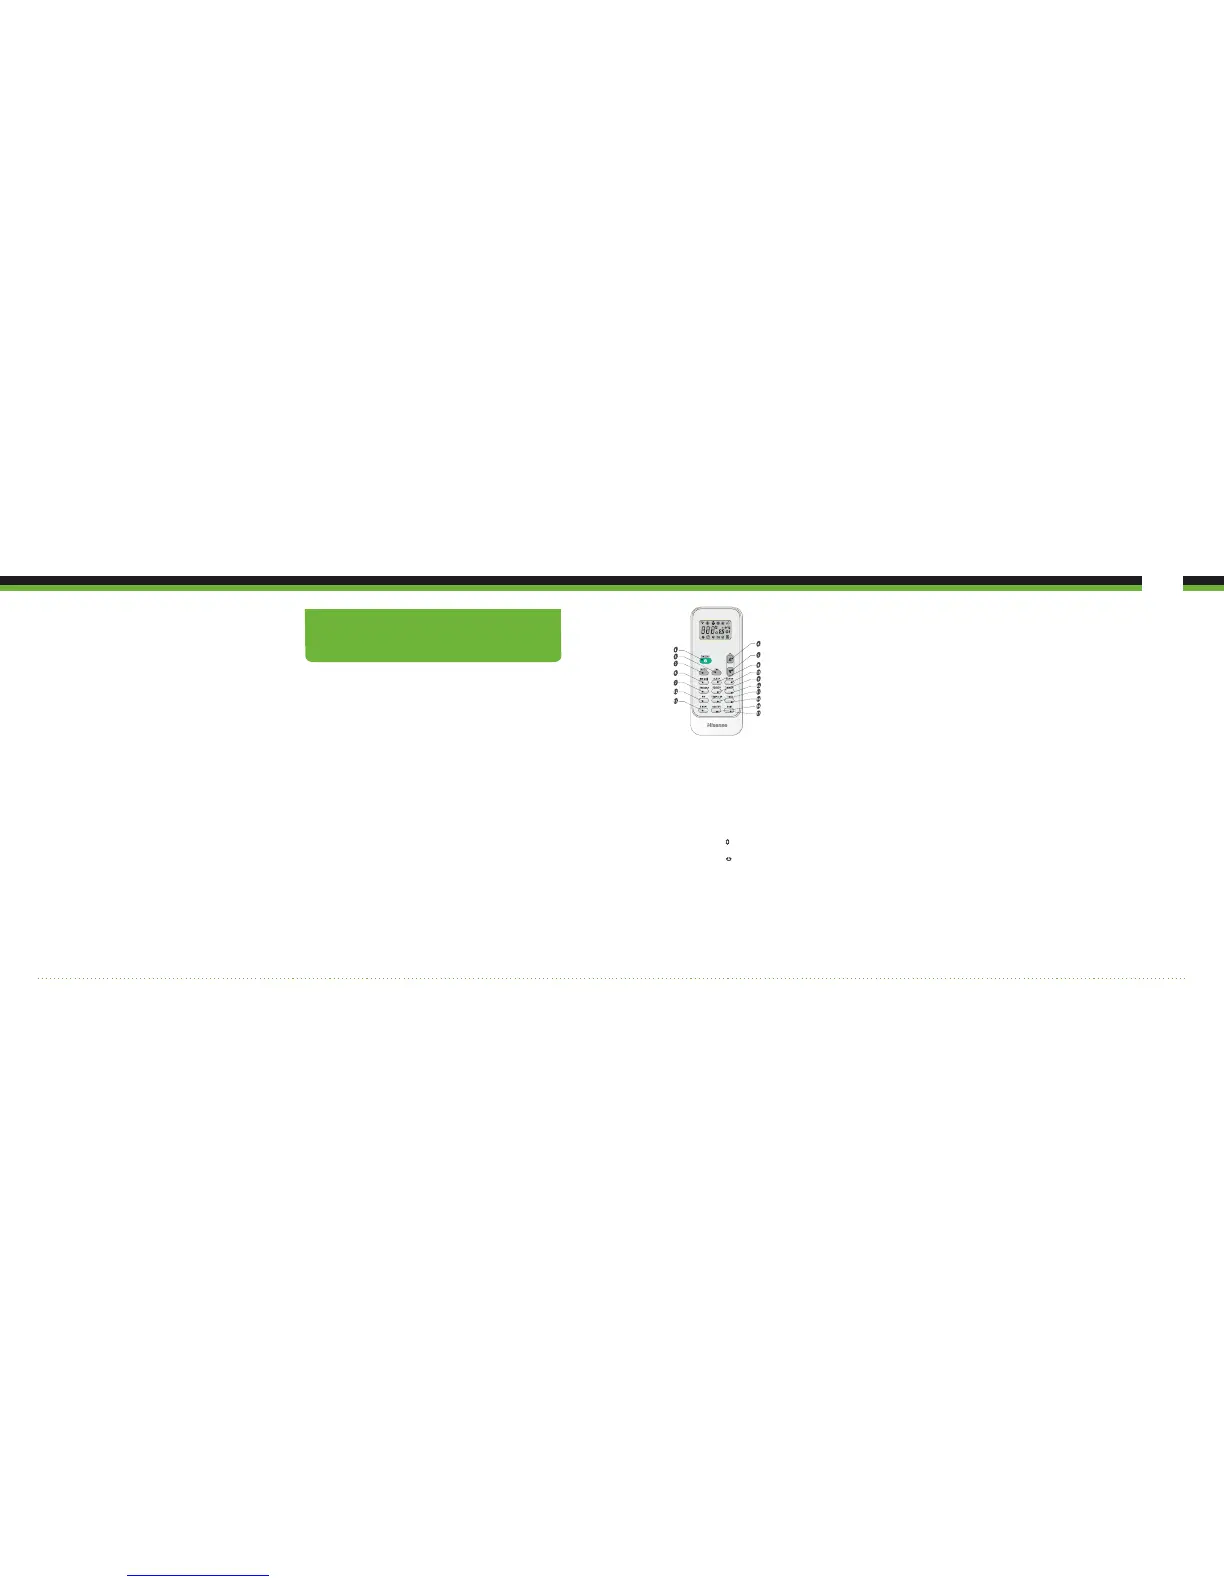
Figure 3. Description of remote control board
:
LR03, .
.
,
.
.
.
,
, .
, -
,
. 8 .
,
, .
.
7.
,
.
, (COOL, HEAT, FAN)
1. , "ON/OFF".
2. "MODE", (COOL),
(HEAT) (FAN) .
3. "TEMP" (-),
( ).
4. "FAN" ,
: , , ,,
.
5. "ON/OFF".
.
(DRY)
, "ON/OFF". "MODE",
(DRY).
.
"ON/OFF".
.
,
.
TURBO (SUPER)
"SUPER"
(
) ( ).
15 ,
.
HD Sensor control
(
).
-
.
,
.
HD sensor control
( on/off).
SLEEP
.
.
, .
8 .
Sleep 1
2°C
2 , .
2°C 2
, .
5
ENGLISH
Indication of the control board
display shall correspond to
selected modes.
"Timer" to order.
To cancel the function, press the "Timer" again, a beep sounds, the function is
disabled.
11. Button «TEMP DISP». Using this button to switch temperature display: set
temperature or temperature indoor unit.
12. Button "IDM". Used to set or cancel IDM mode operation.
13. Button SUPER. With the use of this button you may switch the heavy-
duty operating mode involving the maximum cooling efficiency of 18° (in
the cooling mode) or the maximum heating efficiency of 32° (in the
heating mode).
14. Button «DIMMER». With this button to turn off all indicators on the display
of the indoor unit.
15. Button «SILENT». With this button, you can turn on or off mode SILENT.
16. Button "HEATER". Using this button you can select the heater mode. *
17. Button "SOFT". Using this button you can limit the maximum electric
current.
Work with remote control board
Mounting and replacement of batteries: mount two LR03 alkaline batteries,
according to polarity indicated on the remote control board.
In order to avoid malfunction of the remote control board do not insert used
batteries or batteries of various types.
If the conditioner is not used for a long time, remove batteries from the board
or else electrolyte may leak and damage the board.
In normal operation of the conditioner average service life of batteries will be
about a half-year.
Replace batteries, if command receiving is not confirmed with an audio
signal, or if the display does not show a sign of command transfer. When
*not used in this model
1. Button «ON/OFF» (Power). Using this button, you may turn the conditioner on
or off.
2. Button «MODE». With this button you can select the mode of the air conditioner.
3. Button «FAN». Using this button, you may select rotation speed of the indoor
unit fan: «Auto», «High», «Middle», «Low».
In Auto mode the fan speed will change automatically. In dry mode the fan
speed will remain unchanged Low.
4,5. Buttons «TEMP» (increase/decrease). Using this button, you may set needed
air temperature indoors.
6. Button «SWING» . Using this button, you may regulate position of air-
outlet blinds and forward treated air up and down.
7. Button «SWING» . Using this button, you may regulate position of air-
outlet blinds and forward treated air left-right.
8. Button «SLEEP» (Night Care). This button turns on and off night mode.
9. Button «SENSOR» (HD sensor control). With this button, you can switch the
display of the room temperature and the set temperature.
10. Button «TIMER». Pressing this button, you may set the time for turning
the conditioner on and off (set the time by pressing TEMP" buttons up and
down). If the conditioner is off, you may set the time for automatic turning
on in a set time interval. And vice versa, if the conditioner is on, you may set
the time for automatic turning off. Before activation of the Timer function
you may specify the needed settings.
If you do not select the desired time within 10 seconds of pressing the
"Timer", the function will be canceled. Select the desired time and press the
AUTOMATIC mode
In automatic mode, the system selects cooling, heating or dry automatically
depending on the current and set temperature.
COOL, HEAT and FAN
1. Turn the conditioner on pressing the "ON/OFF" button.
2. Pressing the "MODE" button, select COOL, HEAT or FAN mode manually.
3. Pressing the "TEMP" button (up-down), set the desired air temperature
indoors (except for FAN mode).
7. OPERATING MODES
 Loading...