--- 10 ---
8-2. Reassembly
Put the parts together in the reverse order of disassembly, with the precautions given below.
(1) Apply machine oil to Felt Packing (B) [24] <24> then mount it to the Packing Gland [27] <27> to increase the
dust resistance.
(2) Generously lubricate the teeth of the Gear [20] <20> and the Pinion [7] <7> with grease. Rub grease onto the
teeth with your fingers so that the grease reaches each tooth bottom. Note that under-lubricated Gear [20]
<20> and Pinion [7] <7> may wear at a faster rate.
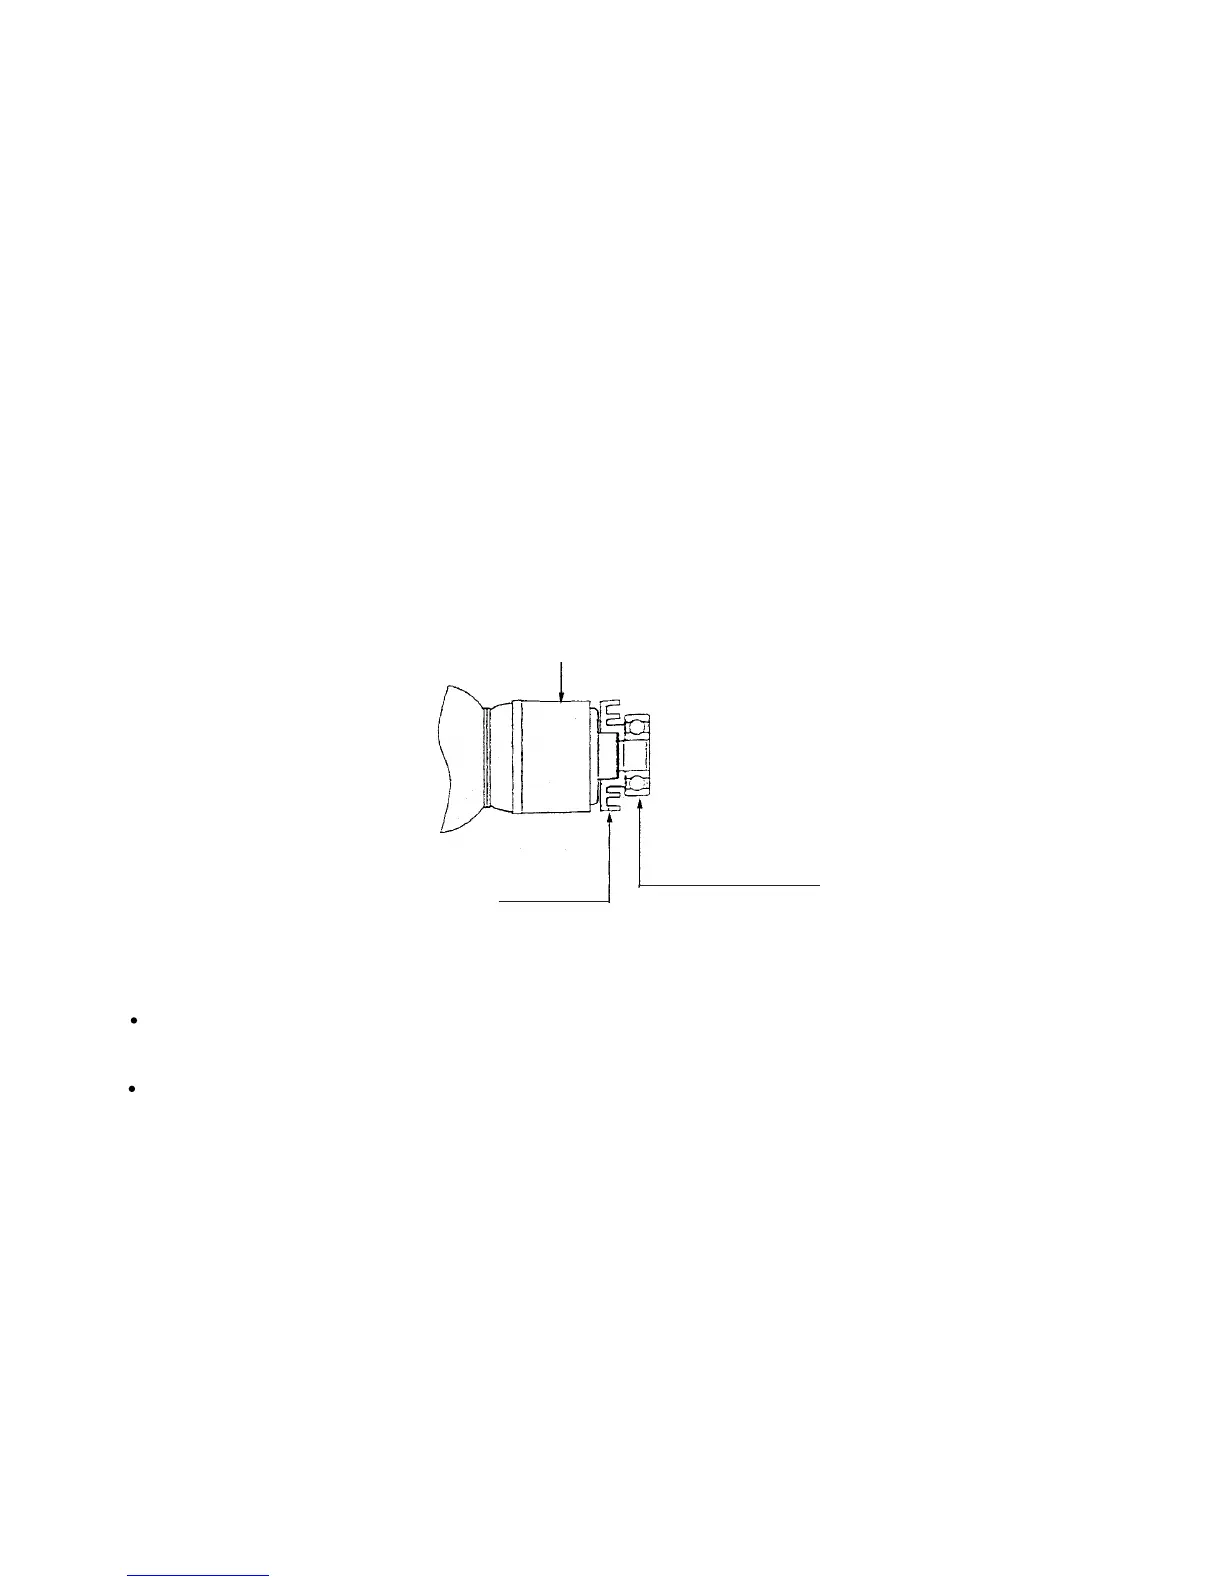
(3) When replacing the Armature [13] <13> and the Ball Bearing 6000VVCMPS2L [38] <46> on the commutator
side, press inward on the Dust Seal [37] <45> while taking care of its direction until the end face of the Dust
Seal [37] <45> hits against the butting surface of the Armature [13] <13> and make sure that the Dust Seal
[37] <45> cannot turn freely. (See Fig. 10.)
The Dust Seal [37] <45> is an important element for improved dust protection of the Ball Bearing
6000VVCMPS2L [38] <46>. Be sure to use a new one at every disassembly work of the Ball Bearing
6000VVCMPS2L [38] <46>.
(4) Apply Three Bond TB 1406 Screw Locking Agent to the following screws.
Two Seal Lock Screws (W/Sp. Washer) M5 x 14 (Black) [1] <1> which fix Bearing Cover (A) [12] <12> in
place.
Four Hex. Socket Hd. Bolt (W/Flange) M5 x 16 [28] <28> which fix the Packing Gland [27] <27> in place.
Fig. 10
Dust seal
Armature
Ball bearing
(6000VVCMPS2L)
 Loading...