23
5. TROUBLESHOOTING [SHUTDOWN/ALARM Indications on the Instrument Panel]
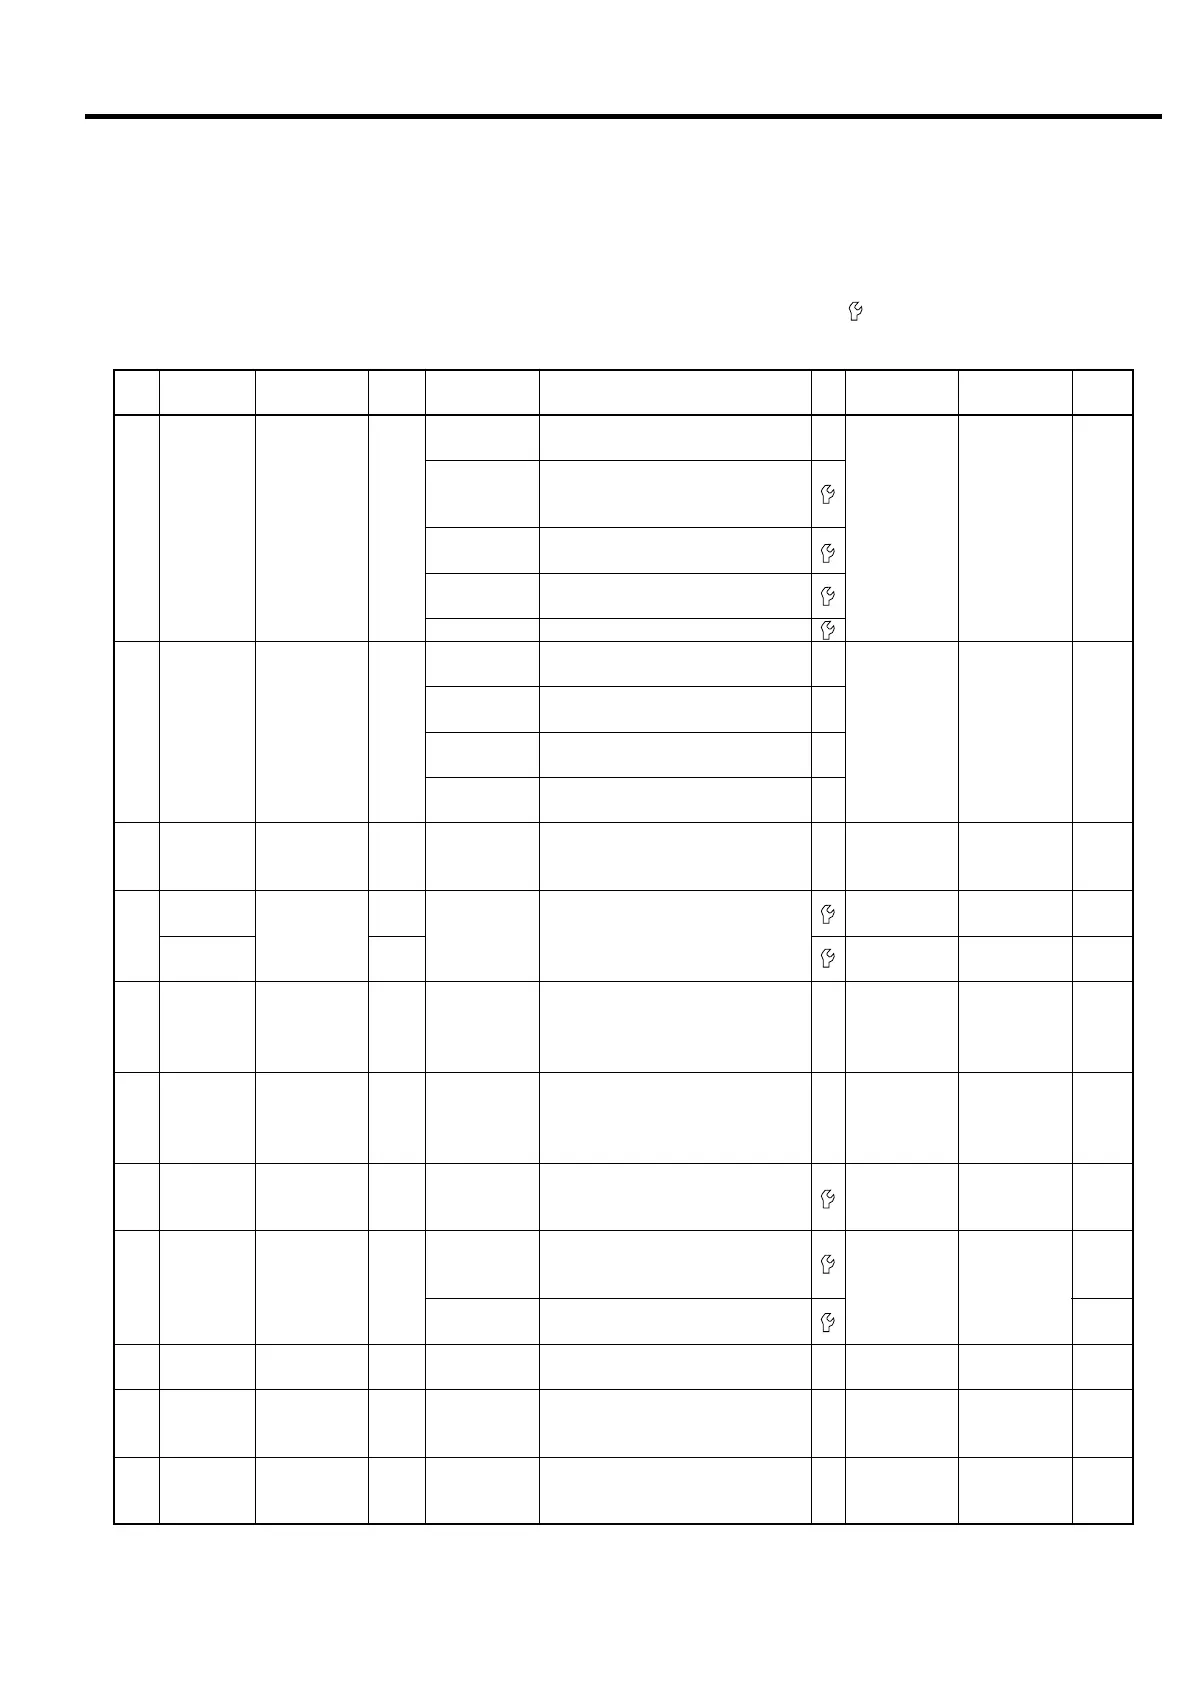
5.3 SHUTDOWN/ALARM Indications on the Instrument Panel
When a problem occurs, the SHUTDOWN, ALARM or AUTO START light flashes and the digital monitor displays
a corresponding ALARM or SHUTDOWN (as ‘A/S’ below) code. If this is the case, refer to the following table to
identify the cause. If you cannot identify the cause, or for the problem with a mark in the table, contact a
Hitachi distributor.
A/S
Code
Yes
Yes
No
Yes
No
Yes
Yes
Yes
Yes
Yes
Yes
Yes
E-17
E-18
E-23
E-19
E-01
E-02
E-11
E-12
E-14
E-16
E-51
SHUTDOWN:
On (flashing)
SHUTDOWN:
On (flashing)
ALARM:
On (flashing)
SHUTDOWN:
On (flashing)
ALARM:
On (flashing)
SHUTDOWN:
On (flashing)
SHUTDOWN:
On (flashing)
SHUTDOWN:
On (flashing)
SHUTDOWN:
On (flashing)
SHUTDOWN:
On (flashing)
SHUTDOWN:
On (flashing)
SHUTDOWN:
On (flashing)
Overloading
High discharge
temperature 1 (*)
High discharge
temperature 1 (*)
Failed air dryer
Reversal phase
connection
Phase-lacking
connection
High discharge
temperature 2 (*)
Abnormally
high discharge
pressure
Option
Answer error of
contactor 42
Answer error of
contactor 52
Failure of power
supply
High discharge
pressure
High discharge
pressure
Failure of main motor
and/or cooling fan motor
Failure of air end
High ambient
temperature
Low oil level
Dirty or clogged
oil cooler
Dirty or clogged
oil filter
Same as
the E-18 above
Tripping of an air
dryer’s protective
device during
operation
Power connected
in a reversal phase
Power connected
with a lack of
phase
Failure of oil
separator
element
Failure of oil
separator
element
Failure of
contactor 52
Failure of
contactor 42
(42 answer error)
Failure of
contactor 52
(52 answer error)
Check the power supply for a voltage drop
and imbalance. Correct it if required.
Check and correct the capacity control settings and/
or readjust the modulator valve, if the discharge pres-
sure is higher than the specification pressure.
Check the oil separator element. Replace
it if it is clogged.
Check the motor for insulation resistance
etc.
Check the air end.
Ventilate the room to reduce the ambient
temperature to 40°C.
Add oil. (Disconnect the power and make sure that the
discharge pressure gauge reads 0 MPa in advance.)
Clean the cooling fins. See page 51.
Replace the oil filter. See page 49.
Same as the E-18 above
See page 25.
Disconnect the power and change 2 of
the 3 power cord wires.
Check the power supply. Tightly reconnect
the power cord wires.
Replace the oil separator element and the
oil.
Check the oil separator element. Replace
if required.
Disconnect the power and tightly reconnect
the 52 wires.
Disconnect the power and check the 42.
Tightly reconnect the 42 wires. Replace the
42 if necessary.
Disconnect the power and check the 52.
Tightly reconnect the 52 wires. Replace the
52 if necessary.
Press the reset
button of the
thermal
overload relay.
Press the
RESET button.
Automatically
reset.
Press the
RESET button.
Press the
RESET button.
Disconnect and
reconnect the
power.
Disconnect and
reconnect the
power.
Press the
RESET button.
Press the
RESET button.
Press the
RESET button.
Press the
RESET button.
Tripping of
thermal
overload relay
Discharge
temperature 1
over 110°C
Discharge
temperature 1
over 105°C
DIP switch SW1
No.2 set to OFF
DIP switch SW1
No.2 set to ON
Detected for 3
seconds after
connecting the
power
Detected for 3
seconds after
connecting the
power
Discharge
temperature 2
over 110°C
Detected during
delta operation
Detected during
delta operation
Detected during
star operation
Light:
Action
Category of
Problem
A
Shutdown
Causes What Actions to Take
Mark
What and How
to Detect
How to
Reset
A/S
History
17
18
23
19
19
01
02
11
12
12
14
16
51
 Loading...