English
18
OPTIONAL ACCESSORIES (sold separately)
1. Dust adapter
2. Elbow
3. Dust bag
APPLICATIONS
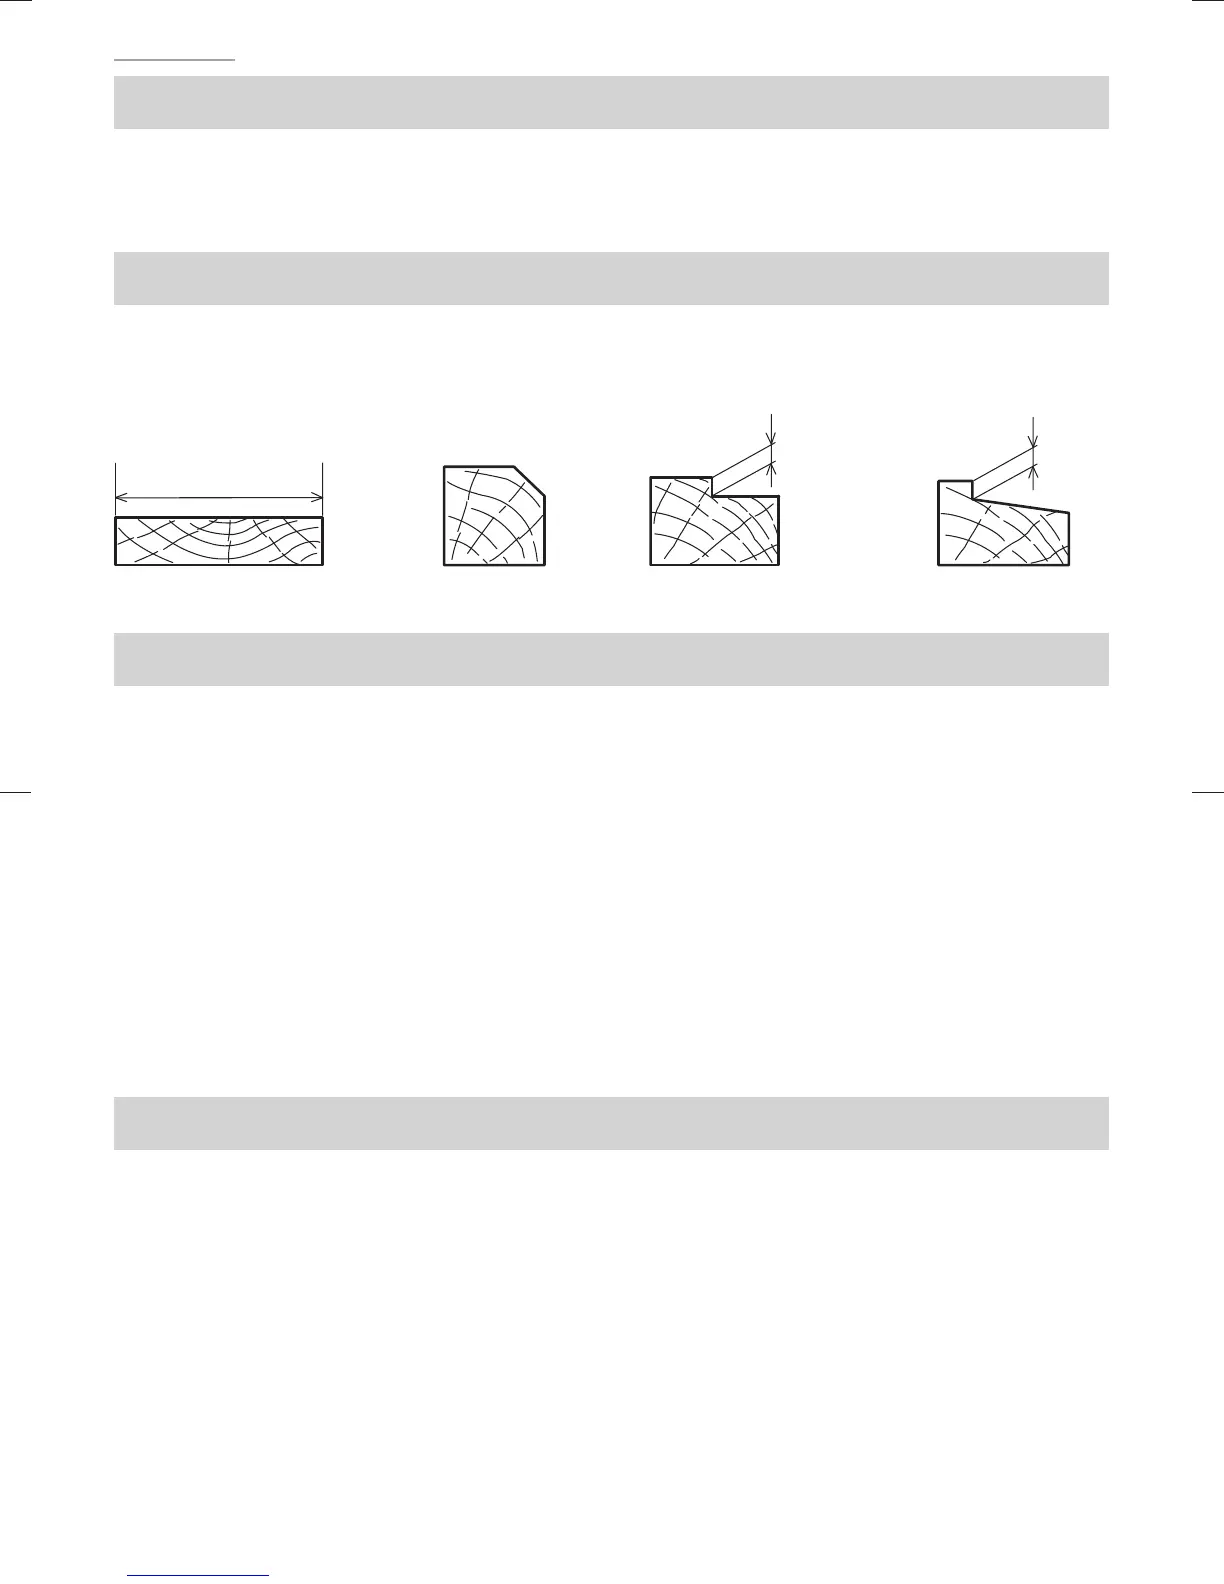
Planing various wooden planks and panels. (See Fig. 1 ― 4)
Fig. 2
Beveling
Fig. 4
Tapering
9 mm
(Max)
Fig. 3
9 mm
(Max)
Rabbeting
82 mm (Max)
Fig. 1
Planing
PRIOR TO OPERATION
1. Power source
Ensure that the power source to be utilized conforms to the power requirements specifi ed on
the product nameplate.
2. Power switch
Ensure that the power switch is in the OFF position. If the plug is connected to a receptacle
while the power switch is in the ON position, the power tool will start operating immediately,
which could case a serious accident.
3. Extension cord
When the work area is removed from the power source. Use an extension cord of suffi cient
thickness and rated capacity. The extension cord should be kept as short as practicable.
4. Prepare a stable wooden workbench suitable for planing operation. As a poorly balanced
workbench creates a hazard, ensure it is securely positioned on fi rm, level ground.
PLANING PROCEDURES
1. Operation of the switch
The trigger switch lock-off button is designed to prevent inadvertent operation of the power
tool. To operate the power tool, it is necessary to fi rst fully insert the lock-off button into the
hole on the handle.
The trigger switch will not operate unless the lock-off button has been pushed in.
When the trigger switch is released, the power goes off and the lock-off button
automatically returns to its initial position, locking the trigger switch.
000BookP20SFChS.indb18000BookP20SFChS.indb18 2016/07/1913:40:442016/07/1913:40:44
 Loading...