Personal Fit Adjustments
Adjustments for Competition 141
Personal Fit Adjustments
The following suggestions may make your ride
both more comfortable and more responsive to
your control input.
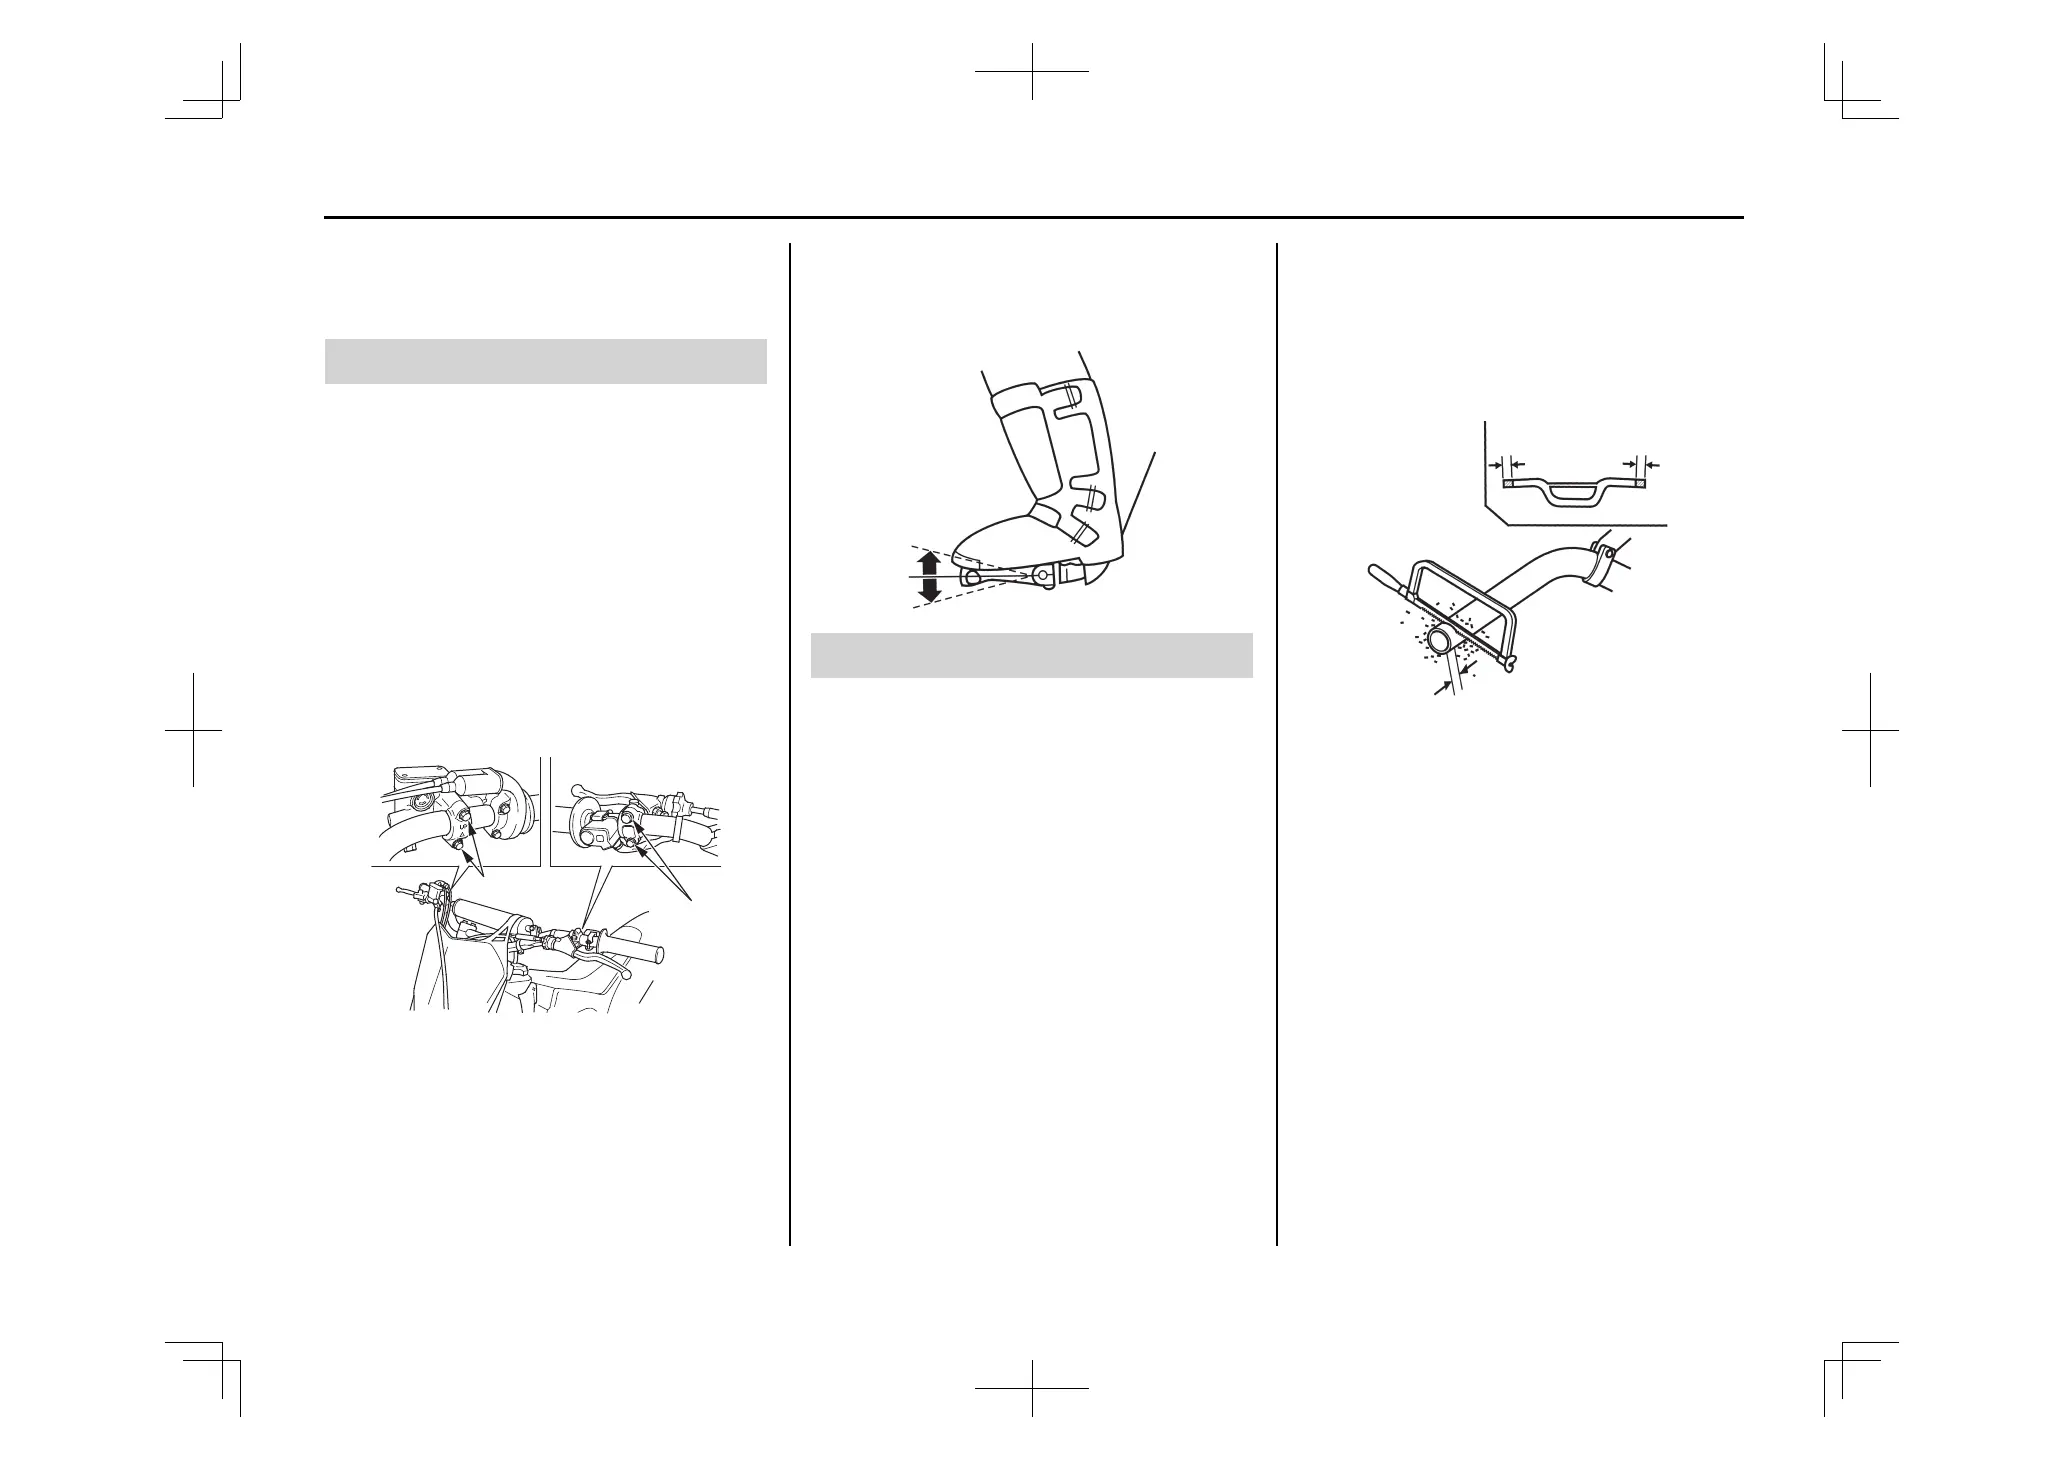
• Position the control levers so that you can use
them comfortably when seated and standing.
• Adjust the mounting bolt torque of the clutch
and front brake lever assemblies so that they
can rotate on the handlebar in a fall. If an
assembly does not rotate, it may bend or break
a control lever. Make sure that the bolts are
torqued securely enough to prevent slippage
during normal operation.
Apply Pro Honda Hondalock or an equivalent to
the threads of these bolts prior to adjustment to
help ensure the correct torque is retained.
Tighten the top bolts first.
As an alternative, consider wrapping the handlebar
area under the control assemblies with Teflon tape.
Then tighten the assemblies to their normal torque.
Upon impact, the fully-tightened assemblies
should rotate on the Teflon tape.
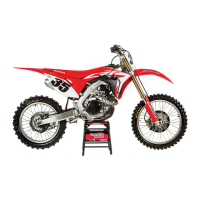
• Position the shift lever and rear brake pedal so
they are close to your boot for rapid access, but
not so close that either is depressed when
sitting or standing comfortably on your CRF.
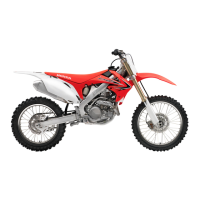
• Position the handlebar so that both gripping the
bar and operating the controls is comfortable
while both seated and standing, while riding
straight ahead and turning.
Tighten the forward handlebar upper holder
bolts first.
• The handlebar position may be moved forward
either 0.1 in (3 mm) (using optional handlebar
lower holders) or 0.2 in (6 mm) (by rotating the
standard holders 180 degrees).
Refer to an official Honda Service Manual for
installation instructions. Be sure to check
control cable and wiring harness routing after
the adjustment.
• Handlebar width can be trimmed with a
hacksaw to better suit your particular shoulder
width and riding preference. Think this
through carefully and cut off just a small
amount at a time from both sides equally. It is
obviously much easier to make the handlebar
narrower than it is to add material.
• Chamfer the edges to remove burrs and other
irregularities or roughness after sawing the
handlebar.
• An alternate handlebar shape, through varying
rise or rearward sweep dimensions, will
provide further adjustment to riding position
and may better suit your particular body size or
riding style. Each of the ergonomic dimensions
of the machine were determined to suit the
greatest possible number of riders based on an
average size rider.
Control Positioning
(1) control lever mounting bolts
(1)
(1)
Handlebar Position, Width & Shape