Mechanical installation
Installation guide 762 VITO interfaces & VITO probes Page 14
When the electrical installation is carried out at a later stage, the cover of the
VITO Interface enclosure can be closed after verifying there is no wire or
cable in the gap between the shield and the enclosure. Make sure the cover
threading is clean – if needed clean the threading with an old tooth brush and
apply anti-seize;
Caution
Do not damage the thread of the cover.
Before closing, inspect, clean and lightly grease with anti seize.
When closing, turn cover counter-clockwise till thread ‘clicks’ in place, then
turn clockwise until cover is fully closed.
Notes:
Make sure the cable gland is water tight – use Teflon
®
tape or a suitable pipe sealant if
needed.
Use of a self-fusing silicone tape (such as rescue Tape
®
) or a suitable pipe sealant
is recommended to protect the cable gland from the environment.
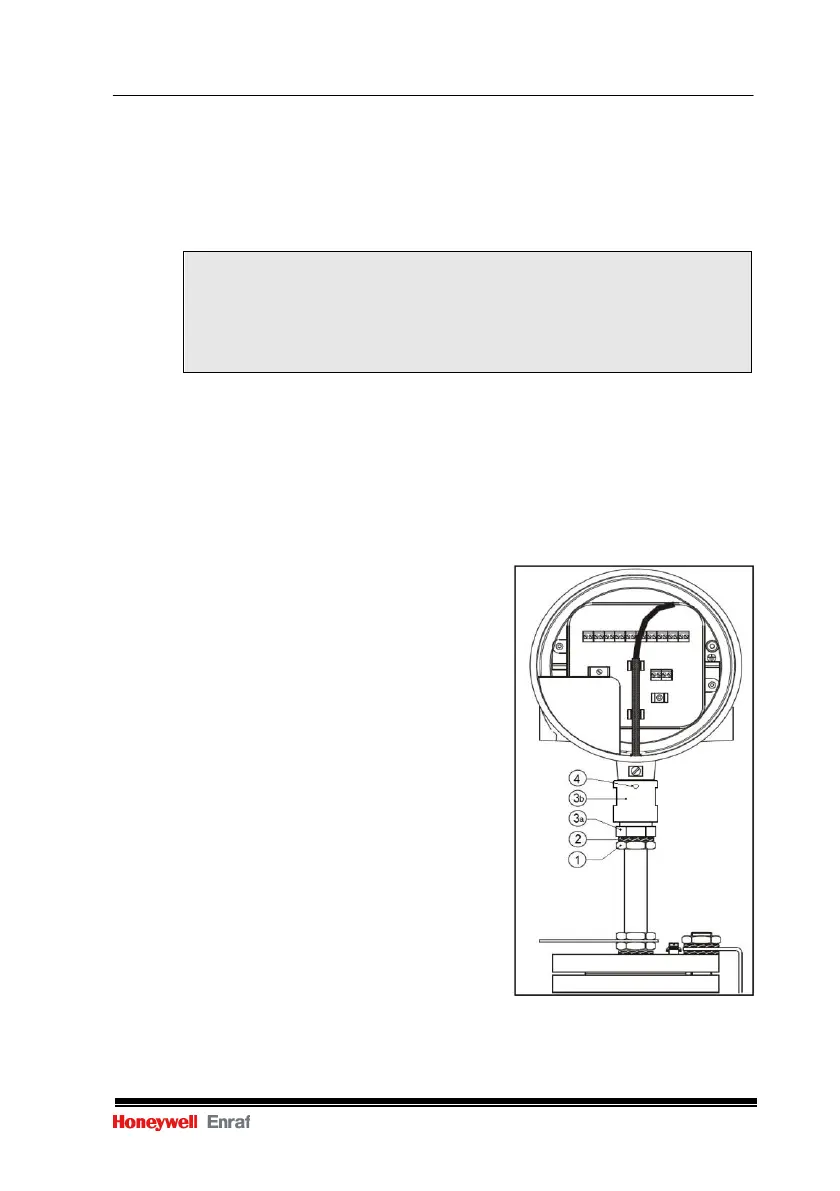
2.5.1.2 Version with optional IP adapter
Refer to figure 7b.
Clean the threads on the temperature
probe and lower IP adapter (3a) removing
any old grease, anti-seize, dirt, etc.
Apply a light, smooth layer of the Agip TOP
2000 grease over the temperature probe
threads;
Turn the remaining nut (1) for appr. 25 mm
(1") on the adjusting pipe and place the
remaining lock washer (2) on top of the nut;
Bolt the lower IP adapter (3a) to the
temperature probe. Tighten the adapter to
the probe to achieve positive sealing
between the two parts! Tightening the
adapter to the probe will compress squared
ring located inside of the adapter.
Note:
Make sure not to over tighten the
connection and/or damage the ring!
Looking through the opening on the
adapter top side you will be able to see
when the sealing ring gets oval shape
while the probe has pushed it from the
bottom side;
Secure the lower IP adapter (3a) by Figure 7b Installation VITO Interface
fastening lock nut (1) with lock (with optional IP adapter)
washer (2);
 Loading...