HP 560 Wireless 802.11ac Access Point Quickstart 6 Using the AP in autonomous mode
Note: The remainder of this Quickstart does not apply to controller-managed
APs.
Using the AP in autonomous mode
In autonomous mode, the AP operates as a standalone device. You configure
and manage an autonomous AP by using its web-based management tool, as
described in this section.
The management tool is organized with menus and sub-menus. Instructions for
making menu selections, such as “select
Wireless > Local mesh
” instruct you
to select the
Wireless
menu and then the
Local mesh
sub-menu, as follows:
AP status LED states in autonomous mode
This procedure describes how to set a factory-default AP to autonomous
mode, and then perform its initial configuration that enables you to establish a
wireless connection through the AP to the Internet.
In autonomous mode, the AP is managed via its web-based management tool
using Microsoft Internet Explorer 9+ or Mozilla Firefox 15+.
Caution:
Wireless protection: A factory-default AP that has been switched
to autonomous mode has wireless protection options disabled. HP
recommends that you follow the procedure in Configure basic wireless
protection on page 7. See also Wireless protection in the HP MSM APs
Configuration Guide.
Note: Do not power on the AP until directed.
A. Configure your computer
1. Disconnect your computer LAN port and configure it to use the static IP
address
192.168.1.2 and the subnet mask 255.255.255.0. Set the
default gateway to
192.168.1.1 and DNS server to 192.168.1.1.
2. Disable any wireless connection on your computer.
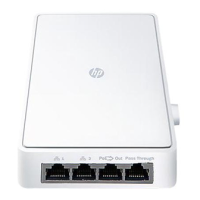
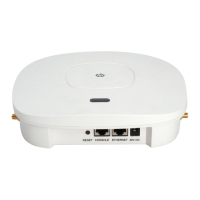
B. Connect the cables and power on the AP
1. Connect the cables:
• If using a PoE switch, use Ethernet cables to connect your
computer and the AP to an unused factory-default PoE switch.
• If using a PoE injector, use Ethernet cables to connect your
computer to the data in port of the PoE injector and the AP to the
data and power out port of the PoE injector.
2. Power on the AP by powering on the PoE switch or injector.
Initially, the AP power LED flashes once every two seconds. Wait
approximately a minute until it begins flashing once per second before
proceeding to the next step.
C. Switch the AP to autonomous mode
Note:
A factory-default AP is assumed.
1. In a web browser, enter the address: https://192.168.1.1.
2. A security certificate warning is displayed the first time you connect to the
management tool. This is expected behavior. Select whatever option is
needed in your web browser to continue to the management tool.
3. On the Login page, specify admin for both Username and Password,
and then select Login. The AP management tool home page opens.
4. Select Switch to Autonomous Mode and confirm the change. The AP
restarts in autonomous mode.
Note: To avoid a delay after switching modes, clear the ARP (address
resolution protocol) cache on your computer. In Windows for
example, from the
Windows Start menu, select Run and enter
arp -d, and then select
OK.
D. Log in
1. Wait until the Power LED is on solid.
LED State Description
Power/
System OK
Off
The AP has no power.
Flashing
The AP is starting up. A Power LED that
continues to flash after several minutes
indicates that the software failed to load.
Reset or power cycle the AP. If this condition
persists, contact HP customer support.
On
The AP is fully operational.
Ethernet
Off
The port is not connected or there is no
activity.
Flashing
The port is transmitting or receiving data.
Radio Flashing
The radio is transmitting or receiving data.
Main-menu
Sub-menu
 Loading...