4 Removal and replacement procedures
Adherence to these procedures and precautions is essential for proper service.
Preparation for disassembly
Use this information to properly prepare to disassemble and reassemble the monitor.
1) Read the “Important safety information” and “Important service information and precautions” sections in
the “Getting started” chapter of this guide.
2) Clean the room for disassembly.
3) Identify the disassembly area.
4) Check the position that the monitors are to be placed along with the number of monitors. Prepare the area
for material flow according to the disassembly layout.
5) Be sure to have the following equipment and materials:
• Press fixture
• Working table
• Screwdriver
• Knife
• Gloves
• Cleaning cloth
• ESD protection
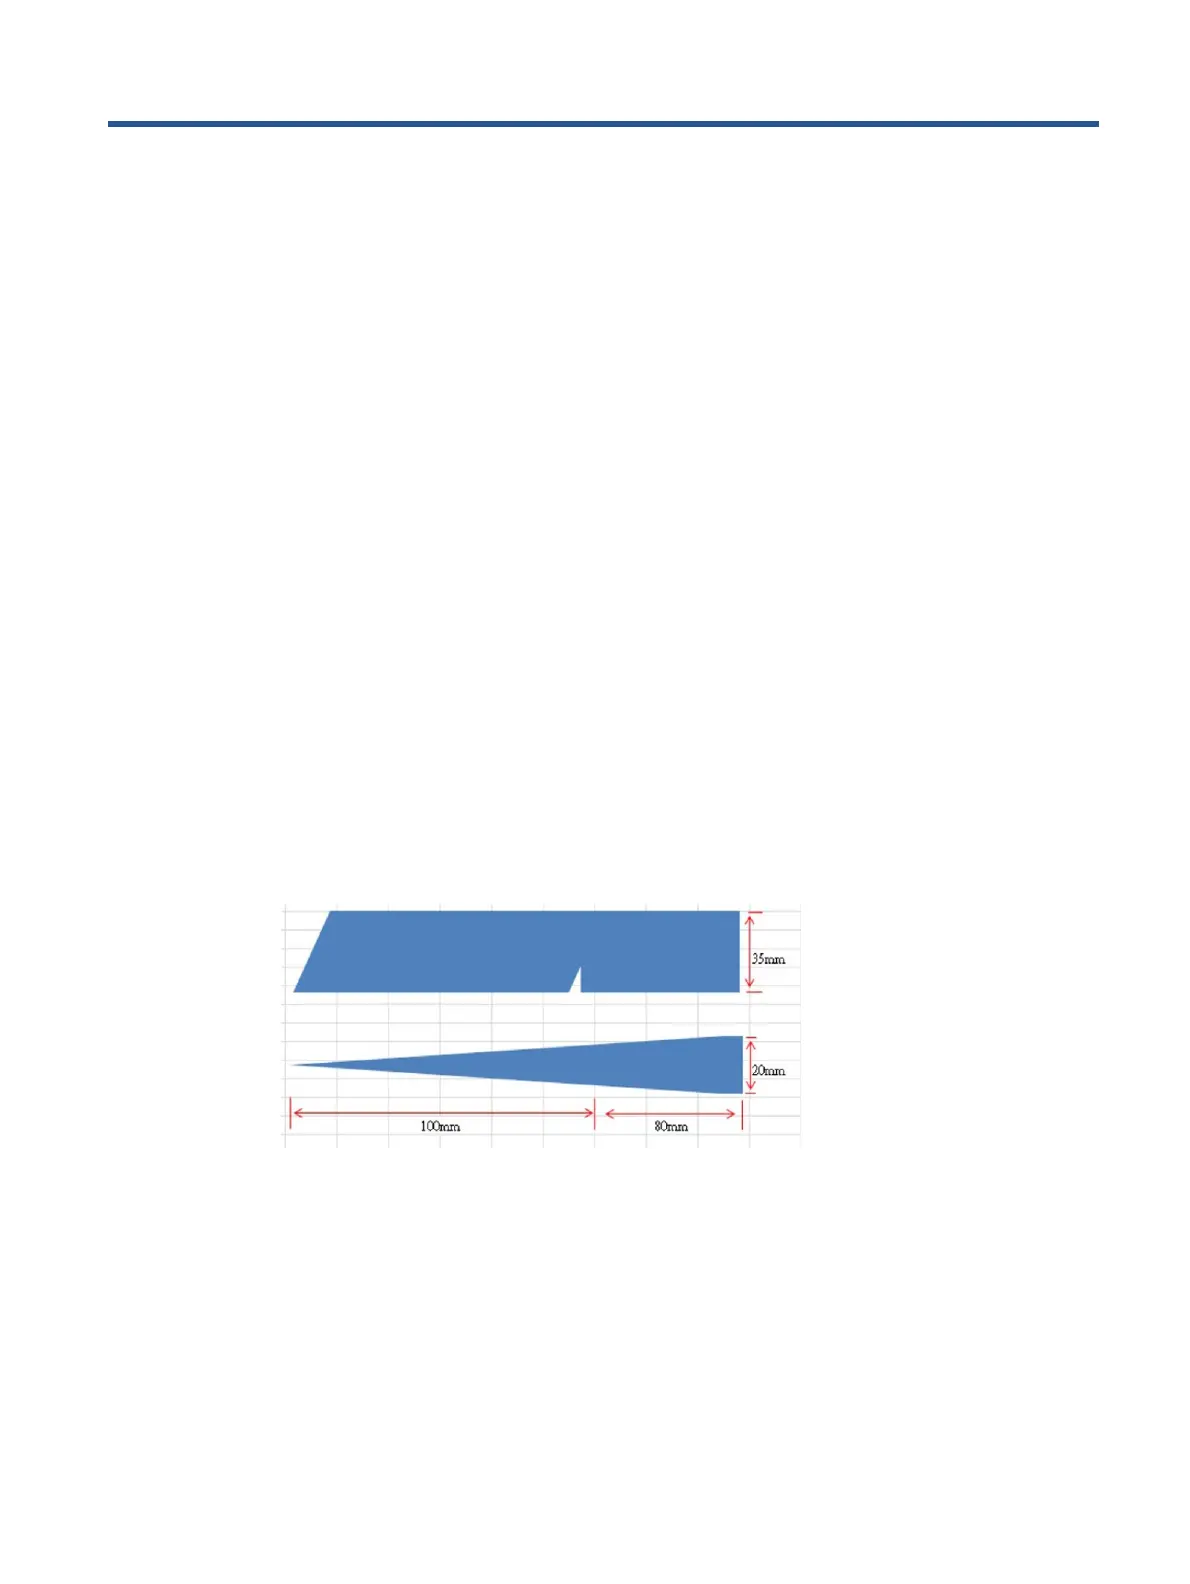
• Scraper bar in the following dimensions:
Rear Cover
Before removing the Rear Cover, follow these steps:
▲ Prepare the monitor for disassembly. See Preparation for disassembly on page 12.
1) Remove webcam tape and cables from Display Head
 Loading...