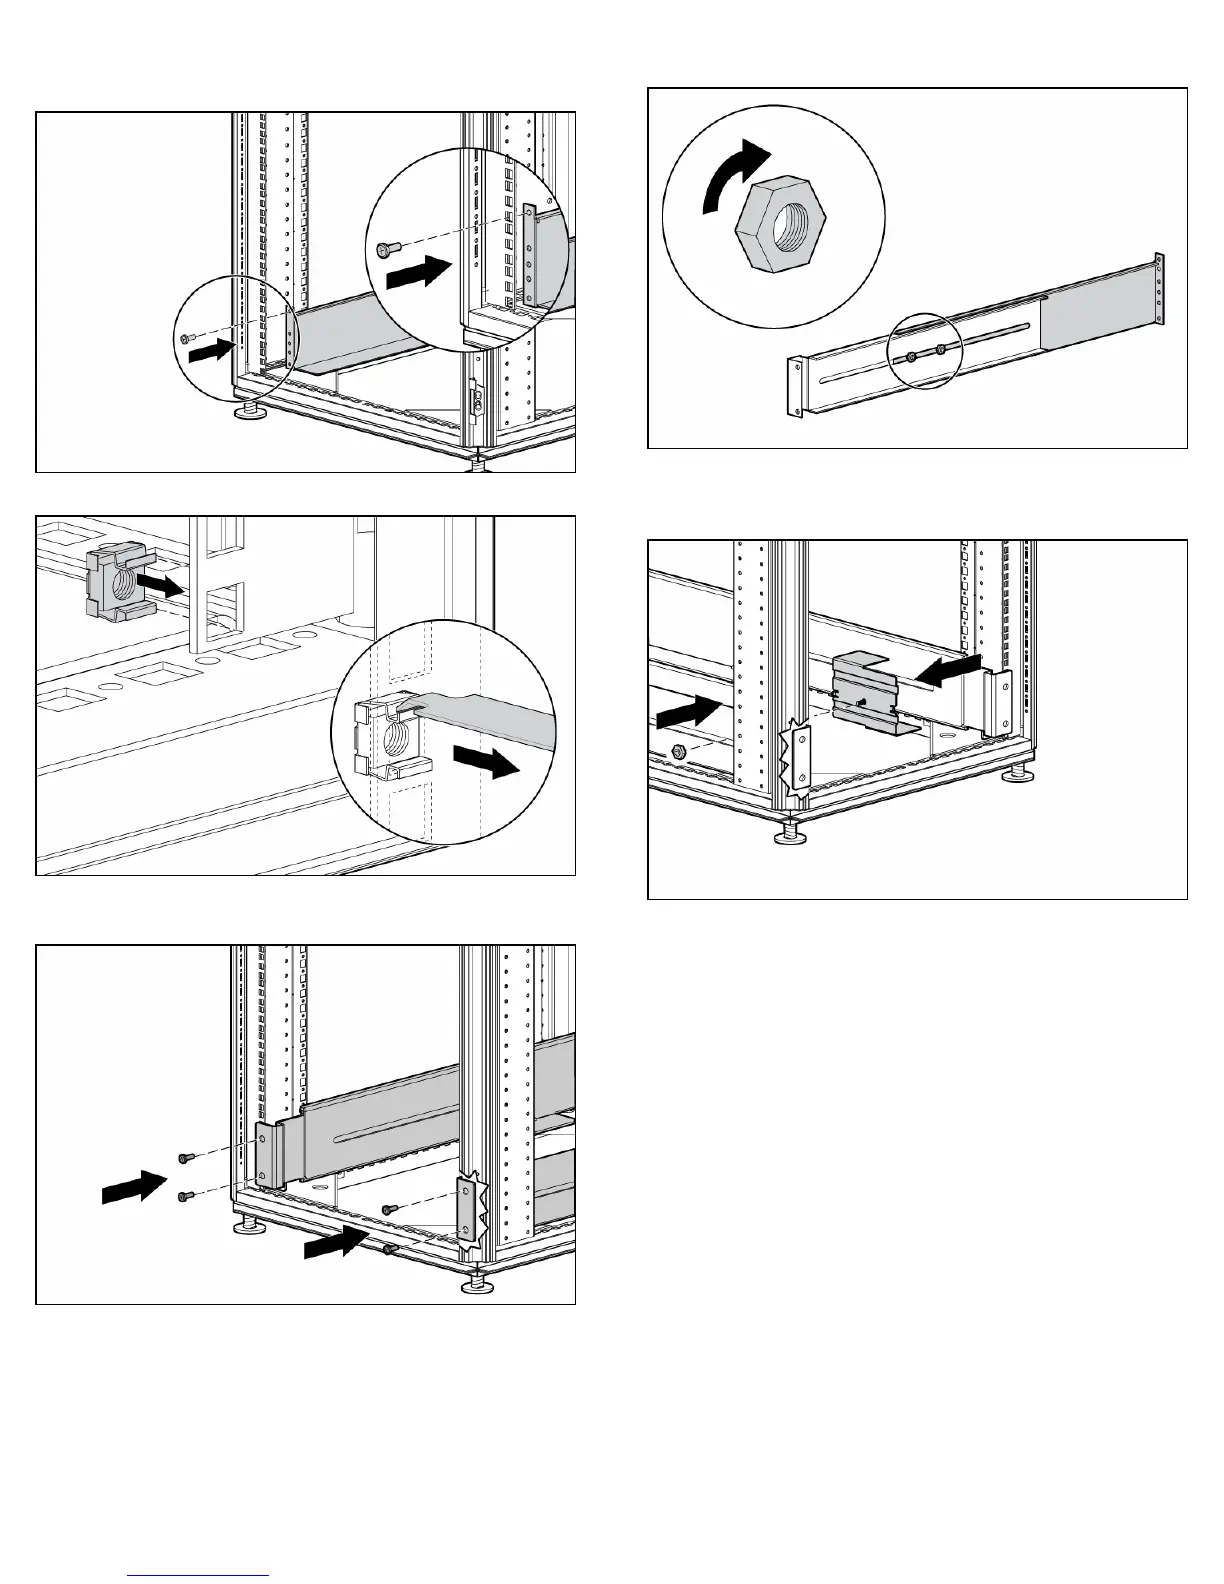
2. Insert screws through the rack into the mounting rail and
the front of each mounting bracket.
3. Install cage nuts or clip nuts into the rear of the rack.
4. Insert screws through the mounting rail into the cage nuts
or clip nuts.
5. Tighten the hex nuts.
6. Install the rear stabilization bracket using hex nuts. Wait
until the unit is installed and the brackets are adjusted
before tightening the nuts.
Powering down the UPS
1. Shut down all load devices.
2. Press the Standby button to take the UPS out of Operate
mode. Power to the load receptacles ceases.
3. Disconnect the UPS from utility power.
4. Wait at least 60 seconds for the UPS internal circuitry to
discharge.
 Loading...