EasyManuals Logo
Home>HP>Monitor>L1750

HP L1750 User Manual

HP L1750
67 pages
To Next Page IconTo Next Page
To Previous Page IconTo Previous Page
Page #26 background imageLoading...
Page #26 background image
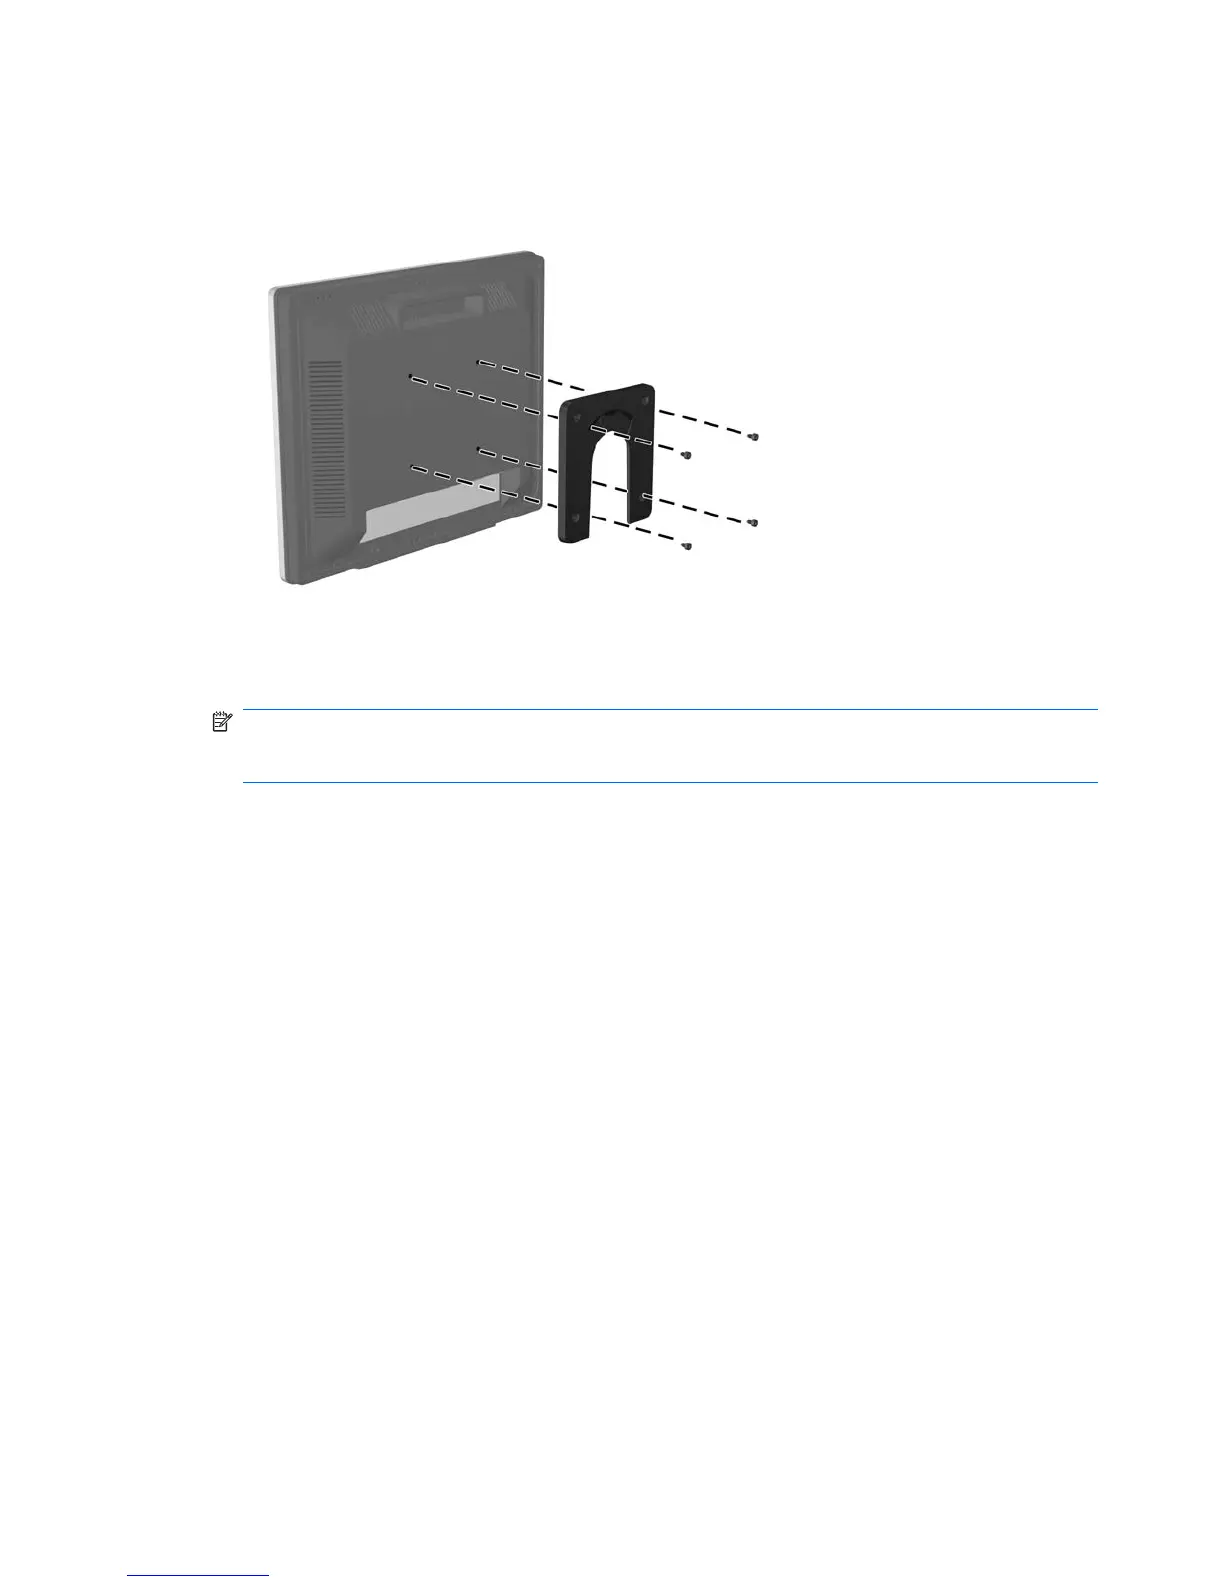
3. Place the optional HP Quick Release onto the back of the monitor. Line up the holes on the HP
Quick Release with the mounting holes on the back of the monitor.
Figure 3-19 Mounting the HP Quick Release
4. Insert four 10mm screws into the mounting holes and tighten.
NOTE: Depending on your model, use the screws that were removed from the back of the monitor
that connected the monitor panel with the pedestal base, or use the four M4 x 10 mm screws that
are provided in the VESA mounting holes on the back of the monitor panel.
18 Chapter 3 Setting Up the Monitor

Table of Contents

Other manuals for HP L1750

Questions and Answers:

Question and Answer IconNeed help?

Do you have a question about the HP L1750 and is the answer not in the manual?

HP L1750 Specifications

General IconGeneral
3DNo
Aspect ratio16:9
Display diagonal17 \
Display resolution1280 x 1024 pixels
Vertical scan range50 - 77 Hz
Horizontal scan range24 - 83 kHz
Viewing angle, vertical160 °
Contrast ratio (dynamic)-
Contrast ratio (typical)800:1
Display brightness (typical)300 cd/m²
Supported graphics resolutions1280 x 1024 (SXGA)
On/off switchYes
Power consumption (standby)- W
USB Type-A downstream ports quantity0
Tilt angle range-5 - 35 °
Panel mounting interface- mm
Product colorSilver
Country of originChina
Cables includedAC
Sustainability certificatesENERGY STAR
Weight and Dimensions IconWeight and Dimensions
Depth (without stand)301 mm
Width (without stand)377 mm
Height (without stand)351 mm
Weight (without stand)6800 g

Related product manuals