For a wall-mounted switch, take water-proofing and dust-proofing measures to protect the switch from
damage caused by water and dust.
The S5720-16X-PWH-LI-AC, S6720S-S, and S6730 (220-mm deep models) need to be installed with the
port side facing up.
Ensure that there are no flammable or explosive materials near the switch and no obstructions
within 100 mm around the switch.
S3700-HI, S5700-HI, S6720S-EI, and other 420 mm or deeper switches cannot be wall mounted.
The expansion bolts need to be purchased separately.
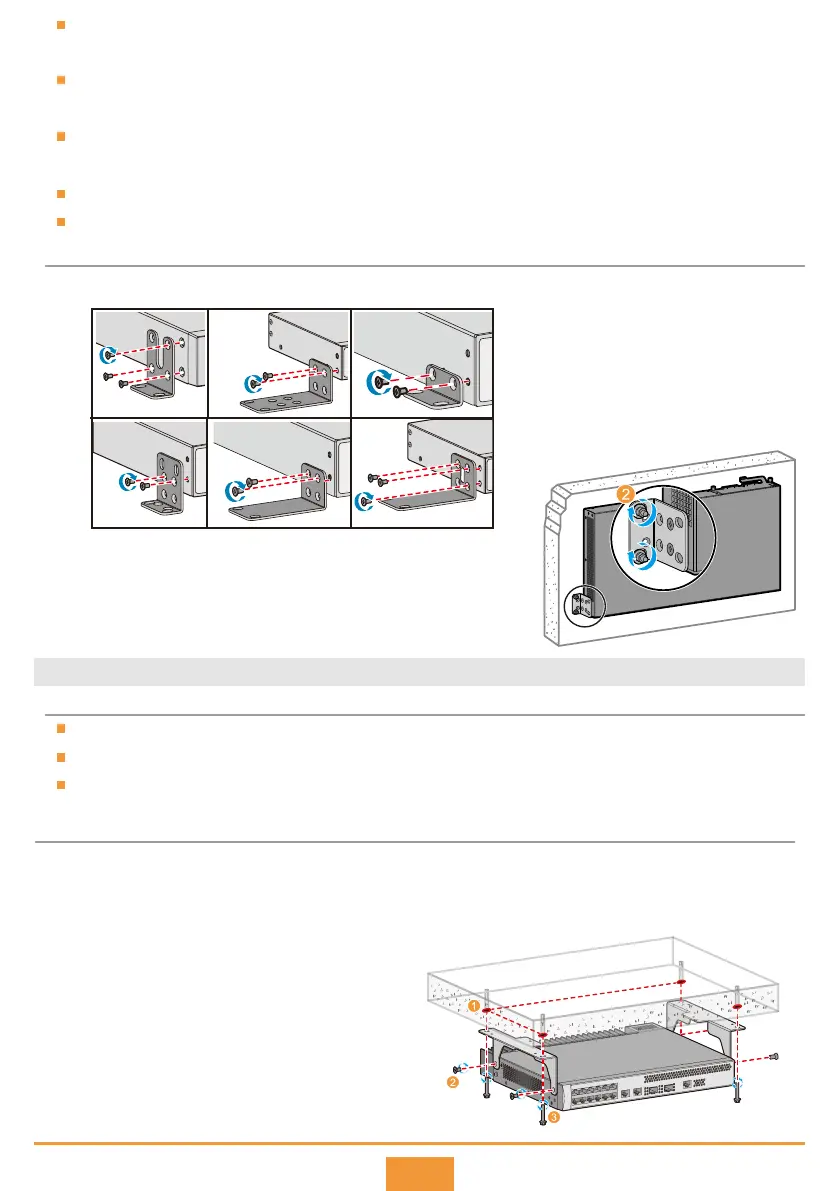
Use a hammer drill with φ8 drill bit to drill
holes on the wall, and fix the switch on the
wall with expansion bolts.
Connect the ground cable to the ground point.
Step 2
Step 3
Step 1 Use M4 screws to fix the mounting brackets on both sides close to the port side.
Expansion bolt
Port side faces down
Installation Procedure
3
Scenario 3: Top Wall Mounting
Before drilling holes in a wall, make sure there are no power cables in the wall to avoid electric shock.
Only the S5720-16X-PWH-LI-AC can be installed on the top wall.
Expansion bolts and top-mounting brackets must be self-provided.
360 mm
180 mm
Before You Start
Installation Procedure
Mark the positions to drill holes according to the switch's size and positions of top-mounting brackets.
Use M4 screws to attach two top-mounting brackets to the switch.
Use a hammer drill (with φ8 drill bit) to drill holes, and use expansion bolts to secure the switch on
the top wall.
Connect the ground cable to the ground point.
Step 1
Step 2
Step 3
Step 4
 Loading...