12
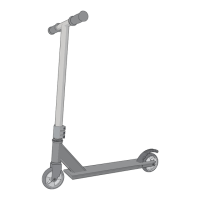
Operation
Operation:
B
E
C
D
A
USAGE:
• Turn ON Scooter power by holding down Power
Button
A
. Release Power Button to stop.
• Push Motor Engage-Lever
B
DOWN to engage
motor and UP to disengage motor.
NOTE: Disengaging Motor allows scooter to be self-
propelled.
TO USE BUBBLE MAKER:
CAUTION: Fill ONLY with solution designated on the
product:
• Pull out Fill Tray
C
as shown (Drawer is not
removable), to ll with Bubble solution. Do Not
Over ll.
• Turn Switch
D
ON to activate Bubble feature
when pressing Power Button
A
.
E
is Bubble outlet - Keep clean and free of debris.
NOTE: With Motor disengaged, Bubble feature will
continue to function if Switch
D
is turned ON.
WARNING: Both hands must rmly grip the handlebar before pushing Power
Button
A
. Failure to follow this rule can result in personal injury or damage to the product.
9
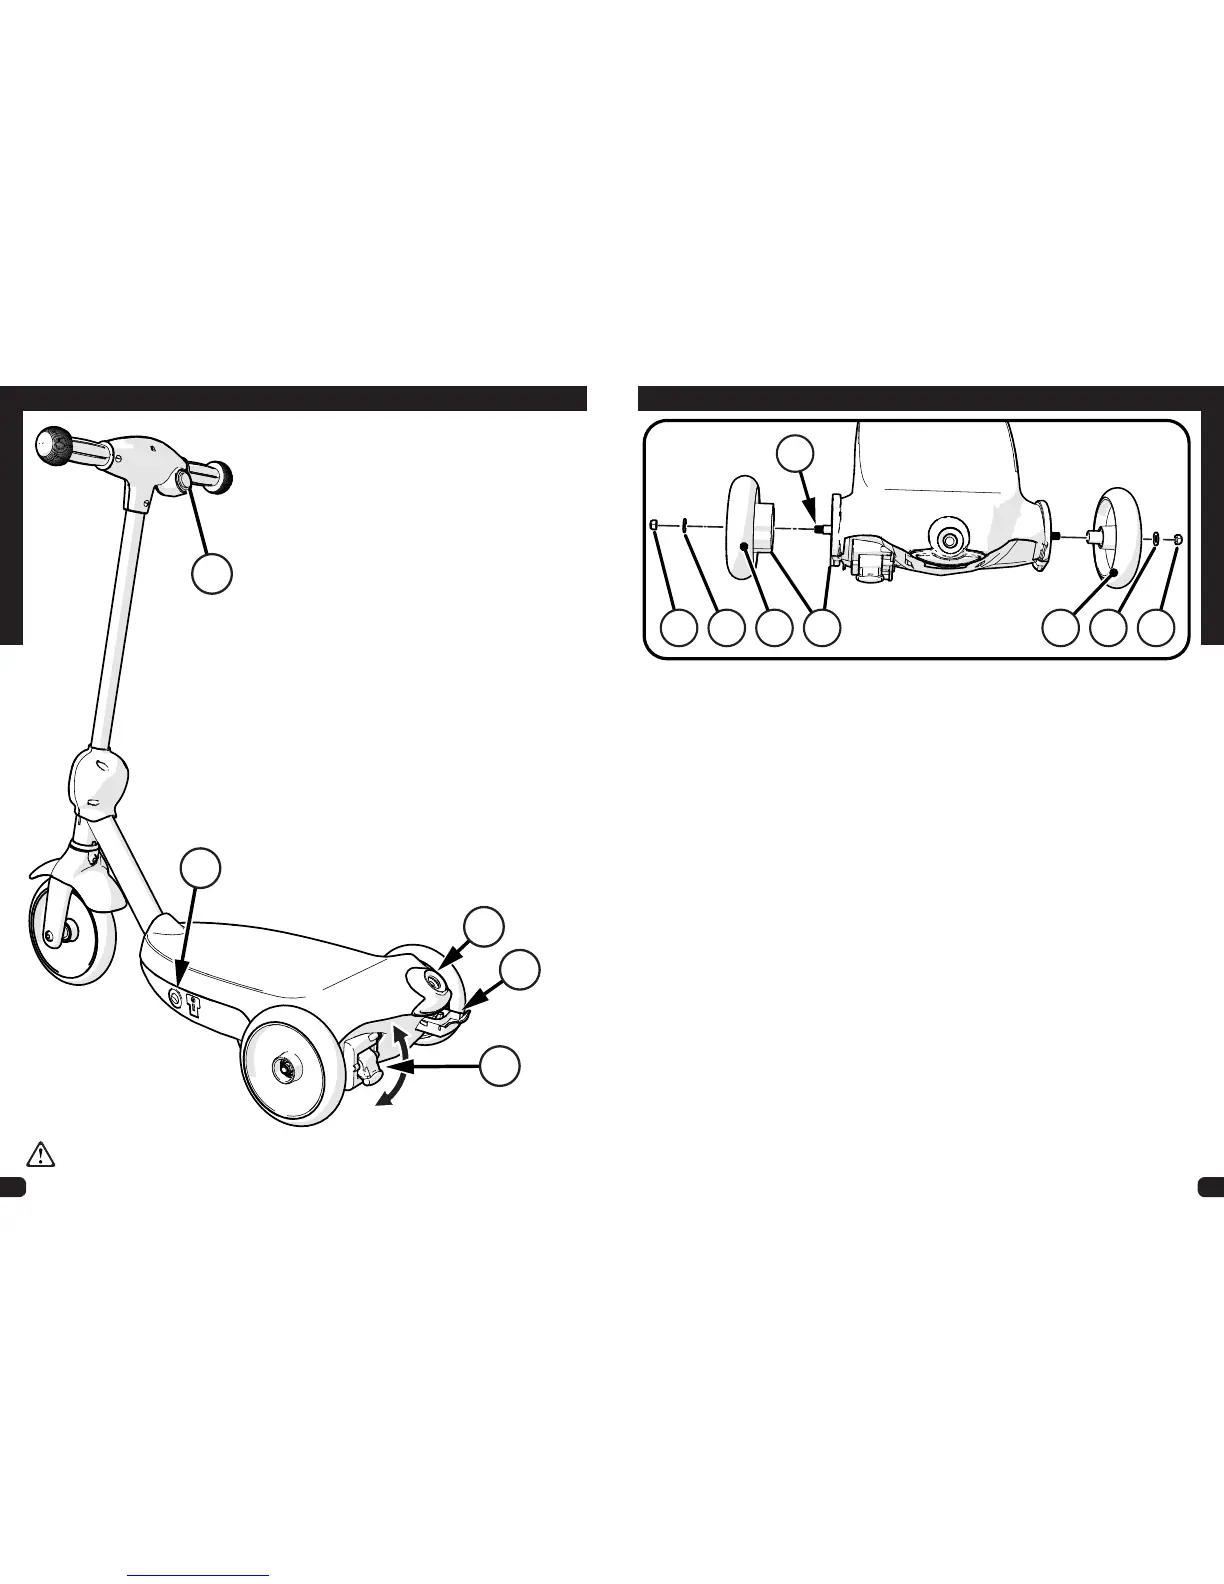
Assembly
Installing Rear Wheels:
D C E F
A
B C D
STEPS:
1. Insert Rear Axle
A
through Body as shown.
2. Install right rear Wheel
B
, one Washer
C
and one Locknut
D
onto Axle.
3. Install Drive Wheel
E
onto Axle so that Drive Gear
F
ts into Drive Motor.
4. Install Washer
C
and Locknut
D
.
5. Tighten both Locknuts fully and securely.
 Loading...