MAINTENANCE
3-30 powermax30 Service Manual
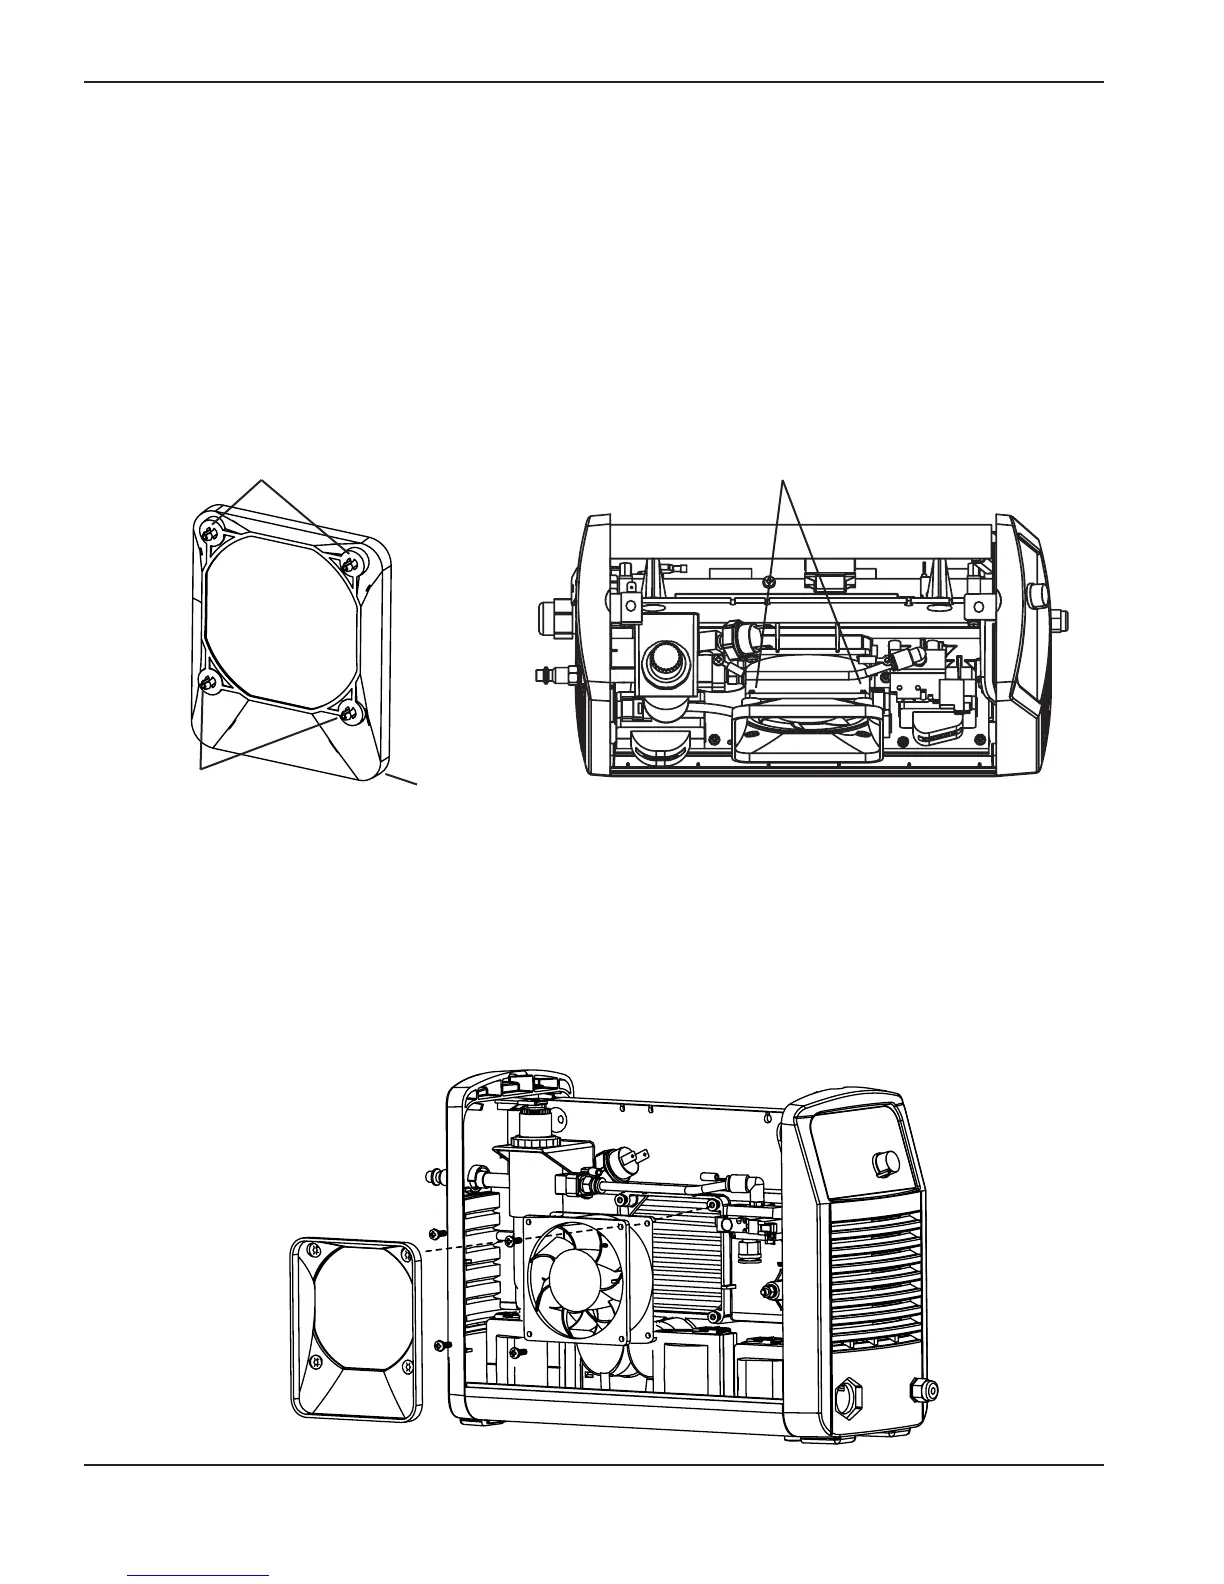
5. Insert a #1 Phillips screwdriver through the holes in the fan casing to remove the retaining screw from each
corner of the fan.
6. Slide the old fan out from the power supply.
7. Slide the new fan into place.
8. Replace the 4 retaining screws.
9. Orient the fan plenum so that the wider end is at the bottom and snap it into place.
Replace the fan
1. Turn OFF the power, disconnect the power cord, and disconnect the gas supply.
2. Remove the 2 screws from the handle on the top of the power supply. Remove the handle and then lift the cover
off the power supply.
3. Detach the connector from J5 on the power board. You may have to lift the top edge of the Nomex barrier to see
the connector.
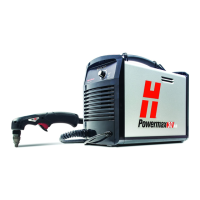
4. From the top of the power supply, use needlenose pliers to compress and release the 4 corner clips on the fan’s
plenum. After you release the top clips, you can tilt the plenum away from the power supply to reach the bottom
2 clips. Lift the plenum off the fan casing.
Corner clips
Top corner clips
Bottom
Corner clips

 Loading...