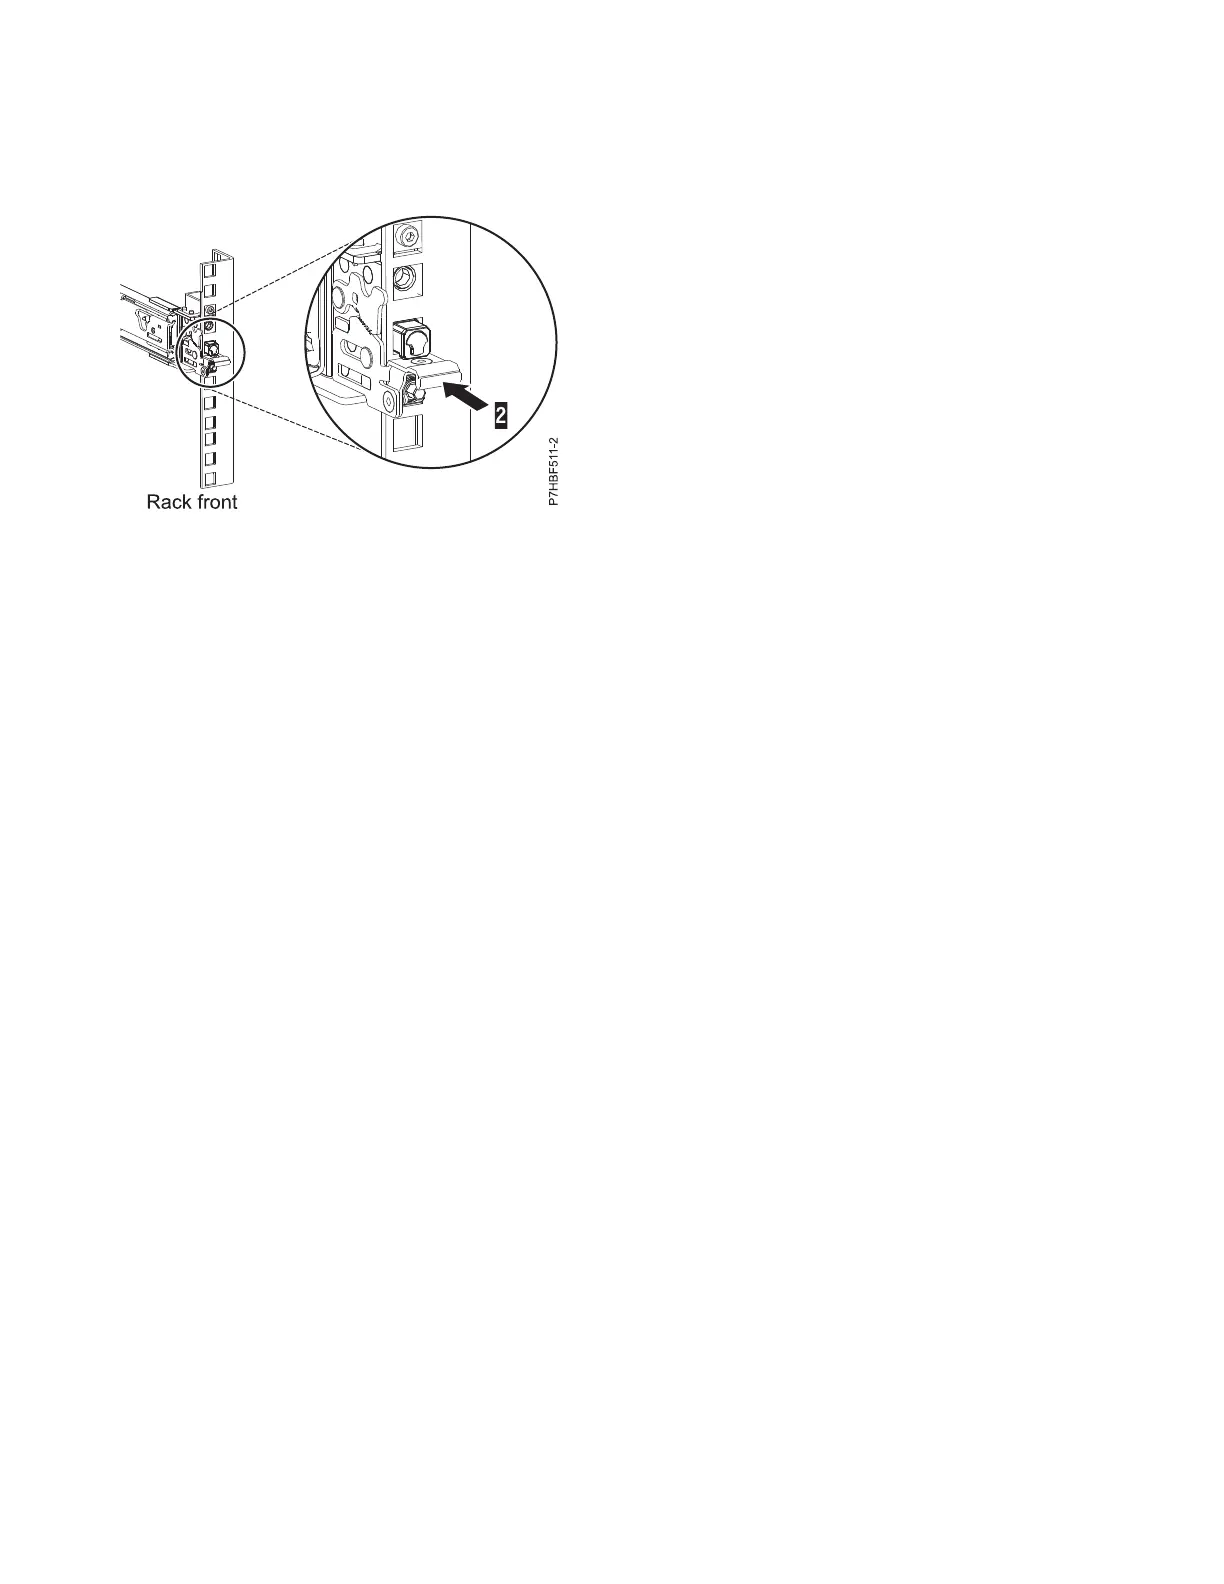
7. While you pull the slide rail forward, ensure that all three pins protrude through the rack holes, then
push the front latch (2) all the way in. For details, see Figure 6.
Note: If you must reposition the rail, release the front latch (2), and while you press the blue pin at
the bottom, push the rail up and toward the rear to release from the rack.
8. Repeat step 1 on page 4 through step 7 to install the right rail into the rack.
Installing the system into the rack
Use the procedure to install the system into the rack.
Attention:
v Attach an electrostatic discharge (ESD) wrist strap to the front ESD jack, to the rear ESD jack, or to an
unpainted metal surface of your hardware to prevent the electrostatic discharge from damaging your
hardware.
v When you use an ESD wrist strap, follow all electrical safety procedures. An ESD wrist strap is used
for static control. It does not increase or decrease your risk of receiving electric shock when using or
working on electrical equipment.
v If you do not have an ESD wrist strap, just prior to removing the product from ESD packaging and
installing or replacing hardware, touch an unpainted metal surface of the system for a minimum of 5
seconds.
CAUTION:
This system requires three people to install the system into the rack.
To install the system into the rack, complete the following steps:
1. Remove the shipping cover on the rear and the front of the system, if present.
2. Extend the slide rails forward (1) until they click twice into place. Carefully lift the server and tilt it
into position over the slide rails so that the rear nail heads (2) on the server line up with the rear slots
(3) on the slide rails. Slide the server down until the rear nail heads slip into the two rear slots. Then,
slowly lower the front of the server (4) until the other nail heads slip into the other slots on the slide
rails. Ensure that the front latch (5) slides over the nail heads.
Figure 6. Latch seated on the front rail of the rack
6 Power Systems: Installing the IBM Power System S814 (8286-41A)
 Loading...