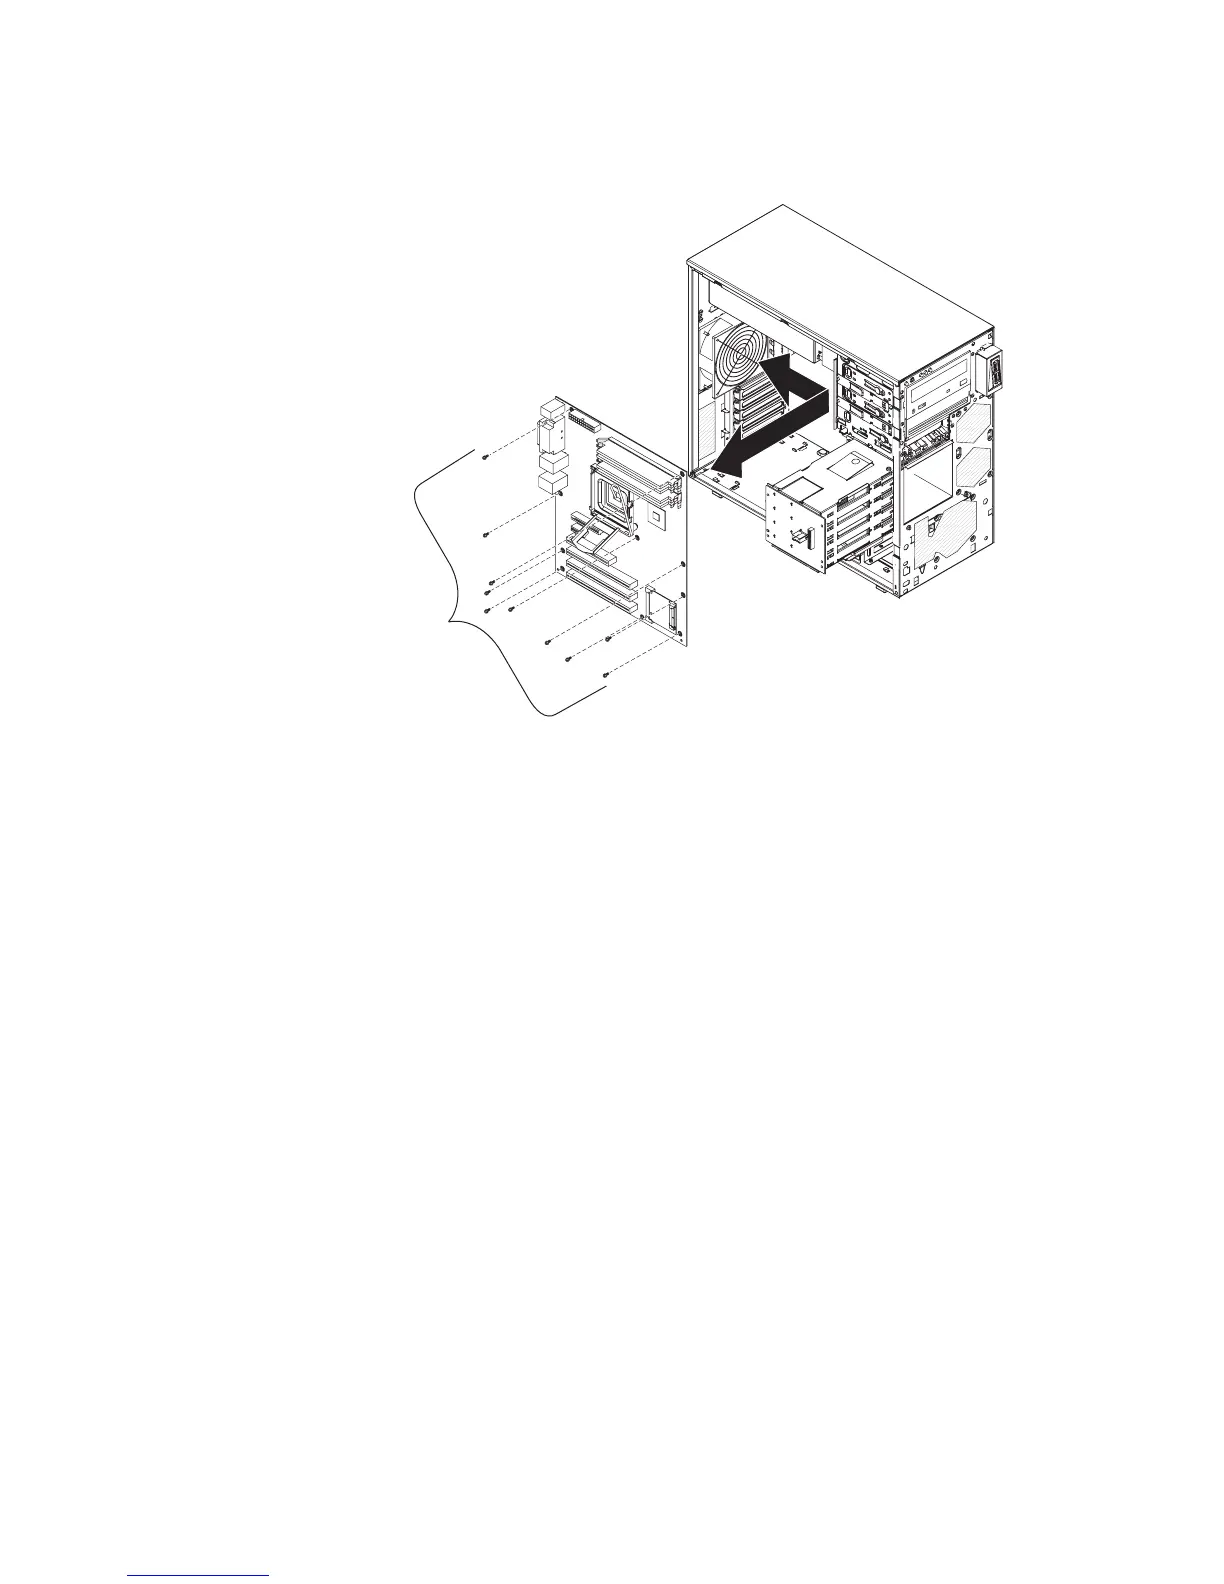
Removing the system board
To remove the system board, complete the following steps.
System board
mounting screws
(10 places)
1. Read the safety information that begins on page vii and “Installation guidelines”
on page 73.
2. Turn off the server and all attached devices; then, disconnect all power cords
and external cables.
3. Turn the server on its side so that it is lying flat, with the cover facing up.
4. Unlock and remove the side cover (see “Removing the side cover” on page
77).
5. Note where each cable is connected; then, disconnect all cables from the
system board.
6. Press and hold the drive cage release tab; then, rotate the drive cage out of
the chassis until the retaining tab on top of the cage locks into place.
7. Remove any of the following components that are installed on the system
board and put them in a safe, static-protective place:
v Adapters (see “Removing an adapter” on page 83).
v Microprocessor and fan sink (see “Removing the microprocessor and fan
sink” on page 123).
v DIMMs (see “Removing a memory module” on page 101).
v Battery (see “Removing the battery” on page 103).
v SAS/SATA controller (see “Removing the SAS/SATA controller” on page
118).
8. Remove the seven screws that secure the system board to the chassis.
9. Slide the system board toward the front of the server to disengage the tabs in
the chassis; then, carefully lift the system board out of the server.
10. If you are instructed to return the system board, follow all packaging
instructions, and use any packaging materials for shipping that are supplied to
you.
Chapter 4. Removing and replacing server components 127
 Loading...