W
W
a
a
t
t
e
e
r
r
S
S
y
y
s
s
t
t
e
e
m
m
s
s
,
,
L
L
L
L
C
C
www.123filter.com
- Page 5 of 12 -
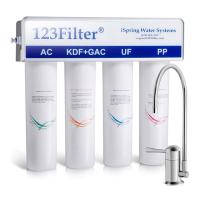
INSTALLATION QUICK VIEW
Connections
Color of tubing
A Feed water valve Red or Orange
B Dispensing Faucet Blue
C Drain saddle valve Black
D Tank ball valve Yellow
INSTALLATION (for under-the-sink installation)
STEP 1
: TAPPING INTO COLD WATER SUPPLY
CAUTION: The water supply to your RO unit MUST come from COLD water line. Hot water will damage your RO system.
1. Locate cold water shut off valve under the sink and turn it off. Open cold-water faucet to release the pressure, and make sure there is no
water.
2. Put 3 turns of Teflon tape on threaded ends of the angle needle valve, or the ball valve.
3. Determine the best location for putting the feed water adapter. Do you have a flexible line or a solid copper tube? Is the flexible line with
smooth surface or spiral line? Is there enough space for installing feed water adapter? More radius or more
space is required if you first
joint the feed water adapter with the needle valve. Is the size of fitting thread the same as the
feed water adapter?
4. You can either joint the angle needle valve to the feed water adapter first, or install adapter to cold water supply line first. It depends on
how much space is available under the sink.
5. For FLEX line: Loosen nut and separate cold water riser tube from faucet shank. Gently bend riser tube so that feed water adapter fits onto
faucet shank. Use the Existing cone washer (if the existing cone water is badly damaged, use the new cone
water provided in the kit).
NOTE: If you have a spiral type flex tube riser, you NEED to use the existing cone water, since
the cone washer we provided is straight,
not spiral). Use Teflon tape on threaded parts to prevent leaks. Then tighten the
connection.
6. For Solid Copper riser: Same procedure as flex tubing except you must cut a piece of the riser tube about 3/ 4” to 1” so the adapter can fit
between faucet and riser tube. Use Teflon tape to prevent leaks.
7. Install the angle needle valve to adapter if you have not done so in procedure #4.
8. For connecting red tubing to angle needle valve, refer to the photo below. Then push tubing through the brass nut, then the sleeve, then put
plastic insert inside the tubing, then push sleeve against the insert, then screw on the brass nut. Don’t over
tighten it. But it has to be tight.
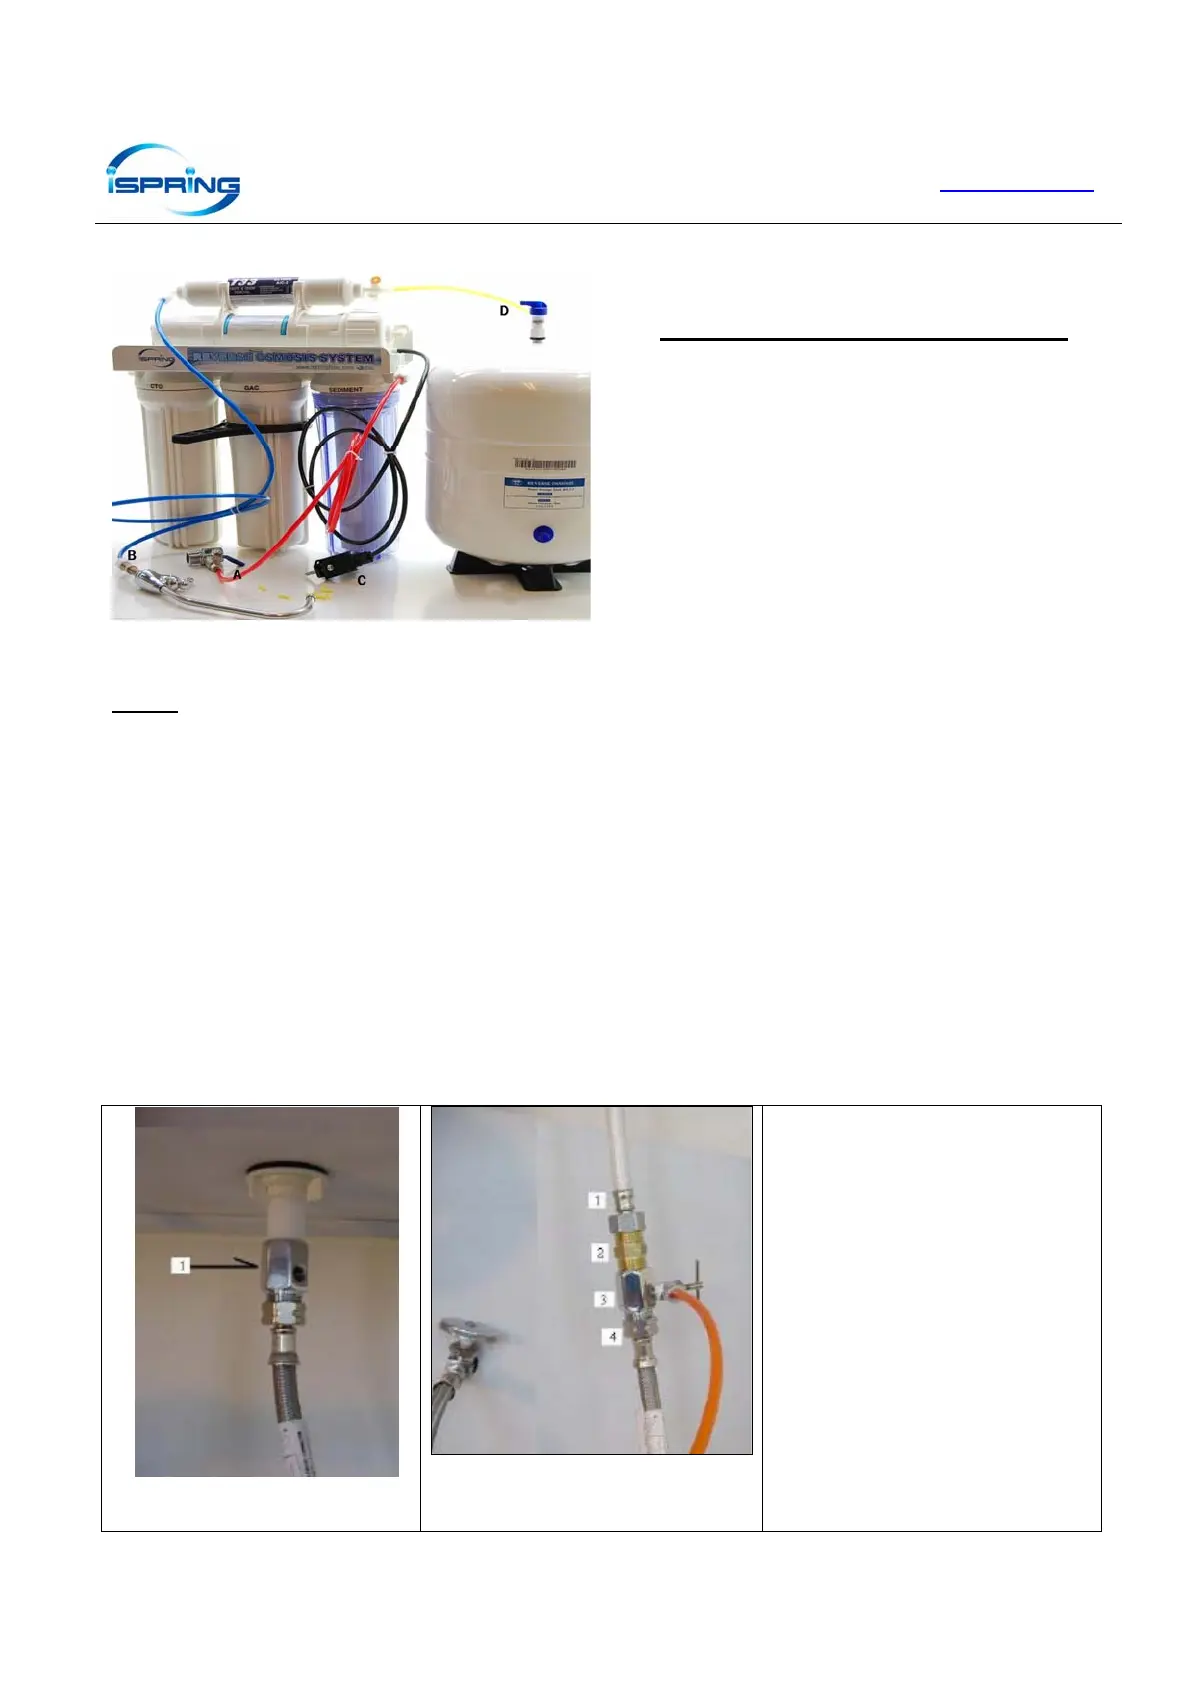
1. Feed water adapter ½ “ connect to
base of kitchen faucet
1. Buy a ½ pipe to ½“ pipe hose
2. ½ to ½” nipple fitting.
3. Adapter
4. Your existing faucet pipe
• Many times, it is easier to use the
existing cone washer than using the
new one
• If there is not enough space on the
sink base, or it’s difficult to get to,
you can disconnect the riser from the
cold-water valve side. If the fitting
size does not match, buy
size-changing fittings, or buy a new
flex riser with matching sizes
• Many times, it is easier to buy an
additional stainless steel braded flex
riser and a ½“ nipple to put in
between the bottom of the faucet
male thread and the feed water
adapter (Don’t buy the spiral type)
so you can easily put the feed water
adapter between two risers. This is
the EASIEST way. Spend additional
$5 on the riser may save you a lot of
time.
 Loading...