Page 9 www.123filter.com | +1 (678) 261-7611 | support@123filter.com
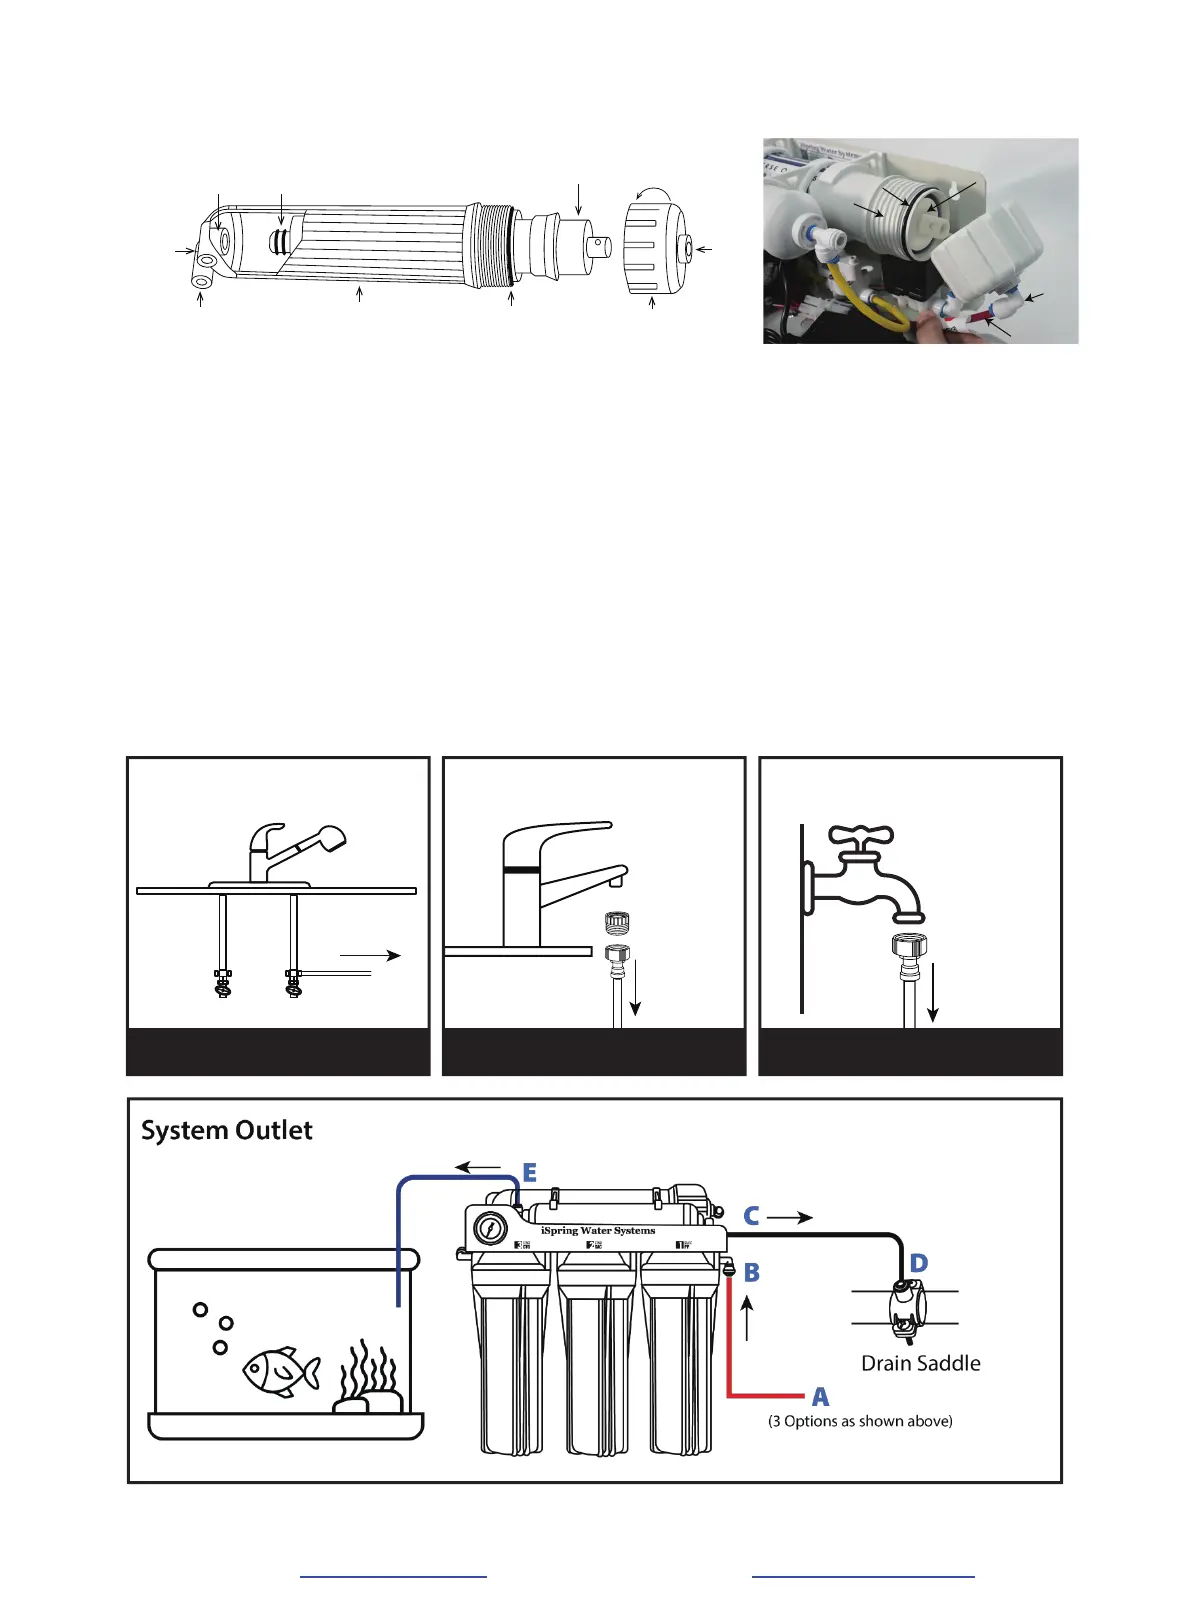
Step 4: Installing the Reverse Osmosis Membrane
Step 4. a. Disconnect the tubing from the quick-fitting connection on the membrane cap.
Step 4. b. Open the membrane housing cap. A thick rubber band can be slipped on the housing
body for better grip.
Step 4. c. Find the inner end with 2 O-rings, cut open the end of the sealed bag, use it to hold
the RO membrane to avoid contamination, and firmly insert the membrane into the housing
until the outer end without the O-ring is completely inside the housing.
See Figure above.
Step 4. d. Before twisting the housing cap back on, check that the O-ring is evenly snagged on
the membrane housing. Hang tight and tighten up for about 1/4 – 1/2 turns using a small
plastic housing wrench, but do not over tighten. DO NOT reconnect the tubing to the inlet on
the cap at this point (will do it in system start-up).
Step 5: Tubing Hook Up
OUTLET
WASTE
RO WATER
HOUSING O-RING
MEMBRANE
O-RING
RO MEMBRANE
OPEN
INLET
CAP
System Inlet
Option 2
A2
to System
Kitchen/Bathroom Faucet
System Inlet
Option 1
A1
to System
Hot Cold
Cold Water Valve Under the Sink
System Inlet
Option 3
A3
to System
Garden Hose Bibb
O-RING
MEMBRANE
CAP
TUBING
INLET
HOUSING
 Loading...