7
Auto Pause & Restart Function
Once the set humidity level has been reached, the unit will pause the dehumidification process for 60 minutes,
to conserve energy. After 60 minutes, the unit will run on fan mode for five (5) minutes to monitor the humidity
level in the room. If the humidity level in the room increases by 5% or more during the time that the dehumidifier
is paused or running on fan mode, the unit will start dehumidifying again.
If the humidity level in the room does not increase during this time, the dehumidifier will repeat the 60-minute
pause and 5-minute fan cycle until the unit detects an increase in humidity level.
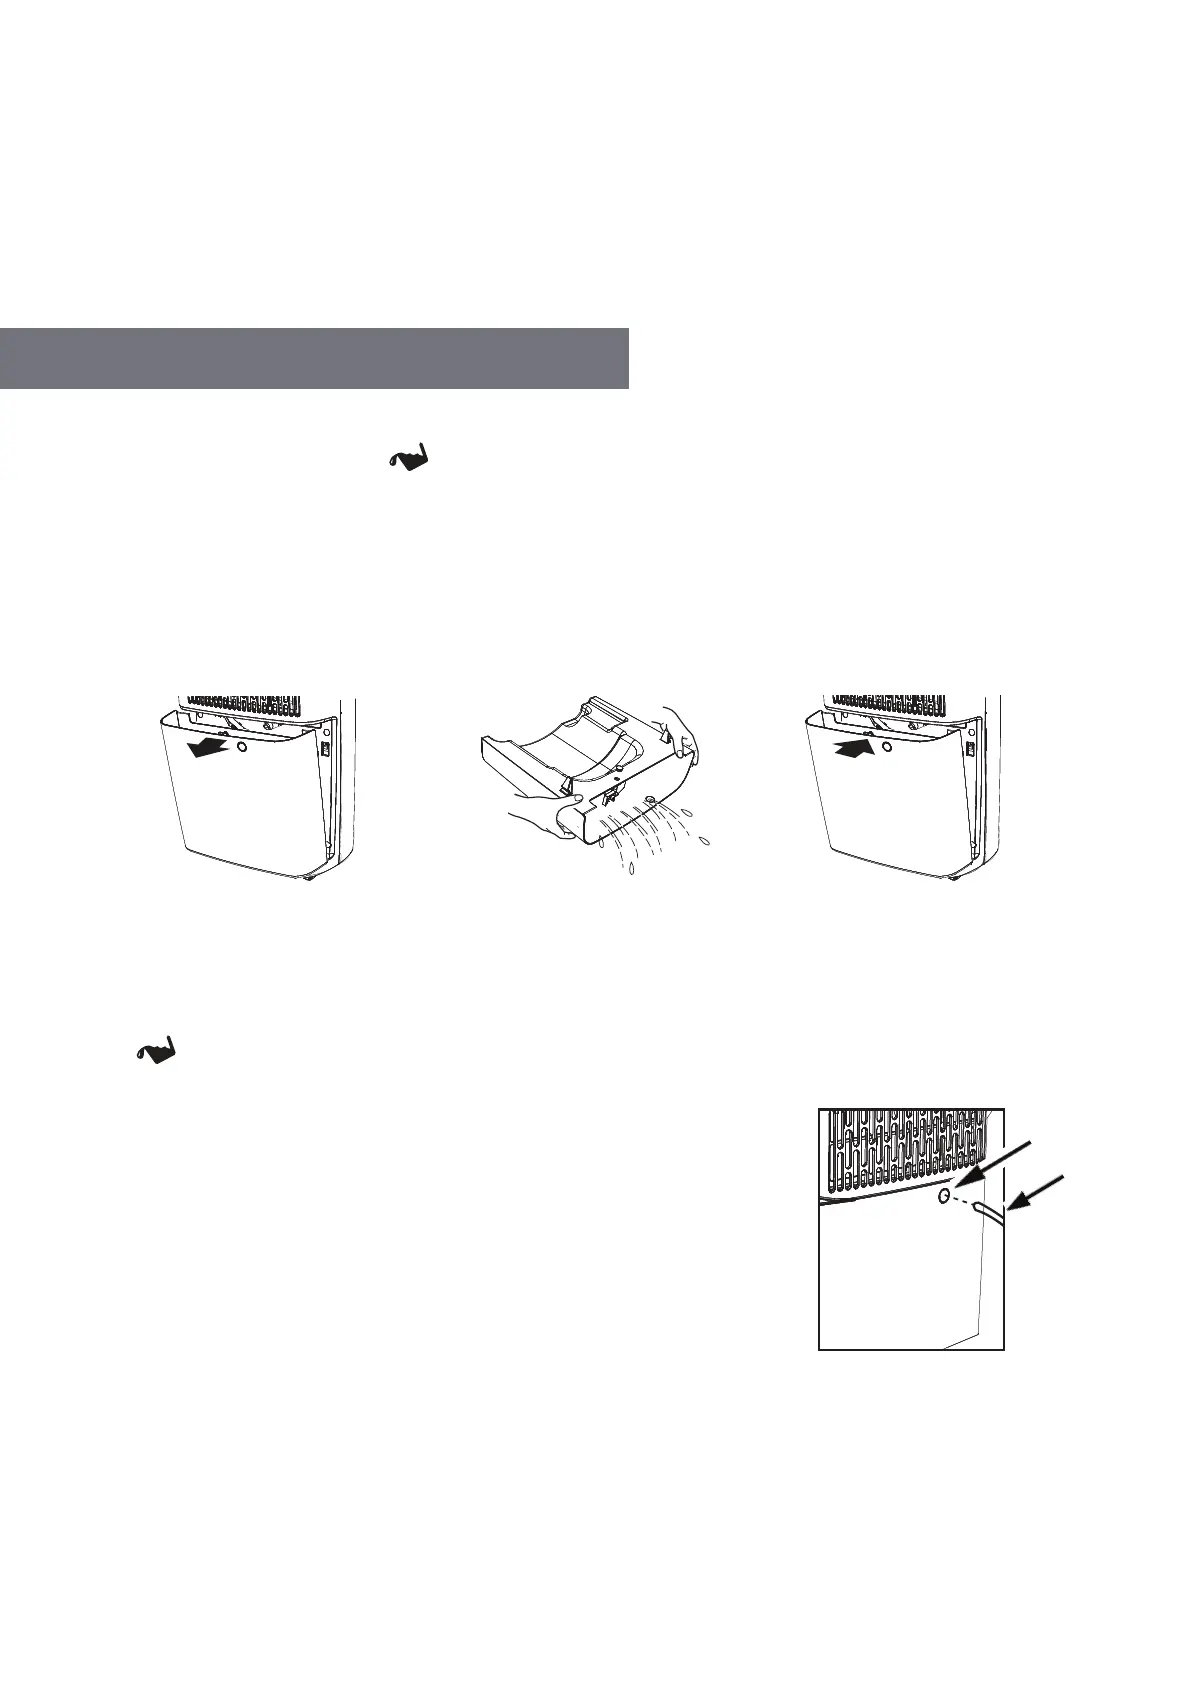
Option 1: Manually Emptying the Water Tank
1. Once the water tank is full, the icon light will blink and the dehumidifier will stop running.
2. Never move the unit or remove the water tank while the dehumidifier is running, as water may leak, damage
the unit, or cause an electric shock hazard.
3. Hold the handles on both sides of the water tank and gently lift it toward you. Please make sure to do this
slowly and carefully because water may slosh onto the floor or the unit itself.
4. Empty the water (into a drain) and then clean the water tank.
5. Once the bucket is emptied and cleaned, replace it as normal into the dehumidifier
NOTE:
• Use clean water to clean the tank as needed. Do not use detergent, solvents, abrasives, or hot water, in order
to avoid damaging the dehumidifier.
• Do not remove or damage the float in the water tank, or else the unit will not work correctly.
• The icon will blink if the water tank is not properly repositioned in the unit.
Option 2: Continuous Hose Drainage
1. A hose is included in the box; however you can also use your own hose,
if the provided hose is not long enough. The hose should have an inner
diameter of 0.47" (12 mm).
2. Use a screwdriver to remove the knockout hole at the rear of the unit
(on the tank).
3. Attach the hose through the hole to the connector.
4. Make sure that the drainage hose you have installed is aimed downward.
Feed the other end of the hose into a floor drain and then cover the
hole with a lid so the water will run straight into the drain and not spill.
Please note that the hose should not be pressed, twisted, or run up an incline, or else the water will not
drain properly.
NOTE:
• Ensure the water tank is properly fitted into position before you insert the hose.
• Make sure to disconnect the hose prior to removing the water tank.
DRAINAGE OPTIONS
Knockout
Hose
 Loading...