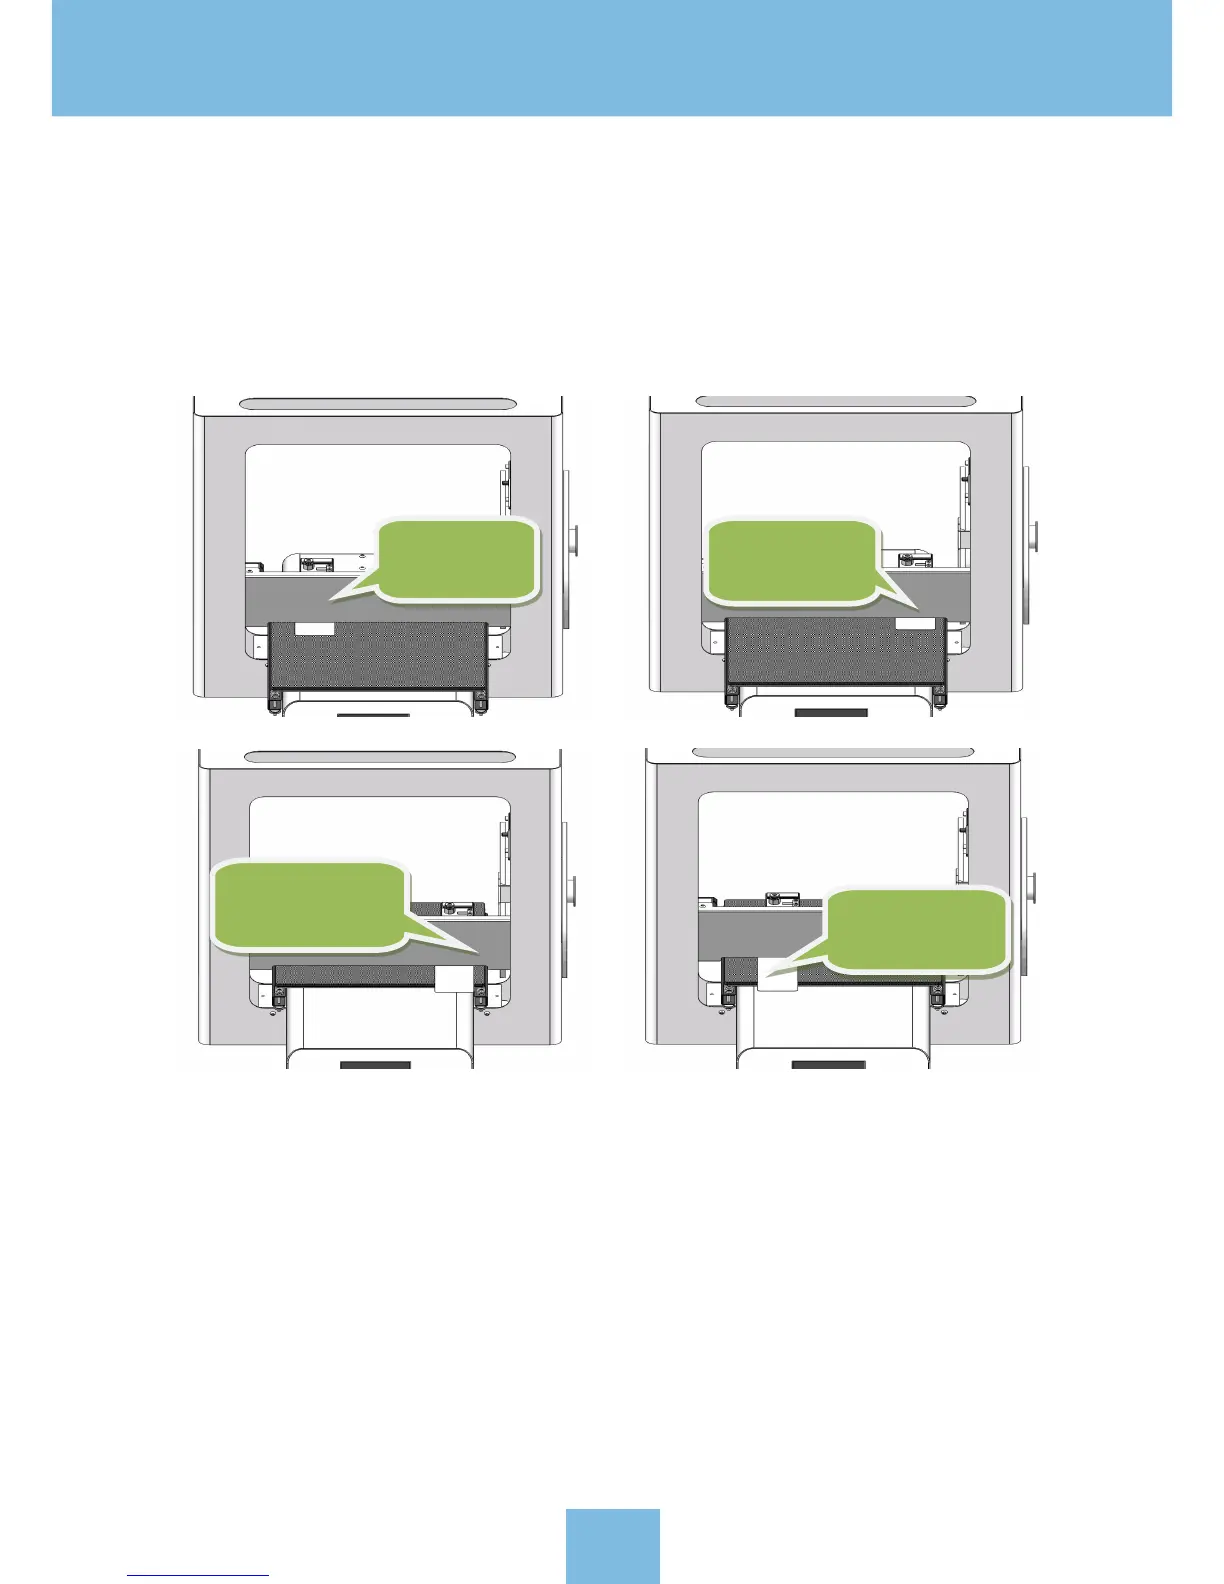
After performing the initial homing, use the “L evel” menu options to cycle the extruder head through the various
locations, as shown in the figure below.
Using a piece of copy paper as a thickness guide, place it on the print bed. Move the nozzle over t he paper and
try to remove the paper. If the paper is easy to remove, then turn the adjustment knob clockwise. If the paper
is difficult to remove, then the adjustment knob counter-clockwise. Keep repeatin this process until the no
zzle height
is calibrated for all of the leveling positions.
Please Note: You may find it helpful to refer to the video demonstrating platform leveling, that is found in t he
included USB stick.
4.4 Filament loading
Click [ HEAT ] to enter “Preheat menu”->click preheat “Extruder 1(E1)”->click [ Increase ] button to increase E1
to 200ºC. Here, we are using PLA as an example.
Firstly
:
move
to left back
Secondly:move
to right ba ck
Thirdly:move to
right front
Fourthly:move
to left front
13