6.
Connecting
the
cords
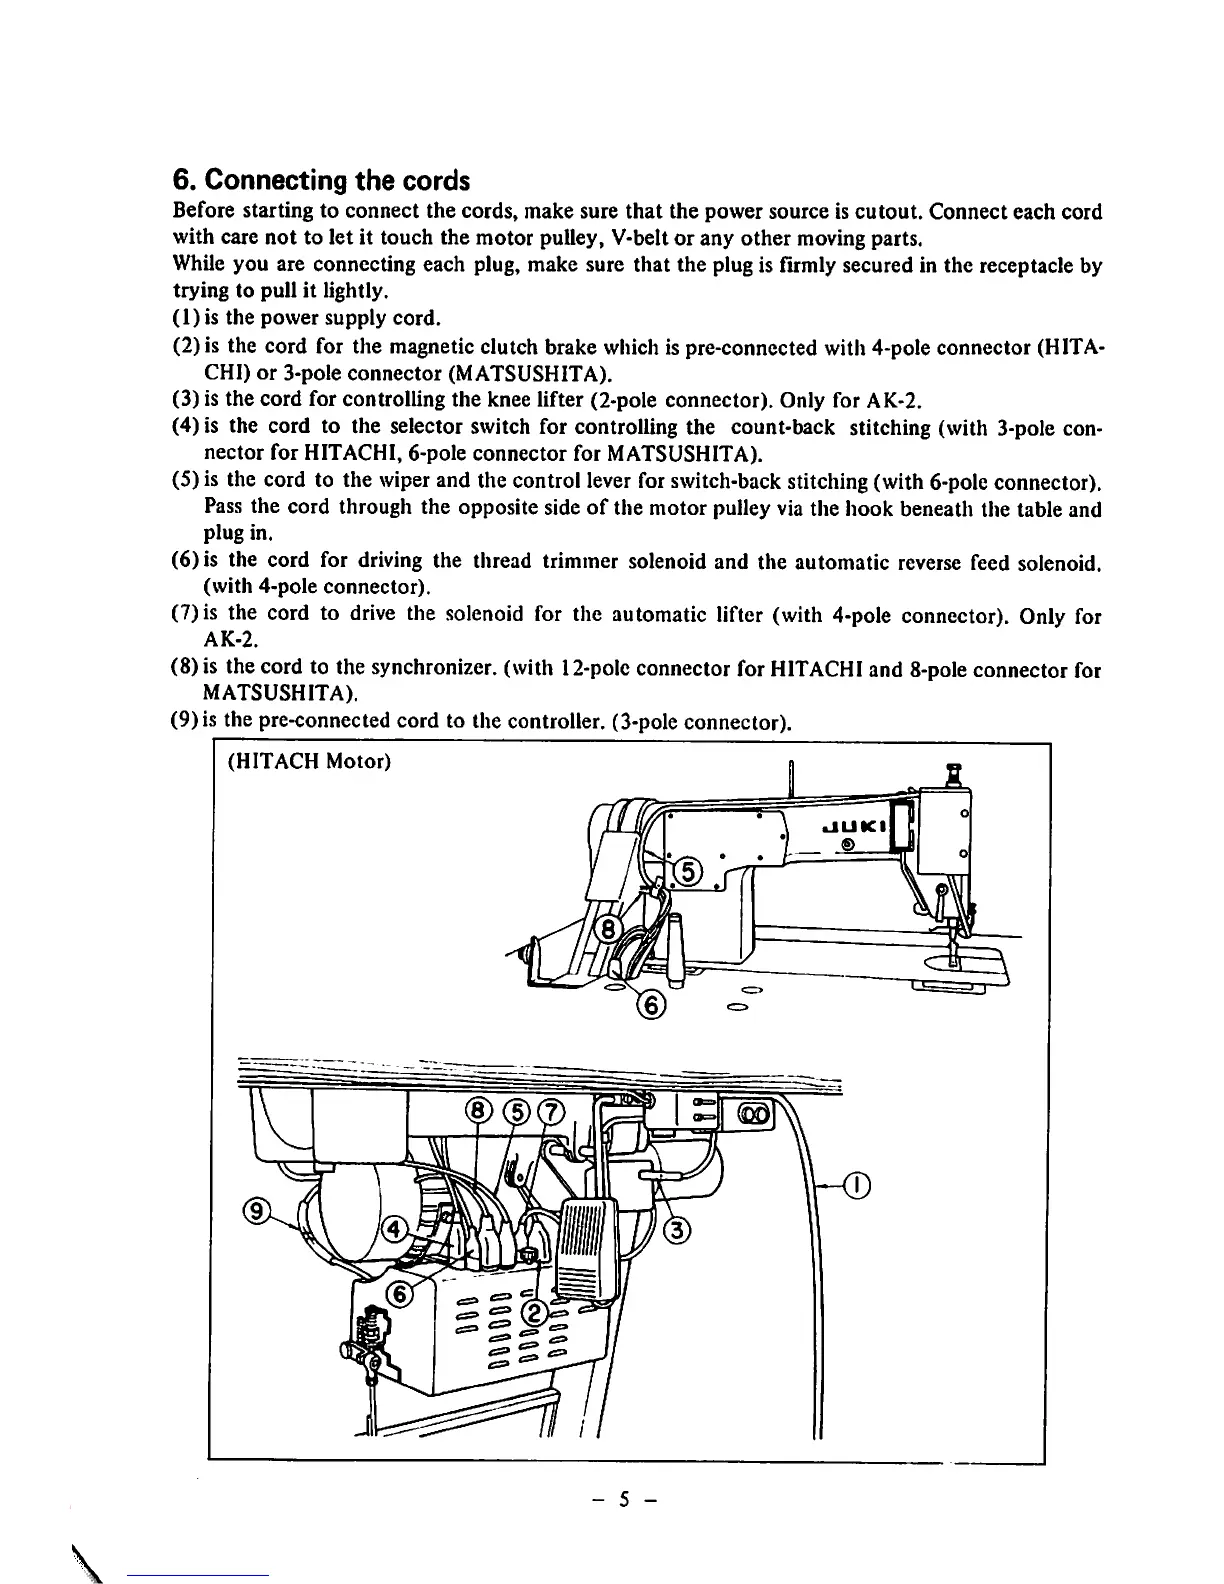
Before starting to connect the cords, make sure
that
the power source is
cutout.
Connect each cord
with care not to let it touch the motor pulley, V-belt or any other moving parts.
While you are connecting each plug, make sure that the plug is firmly secured in the receptacle by
trying
to
pull
it lightly.
(1) is the
power
supply
cord.
(2) is the cord for the magnetic clutch brake which is pre-connccted with 4-pole connector (HITA
CHI)
or
3-pole
connector
(MATSUSHITA).
(3) is the cord for controlling the knee lifter (2-pole connector). Only for AK-2.
(4) is the cord to the selector switch for controlling the count-back stitching (with 3-pole con
nector for HITACHI, 6-pole connector for MATSUSHITA).
(5) is the cord to the wiperand the control lever for switch-backstitching (with 6-poleconnector).
Pass the cord through the opposite side
of
the motor pulley via the hook beneath the table and
plug
in.
(6) is the cord for driving the thread trimmer solenoid and the automatic reverse feed solenoid,
(with
4-pole
connector).
(7)is the cord to
drive
the
solenoid
for the automatic lifter (with 4-pole connector). Only for
AK-2.
(8) is the cord to the synchronizer, (with
12-poIc
connector for
HITACHI
and 8-poleconnector for
MATSUSHITA).
(9) is the pre-connected cord to the controller. (3-pole connector).
(HITACH
Motor)
- 5 -
 Loading...