19.
ADJUSTING
THE OVERDOING WIDTH (STITCH WIDTH AND BAR
TACKING
WIDTH)
AND
OVEREDGING REFERENCE
POSITION
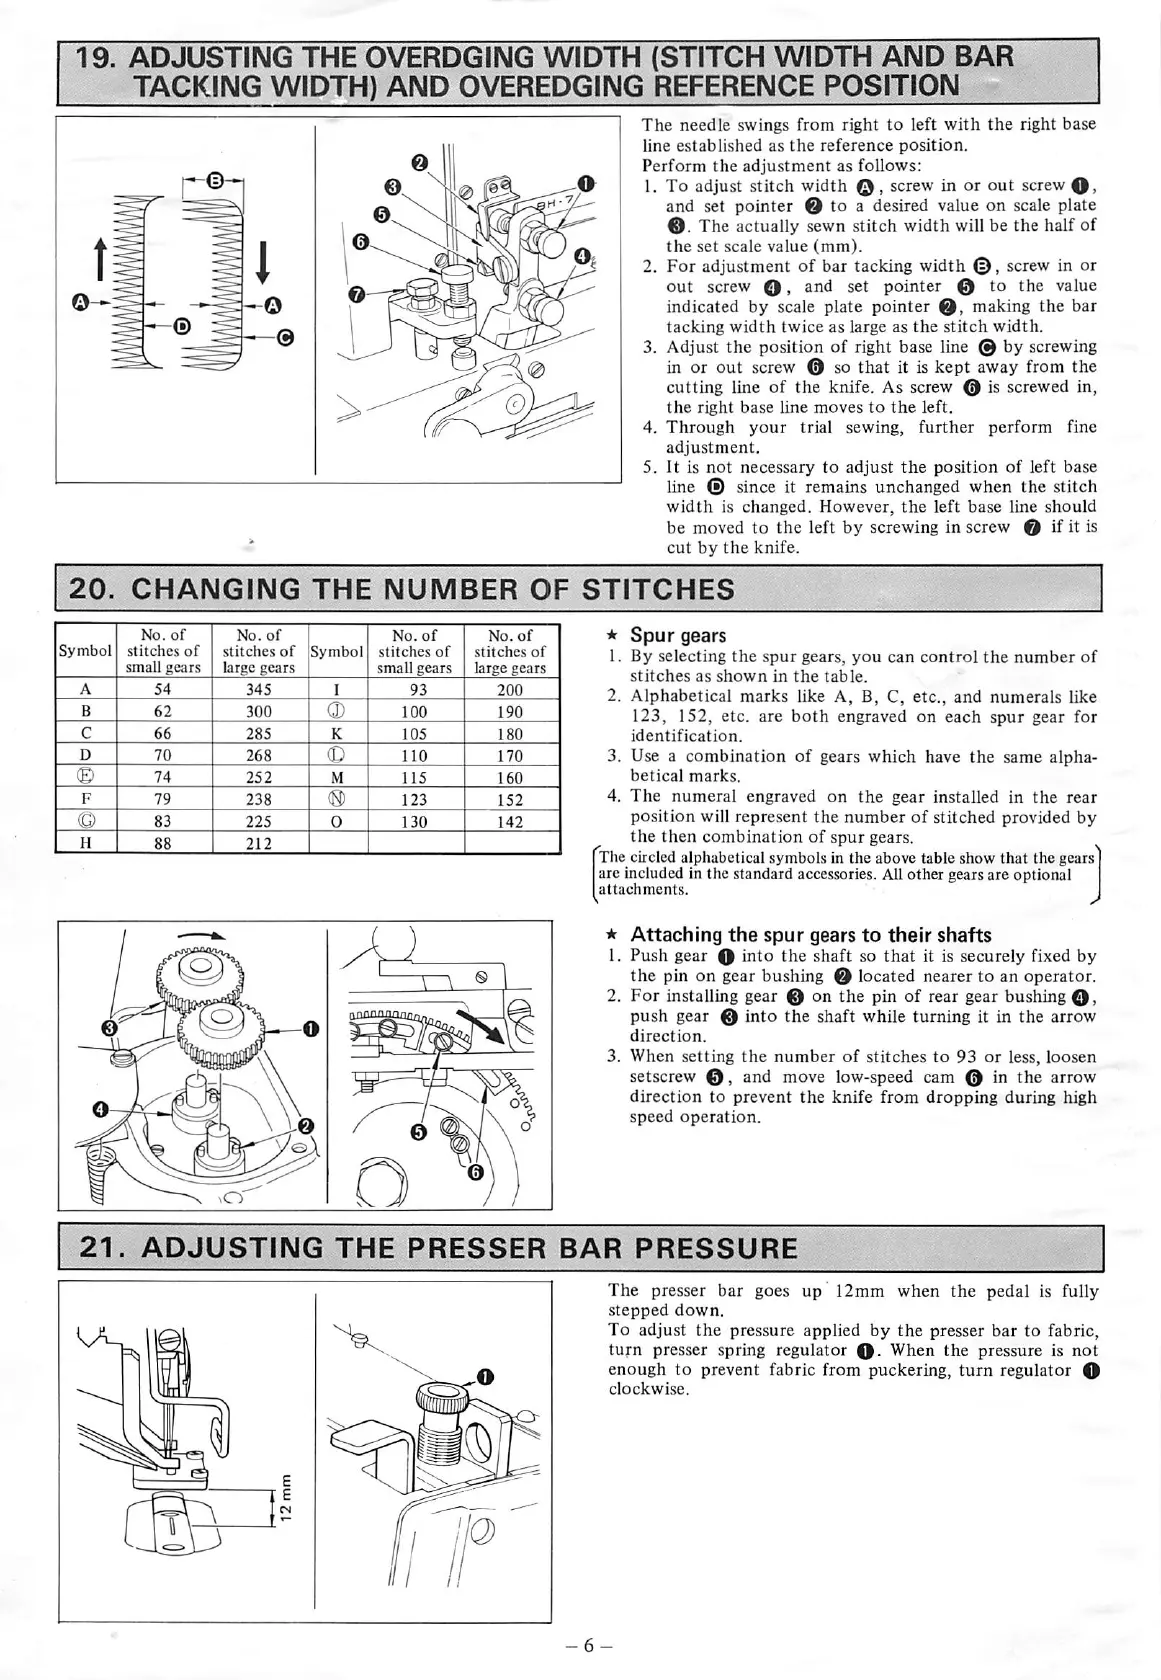
The
needle
swings
from
right
to
left
with
the
right base
line
established
as
the
reference
position.
Perform
the
adjustment
as
follows:
1. To adjust stitch width
©,
screw
in or out
screw
0,
and set pointer 0 to a desired value on scale plate
0.
The actually sewn
stitch
width
will be
the
half of
the
set
scale
value
(mm).
2.
For
adjustment
of
bar tacking width
©,
screw in or
out screw
0,
and set pointer 0 to the value
indicated by scale plate
pointer
0,
making
the
bar
tacking
width
twice
as large as
the
stitch
width.
3. Adjust the position of right base line © by screwing
in or
out
screw 0 so
that
it is
kept
away from
the
cutting
line of
the
knife. As screw 0 is screwed in,
the
right
base
line
moves
to
the
left.
4.
Through
your
trial sewing,
further
perform
fine
adjustment.
5. It is
not
necessary
to
adjust
the
position
of left base
line ® since it remains unchanged when the stitch
width
is
changed.
However,
the
left
base
line
should
be moved to
the
left by screwing in screw 0 if it is
cut
by
the
knife.
20.
CHANGING
THE
NUMBER
OF
STITCHES
No.
of
No.
of
stitches
of
stitches
of
small
gears
large
gears
*
Spur
gears
1. By selecting
the
spur
gears,
you
can
control
the
number
of
stitches
as
shown
in
the
table.
2. Alphabetical
marks
like A, B, C, etc., and numerals like
123, 152, etc. are
both
engraved on
each
spur gear for
identification.
3. Use a combination of gears which have the same alpha
betical
marks.
4.
The
numeral
engraved
on
the
gear
installed in
the
rear
position
will
represent
the
number
of
stitched
provided
by
the
then
combination
of
spur
gears.
The circled alphabetical symbols in
the
above table show
that
the
gears
are included in the standard accessories. All other gears are optional
attachments,
*
Attaching
the
spur
gears
to
their
shafts
1.
Push
gear 0
into
the
shaft so
that
it is securely fixed by
the pin on gear bushing 0 located nearer to an operator.
2.
For
installing gear 0 on the pin of rear gear bushing
0,
push
gear 0
into
the
shaft while turning it in the arrow
direction.
3. When
setting
the
number
of
stitches
to
93
or
less,
loosen
setscrew
0,
and move low-speed cam 0 in the arrow
direction to prevent
the
knife
from
dropping during high
speed
operation.
21.
ADJUSTING
THE
PRESSER
BAR
PRESSURE
iiinp
i
The
presser
bar
goes
up
12mm
when
the
pedal
is fully
stepped
down,
To
adjust
the
pressure
applied
by
the
presser
bar
to fabric,
turn
presser spring
regulator
0.
When
the
pressure is
not
enough
to
prevent
fabric
from
puckering,
turn
regulator
0
clockwise.
From the library of: Superior Sewing Machine & Supply LLC
 Loading...