What Else Do I Need?
• Someone to help you secure the switch to the rack
• A number two Phillips (+) screwdriver
• Eight rack mount screws
• Cage nuts and washers, if your rack requires them
• Grounding lug and aached cable
• Two 10-32 x 0.25 screws with #10 split-lock washers
• An electrostac discharge (ESD) grounding strap
• Management host, such as a laptop or desktop PC
• Serial-to-USB adapter (if your laptop or desktop PC doesn’t have a serial port)
• An Ethernet cable with RJ-45 connectors aached and an RJ-45 to DB-9 serial port adapter
NOTE: We no longer include a DB-9 to RJ-45 cable or a DB-9 to RJ-45 adapter with a CAT5E
copper cable as part of the device package. If you require a console cable, you can order it
separately with the part number JNP-CBL-RJ45-DB9 (DB-9 to RJ-45 adapter with a CAT5E
copper cable).
Rack It
1. Review General Safety Guidelines and Warnings.
2. Wrap the ESD grounding strap around your bare wrist and ground yourself to an ESD point or to the
rack.
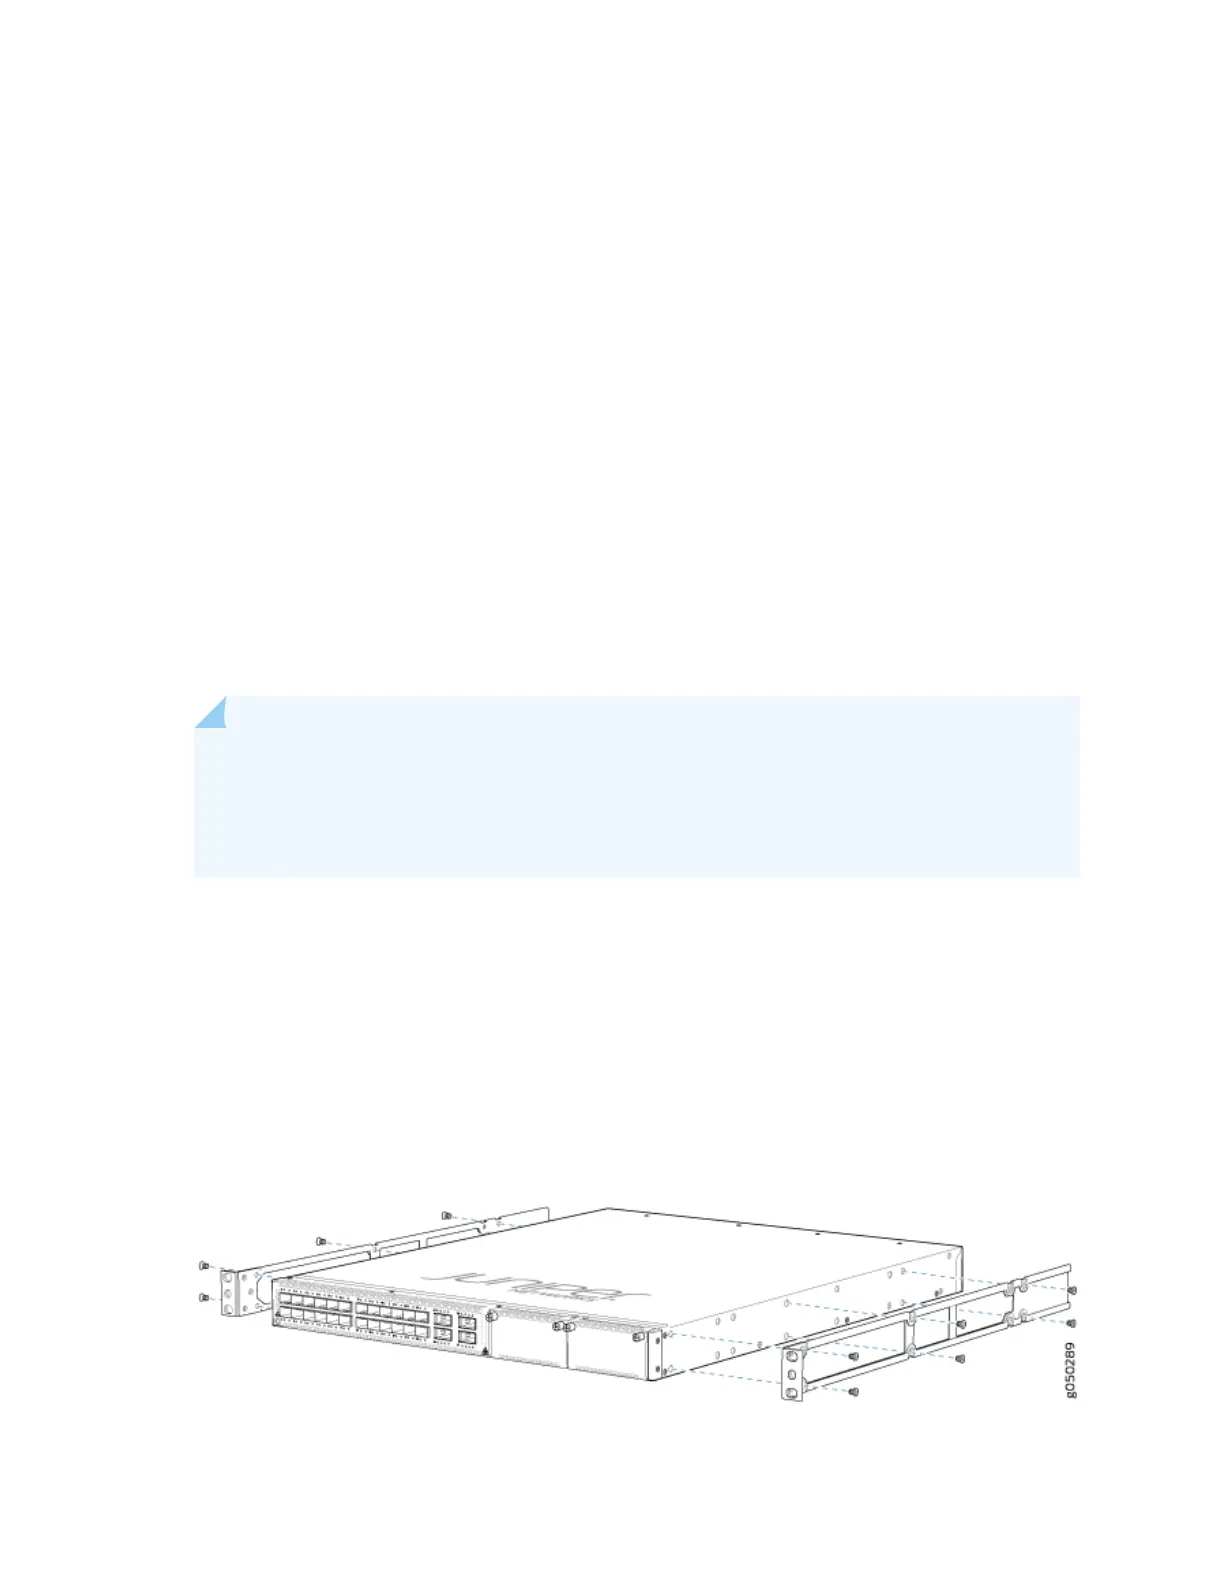
3. Decide which end of the switch you want to place at the front of the rack: the eld-replaceable unit
(FRU) end or the port end. Posion it in the rack so that the AIR IN labels on the power supplies are
next to the cold aisle, and the AIR OUT labels on the power supplies are next to the hot aisle.
4. Aach the mounng rails to each side of the switch using the supplied at-head mounng screws.
3
 Loading...


