Basic Connection and Configuration with the J-Web Interface ! 9
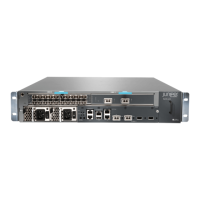
J-series Services Router Quick Start
2. Enter information in the boxes on the Set Up Quick Configuration page as
shown in Table 2, then click OK or Apply.
3. To configure additional interfaces:
a. Under Quick Configuration, click Interfaces, and then click the interface
you want to configure.
b. On the Interfaces page, click Add to add a logical interface.
IP addresses are configured on the logical interface.
c. In the two boxes provided, type the IP address (for example,
192.168.1.4)
and the number of bits in the subnet mask (for example,
24), click Add,
and then click OK or Apply.
To edit an existing interface, you click the logical interface.
Table 2: J-Web Set Up Quick Configuration
Field Description
Host Name (required) Hostname of the router—for example, Chicago.
Domain Name Network or subnetwork that the router belongs to.
Root Password (required) Root password that user “root” can use to log in to the router.
Verify Root Password
(required)
Retyped password.
Time Zone Time zone in which the router is located.
NTP Servers NTP server to synchronize the system time.
Current System Time Your current time and date.
DNS Name Servers DNS server to resolve hostnames into addresses.
Domain Search Name of each domain to include in a DNS search.
Default Gateway Default route. The IP address of a default router that the Services
Router can use to direct packets addressed to networks not
explicitly listed in the routing table.
Loopback Address Reserved IP address that is always available on the router. By
default, this address is set to
127.0.0.1/32.
fe-0/0/0 Address
or
ge-0/0/0 Address
IP address and prefix length of built-in Ethernet port 0. The
interface
fe-0/0/0 or ge-0/0/0 is typically used as the management
interface for accessing the router. The DHCP client sets this address to
192.168.1.1/24 if no DHCP server is find.
You must enter the fe-0/0/0 or ge-0/0/0 address on the Quick
Configuration Set Up page before you click Apply or OK. If you do
not manually configure this address, the DHCP lease is lost and
you will lose your connection to the J-Web interface when you
click Apply or OK.
Allow Telnet Access Enables remote access to the router with Telnet.
Allow JUNOScript over
Clear-Text Access
Allows JUNOScript to send unencrypted text to the router over a
TCP connection.
Allow SSH Access Enables remote SSH access to the router.
 Loading...