Juniper Networks SSG 320M and 350M Security Policy
Unit is the secondary
(backup) device.
• Hardware reset button: After the user follows this sequence—press for 5 seconds,
release for 5 seconds, press again for 5 seconds, and release again for 5 seconds—the
device erases all configurations and restores the default factory settings (Control Input).
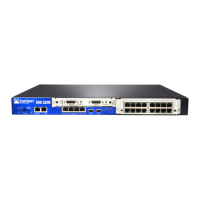
• The SSG 320M has three physical interface module (PIM) slots; the SSG 350M has five
PIM slots.
• Both modules were validated using only the fixed ethernet interfaces on the chassis.
Operation In FIPS Mode
Initial configuration
Connecting to the device
The security appliance provides an interface for an operator to configure the device through the
Console or Network ports. For initial configuration, the operator must directly connect a VT-100
terminal or a non-networked device that can emulate a VT-100 terminal to the Console port via a
serial cable.
By default, the security appliance is in non-FIPS mode on the first power-up. The first time an operator
logs on to the appliance, the operator uses the default user name and password which is “netscreen”,
“netscreen”. This user is assigned the Crypto-Officer role.
Once the device is operating in FIPS mode, the operator should perform the minimum configuration
necessary to establish a management connection via SSH (i.e. configure a network interface and
enable SSH management through that interface), then disable the console connection using the set
console disable CLI command. If the console is re-enabled in FIPS mode, the device will
automatically zeroize itself and return to non-FIPS mode.
Loading and authenticating firmware
Prior to placing the device in FIPS mode, the administrator must load the Juniper firmware
authentication DSA public key, imagekey.cer, using the save image-key CLI command. When this
public key is present on the device, the integrity and authenticity of the firmware is checked at system
start and when firmware is loaded. If the DSA signature appended to the firmware is verified, the
device allows it to be loaded.
If the device is not already running a FIPS validated version of the firmware, the administrator should
load it using the save software CLI command. Loading a new version of firmware completely
replaces any existing firmware.
The firmware is signed by a well-protected 1024 bit modulus DSA private key, which provides 80 bits
of security. The generated signature is attached to the firmware. In order for the device to accept an
authorized image, the image has to have a correct signature.
 Loading...