1-22 (No.MB150)
SECTION 4
ADJUSTMENT
4.1 Jigs and test instruments
• Upgrade disc
• Remote controller
4.2 Adjustment and check items
(1) Initialization of EEPROM (DVD unit)
(2) About upgrade of DVD unit firm
(3) About upgrade of system micom (ROM correction)
(4) Confirming the version of unit and system firm and region
code
4.3 Adjustment and check method
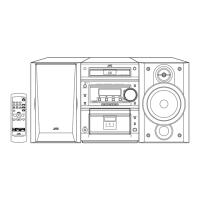
4.3.1 Initialization of EEPROM (DVD unit)
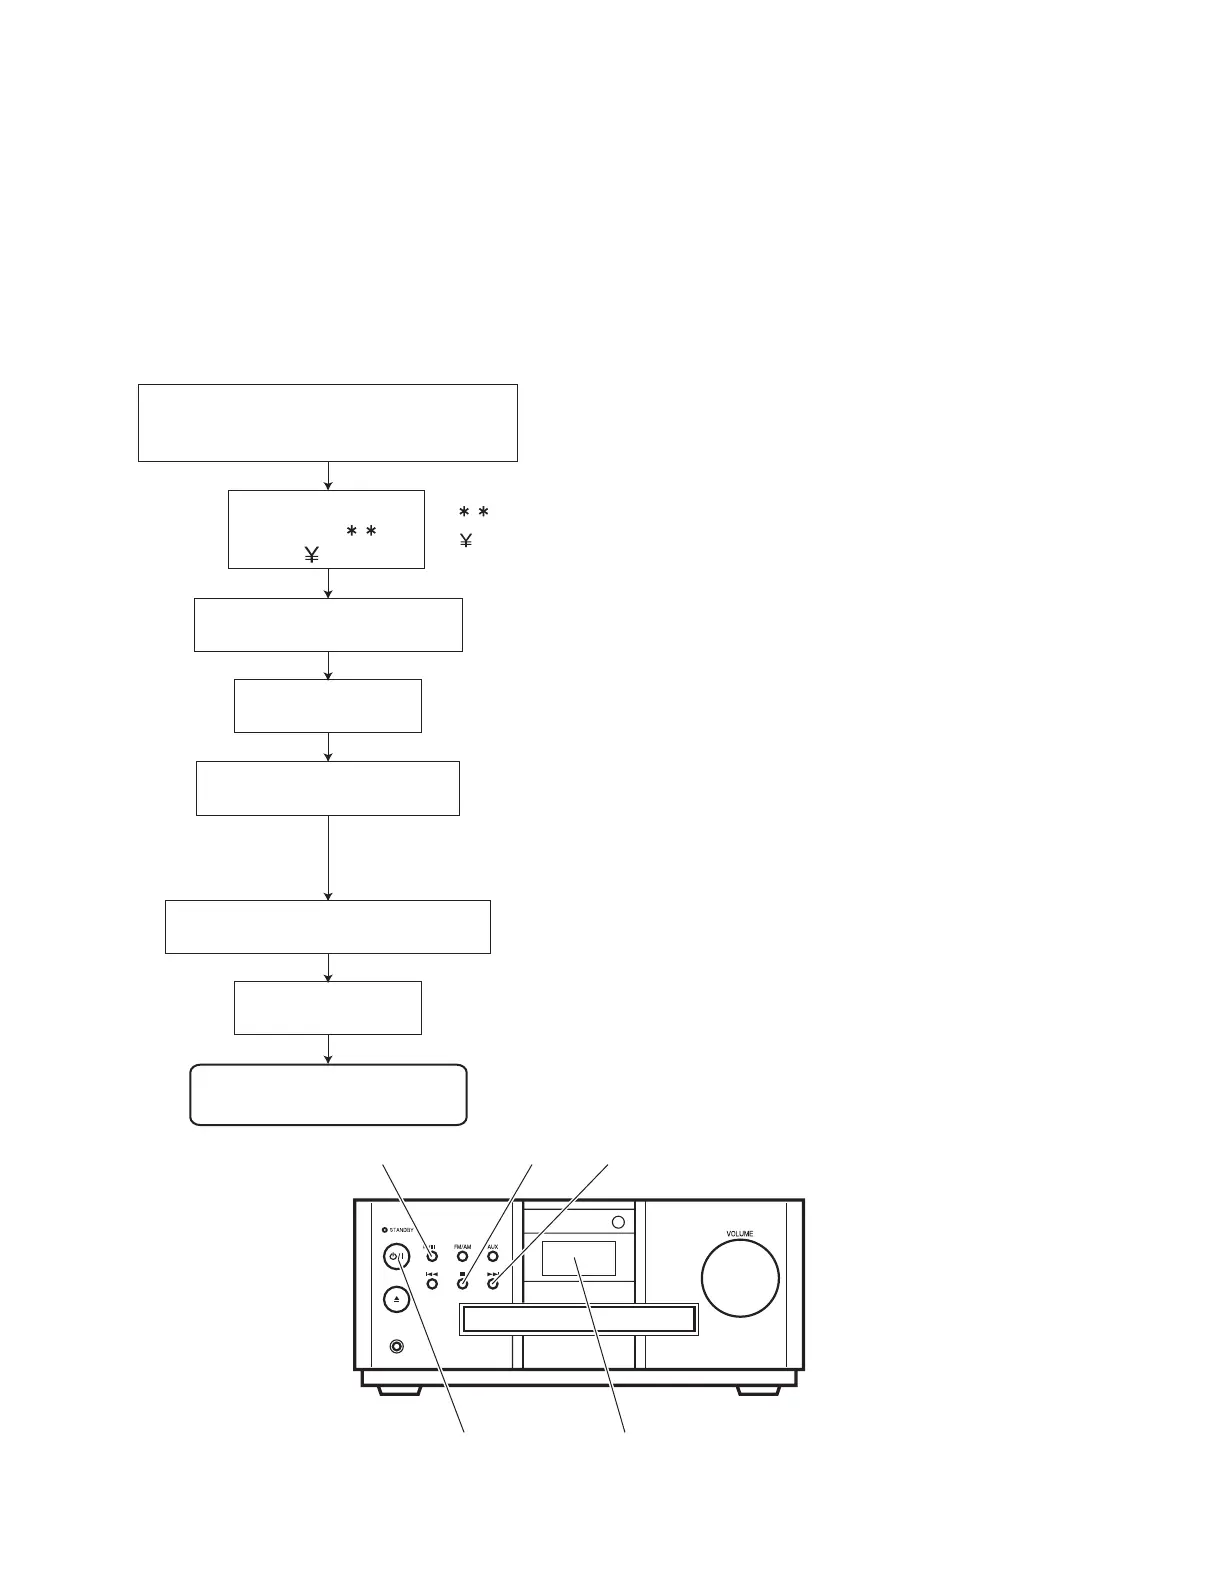
PLAY/PAUSE
STOP
FL display
F.SKIP
POWER
Press "F.SKIP" button at the
front panel.
Insert the power plug to the inlet while
pressing "STOP" and "PLAY/PAUSE "
buttons on the front panel at the same time.
FL display indicates
TEST
: Version (Refer to the table of item 4)
: Region Code (Refer to the table of item 4)
Then initialization of
EEPROM starts.
Indication of "EEPROM CLA"
is displayed.
By pressing "POWER" button at the
front panel, set to STANDBY mode.
Pull the power code
from AC inlet.
(NOTE)
When FL display freezes with the display of "TEST 0", unplug
the power cord. More than 1 second later insert the power plug
and open the tray. Then press "OPEN/CLOSE" button. After
confirming that the tray closes completely, do this initialization
from the first.
The
Initialization of EEPROM
is finished.
 Loading...