52 EN
REFERENCES
Power
No power is supplied.
● The power is not connected properly.
H Connect the AC adapter securely. (墌 pg. 14)
● The battery pack is not attached firmly.
H Detach the battery pack once again and re-attach
it firmly. (墌 pg. 14)
● The battery is dead.
H Replace the dead battery with a fully charged
one. (墌 pg. 14)
No display appears.
● When using the AC adapter, the camera enters
the sleep mode, the access lamp lights, and the
LCD monitor turns off.
H To cancel the sleep mode, perform any operation
such as zooming.
The power was turned off accidentally.
● The drop detection function operated. (墌 pg. 21)
H Set the power switch to OFF, and turn the power
on again. To turn off the drop detection function,
set [DROP DETECTION] to [OFF]. (墌 pg. 49)
Recording
Recording cannot be performed.
● [MEMORY CARD IS FULL] appears.
H Replace with new recording medium or delete
unnecessary files. (墌 pg. 20, 39)
● Recording medium is not selected properly.
H Select the recording medium. (墌 pg. 21, 48, 49)
When shooting a subject illuminated by
bright light, vertical lines appear.
● This is not a malfunction.
When the screen is under direct sunlight
during shooting, the screen becomes red or
black for an instant.
● This is not a malfunction.
During recording, the date/time does not
appear.
● [DATE/TIME] is set to [OFF].
H Set [DATE/TIME] to [ON]. (墌 pg. 49)
The LCD monitor indications blink.
● Certain modes of program AE, effect, DIS and
other functions that cannot be used together are
selected at the same time.
Digital zoom does not work.
● [ZOOM] is set to [15X]* (optical zoom).
H Set [ZOOM] to [60X] or [700X]*. (墌 pg. 50)
● Digital zoom is not available in the still image
recording mode.
* For GZ-MG30E/EK/GZ-MG20E/EK optical zoom
can go up to 25x, and [ZOOM] can be set to
[100X] or [800X].
Troubleshooting
The camera is a microcomputer-controlled
device. External noise and interference (from a
TV, a radio, etc.) might prevent it from
functioning properly.
H To solve the problem, follow the Instructions
below at first.
H If the problem is not solved, reset the
camera. (Refer to “To reset the camera”
below.)
H If the problem still exists, please consult your
nearest JVC dealer.
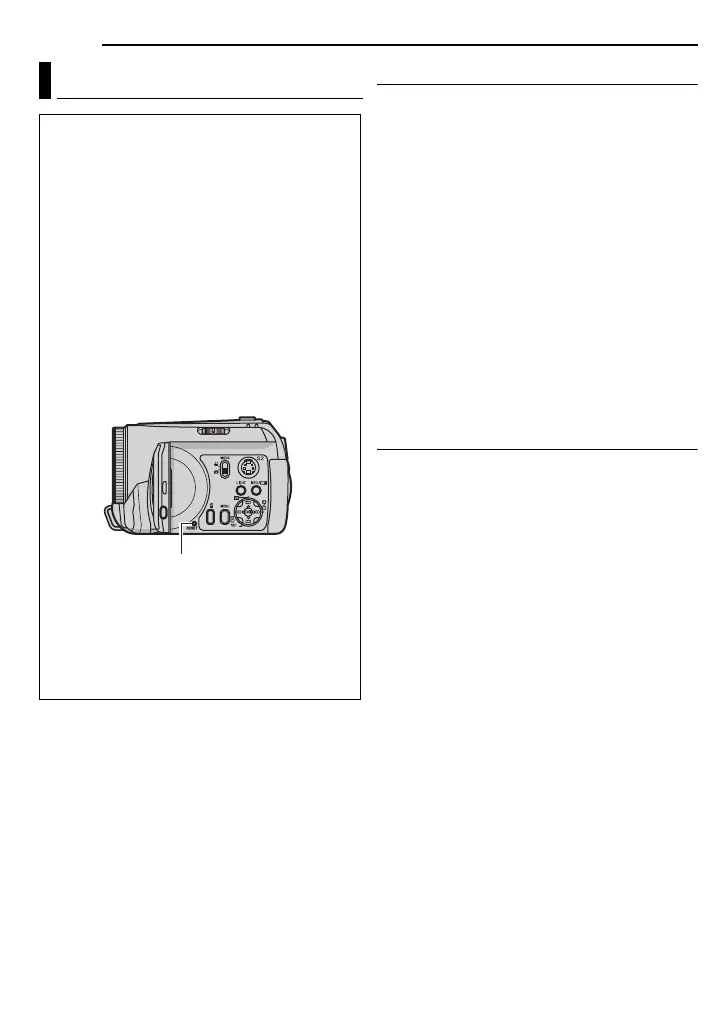
8 To reset the camera
A Press RESET using a piece of wire or other
such pointed instrument. The power is
turned off once and turned on again
automatically.
B If nothing happens, set the power switch to
OFF and remove the power supply (battery
pack or AC adapter) from the camera, then
put it back again.
C Execute [PRESET] from the menu. The
camera returns to it’s factory-preset.
(墌 pg. 48)
RESET
 Loading...