25
Menu Functions
DISPLAY menu
Advanced
• HDR Settings
• Auto/HDR10 / HLG/SDR: The projector supports HDR imaging
sources. It can automatically detect the dynamic range of the source,
and optimize settings to reproduce contents under wide range of light
conditions. If the input source is not defined with dynamic range, you can
also manually select HDR10, HLG or SDR for it.
• Picture Tone: The projector can automatically adjust the brightness
levels of your image according to the input source's meta data
information. You can also manually select a brightness level to display
better picture quality. When the value is higher, the image becomes
brighter; when the value is lower, the image becomes darker.
Reset Current
Picture Mode
Returns all of the adjustments you’ve made for the selected Picture Mode
(including preset modes, User 1, and User 2) to the factory preset values.
Submenu Functions and Descriptions
Submenu Functions and Descriptions
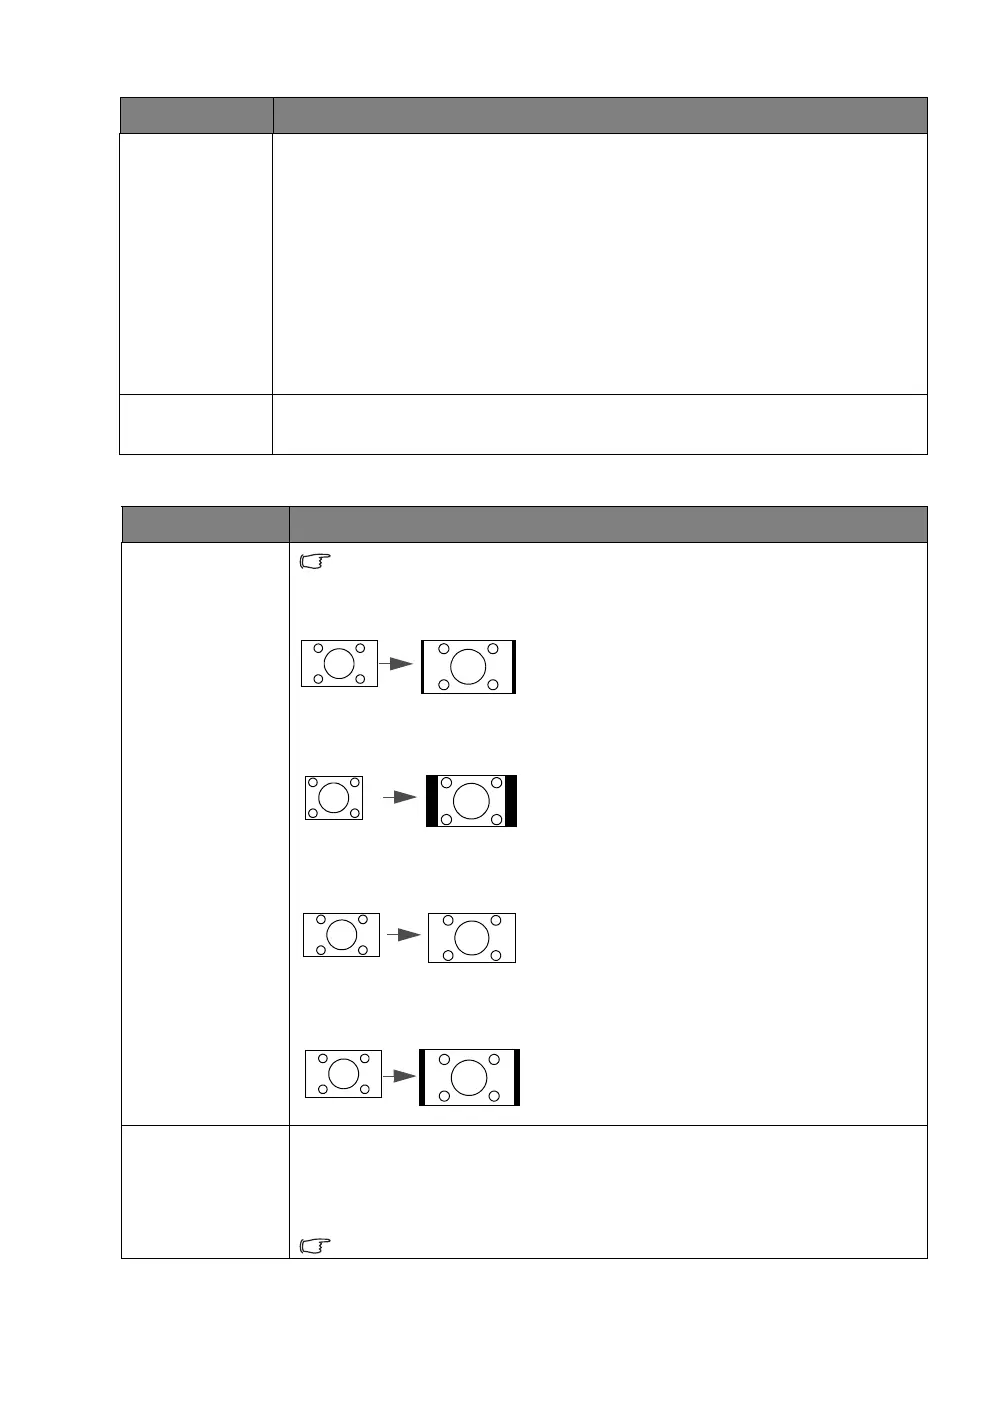
Aspect Ratio
In the following illustrations, the black portions are inactive areas and the
white portions are active areas.
• Auto
Scales a picture proportionally to fit the projector's
native resolution in its horizontal or vertical width.
This makes the most use of the screen and
maintains the aspect ratio of a picture.
• 4:3
Scales the picture so that it is displayed in the
center of the screen with a 4:3 aspect ratio.
• 16:9
Scales a picture so that it is displayed in the center
of the screen with a 16:9 aspect ratio.
• 16:10
Scales a picture so that it is displayed in the
center of the screen with a 16:10 aspect ratio.
Image Position
Displays the Image Position window. You may use the directional arrow keys
on the projector or remote control to adjust the position of the projected picture.
The values shown on the lower position of the window change with every key
press you made.
This function is only available when the PC signal is selected.
 Loading...