1-24
UX-A52R
Prior to performing the following procedure, remove
the side bracket (L), (R), cassette hanger assembly /
cassette holder.
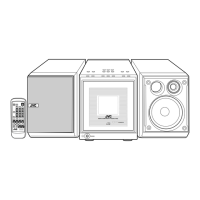
Remove the spring on the lower side of the head
assembly.
Remove the two screws D and remove the head
assembly upward.
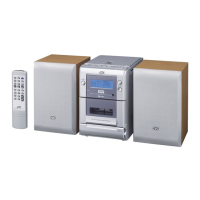
Remove the screw E attaching the head board.
Unsolder the flexible wire extending from the head
assembly if necessary.
1.
2.
3.
Removing the head assembly / head
board (See Fig.9 and 10)
Prior to performing the following procedure, remove
the side bracket (L), (R), cassette hanger assembly /
cassette holder.
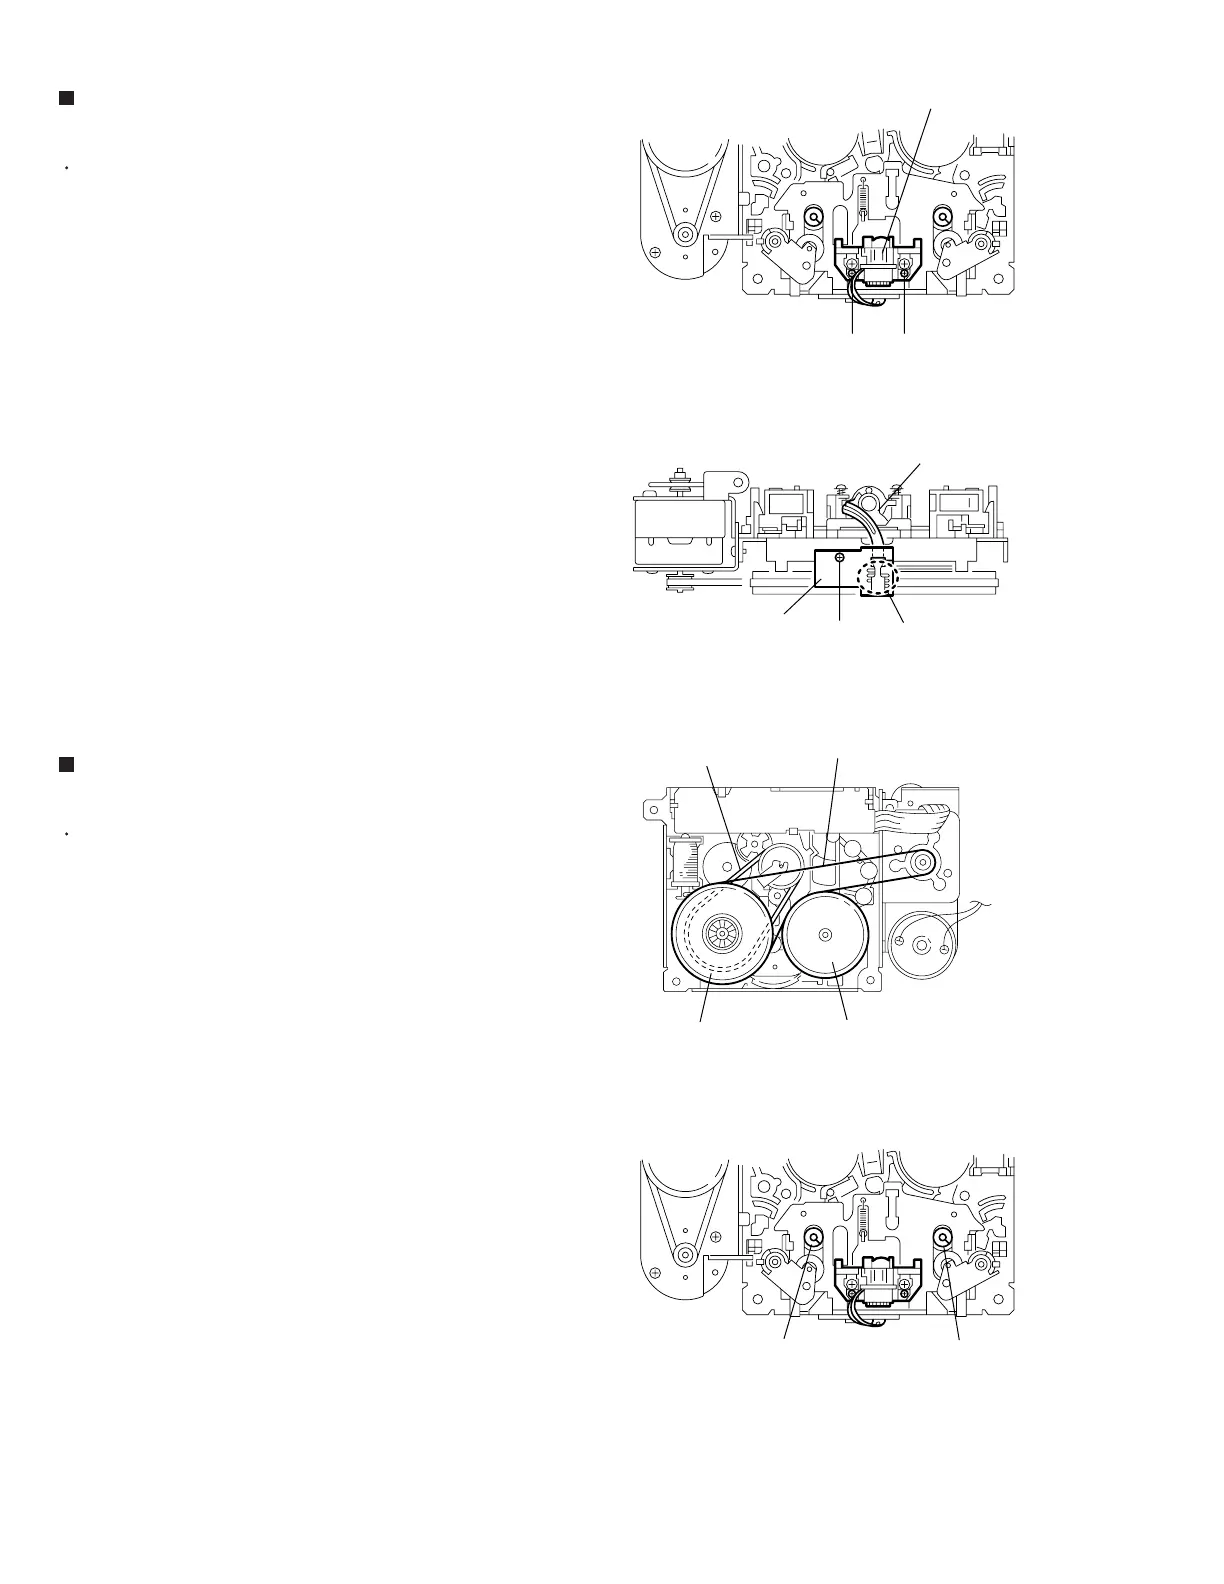
Remove the belt and sub belt on the bottom of the
body.
Remove the polywasher from the flywheel (F) and
(R) on top of the body.
Pull out the flywheel (F) and (R).
1.
2.
3.
Removing the flywheel assembly (F) and
(R) (See Fig.11 and 12)
Fig.9
Fig.10
Fig.11
Head assembly
DD
Fig.12
E
Head assembly
Head board
Soldering
Belt
Sub belt
Flywheel assembly (R)
Flywheel assembly (F)
Polywasher
Polywasher
 Loading...