1-10 (No.MB595)
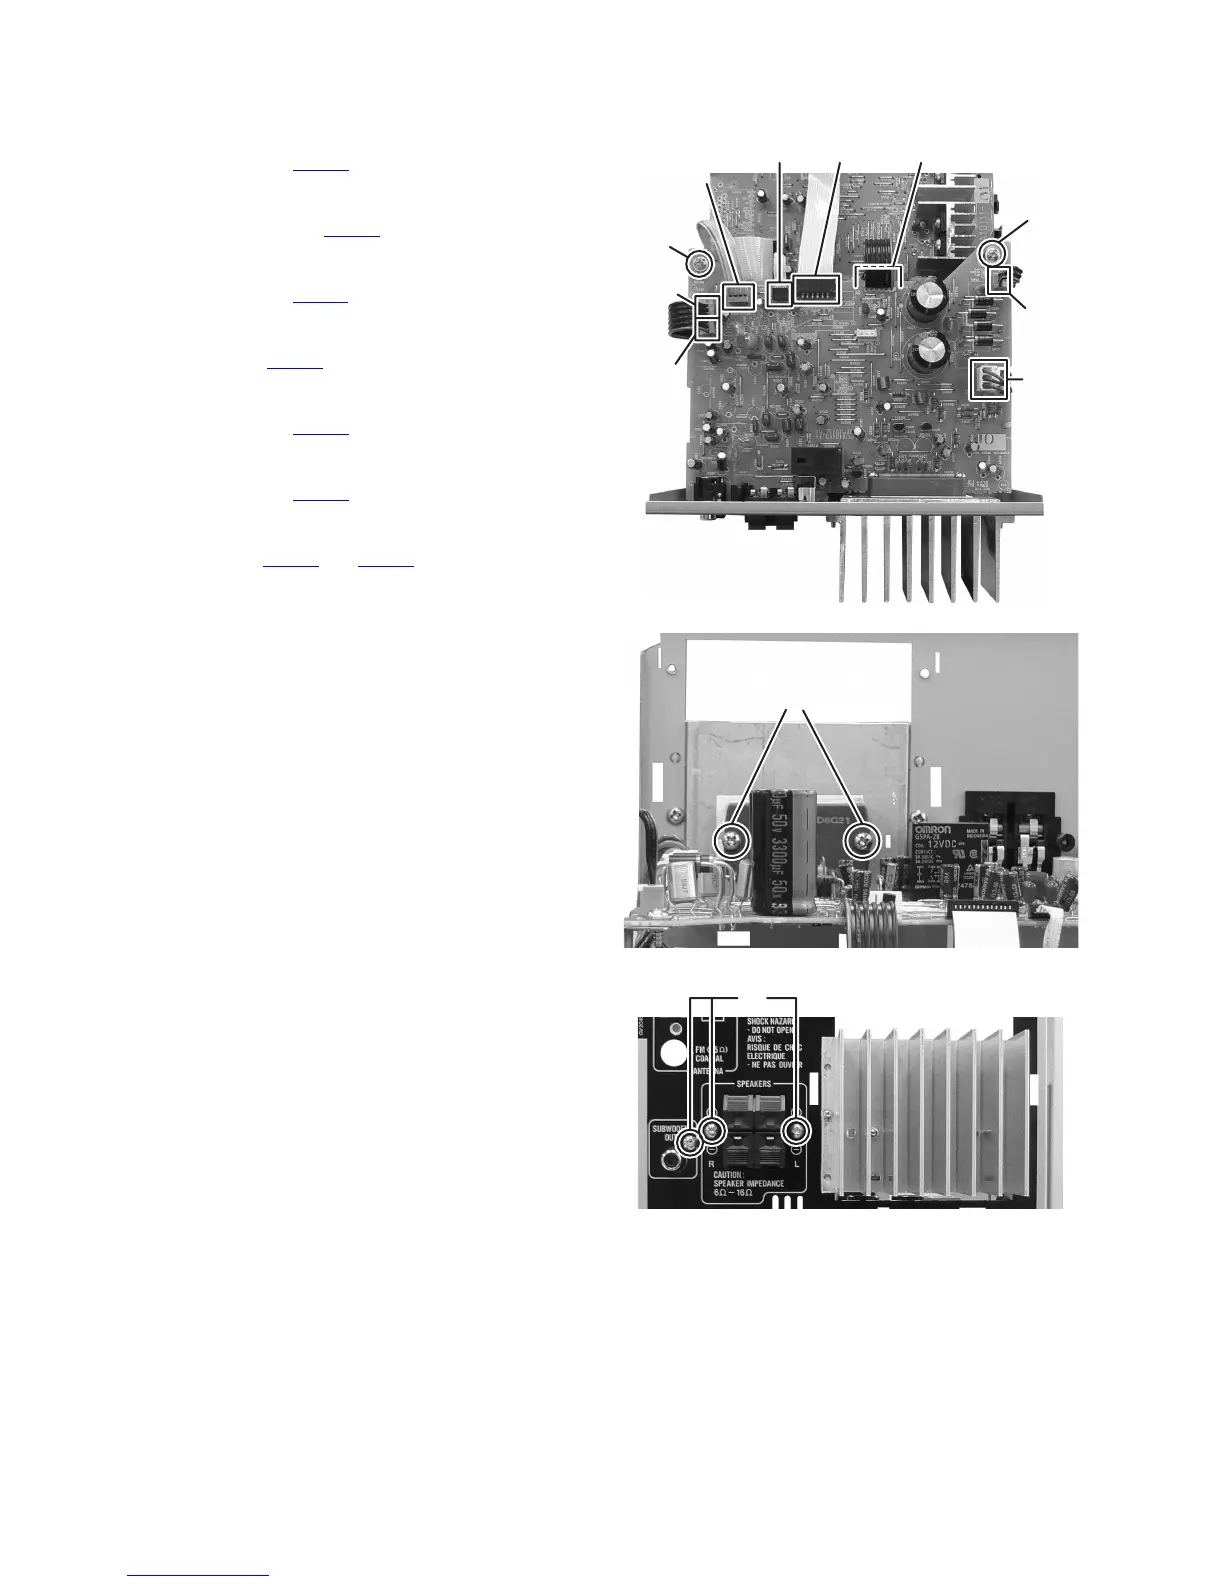
3.1.5 Removing the Audio board assembly
(See Fig.9 to 11)
(1) Disconnect the connector wire from the Power transformer
connected to connector CN601 of the Audio board assem-
bly. (See Fig.9)
(2) Disconnect the card wire from the USB jack board assem-
bly connected to connector CN811
of the Audio board as-
sembly. (See Fig.9)
(3) Disconnect the card wire from the Audio board assembly
connected to connector CN203
of the Micon board assem-
bly. (See Fig.9)
(4) Disconnect the card wire from Micon board assembly con-
nected to connector CN217
of the Audio board assembly.
(See Fig.9)
(5) Disconnect the card wire from DVD mechanism assembly
connected to connector CN722
of the Audio board assem-
bly. (See Fig.9)
(6) Disconnect the card wire from USB jack board assembly
connected to connector CN810
of the Audio board assem-
bly. (See Fig.9)
(7) Disconnect the card wire from Micon board assembly con-
nected to connector CN219
and CN220 of the Audio board
assembly. (See Fig.9)
(8) Remove the two screws G attaching the Audio board as-
sembly. (See Fig.9)
(9) Remove the two screws H attaching the Power amplifier
IC. (See Fig.10)
(10) Remove the three screws J attaching the Amplifier board
assembly. (See Fig.11)
Fig.9
Fig.10
Fig.11
CN601
CN811
CN203CN217CN722
CN810
CN219
CN220
G
G
H
J
 Loading...