12 English
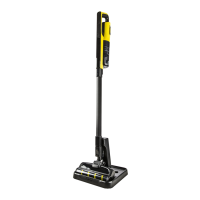
a Press down on the brush roll cover and remove
the brush roll.
Illustration Z
b Remove the dirt e.g. with a brush. If necessary,
tangled threads or hair can be carefully cut off
with scissors.
c Clean the brush opening carefully with a cloth or
soft brush.
Illustration AA
d Insert the brush roll at an angle and fully into the
brush opening, pushing up until the cover snaps
into place.
Illustration AB
Troubleshooting guide
Malfunctions often have simple causes that you can
remedy yourself using the following overview. When in
doubt, or in the case of malfunctions not mentioned
here, please contact your authorised Customer Service.
The device does not start up
Battery is empty.
Charge the rechargeable battery.
Battery is not inserted correctly.
Push the battery into the mount until it locks into
place.
Battery is defective.
Replace the battery.
The battery is not charging
The charging plug/mains plug is not connected correct-
ly.
Connect the charging plug/mains plug correctly.
The socket is defective.
Check that the socket is working.
The wrong charger is being used
Check that the correct charger is being used.
The device stops during operation or the suction
performance is poor
The battery has overheated.
Stop work and wait until the battery temperature is
back in the normal range.
The accessories, the suction opening on the dust con-
tainer or the suction pipes are clogged.
Remove the clog with a suitable aid.
The dust container is full.
Empty the dust container.
The filters are soiled.
Clean the filters, see chapter Care and service.
Roller brush is blocked.
Remove any blockage.
Abnormal engine noise
The accessories, the suction opening on the dust con-
tainer or the suction pipes are clogged.
Remove the clog with a suitable aid.
Removing and installing the battery
ATTENTION
Frequent removal of the battery
Frequent removal of the battery can damage the bat-
tery.
Only remove the battery for maintenance
and care if the device is not used for a long period of
time or if the device has to be sent for servicing.
Removing the battery
1. Press the unlocking button.
2. Remove the battery from the device.
Illustration AC
Inserting the battery
ATTENTION
Dirty contacts
Damage to the device and battery
Check the battery mount and the contacts for soiling
and clean them as necessary before inserting the bat-
tery.
Note
Use only fully charged batteries.
1. Push the battery into the mounting in the device until
it audibly latches into place.
Illustration AD
Technical data
Subject to technical modifications.
Electrical connection
Voltage of charger V 21,6
Nominal power W 140
Battery pack type Li-ION
Charger 26 V TEK *EU
Model YLJXA-E260040
Part number 9.769-119.0
Nominal voltage of charger V 100 -
240
Frequency Hz 50 - 60
Charging time when the battery is
completely discharged
min 345
Protection class II
Device performance data
Tank content l 0,65
Operating time when battery is ful-
ly charged in normal operation
min 30
Operating time in maximum mode
when battery fully charged
min 18
Dimensions and weights
Weight (without accessories) kg 1,55
 Loading...