35
WATER FILTER
Installation
✳
1.
T urn off the water supply to the refrigerator. Dispense
water f or 3 seconds to prevent water drops f rom falling
while installing filter.
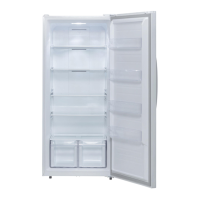
2.
T he water filter is located in
the top of the refrigerator
compartment. Pull the water
filter cover toward you and
down.
3.
R emove the locking cap by turning 1/ 2
counterclockwise. Save locking cap for possible future
use. Always install locking cap if no filter is in place.
4.
I nsert water filter and rotate
clockwise 1/ 2 turn to secure
in place. Raise the water filter
cover and slide back into place.
B efore proceeding, use a cloth
to wipe up any water droplets
that may have f allen.
5.
D ispense water over the course of 5 minutes in cycles
of 30 seconds ON and 60 seconds OFF. Do not
dispense water continuously f or 5 minutes.
NOTE :
Perform this step each time a new water filter
is installed.
✳
One filter is supplied with the refrigerator.
A replacement filter can be purchased at a Sears
store or by calling 1-844-553-6667.
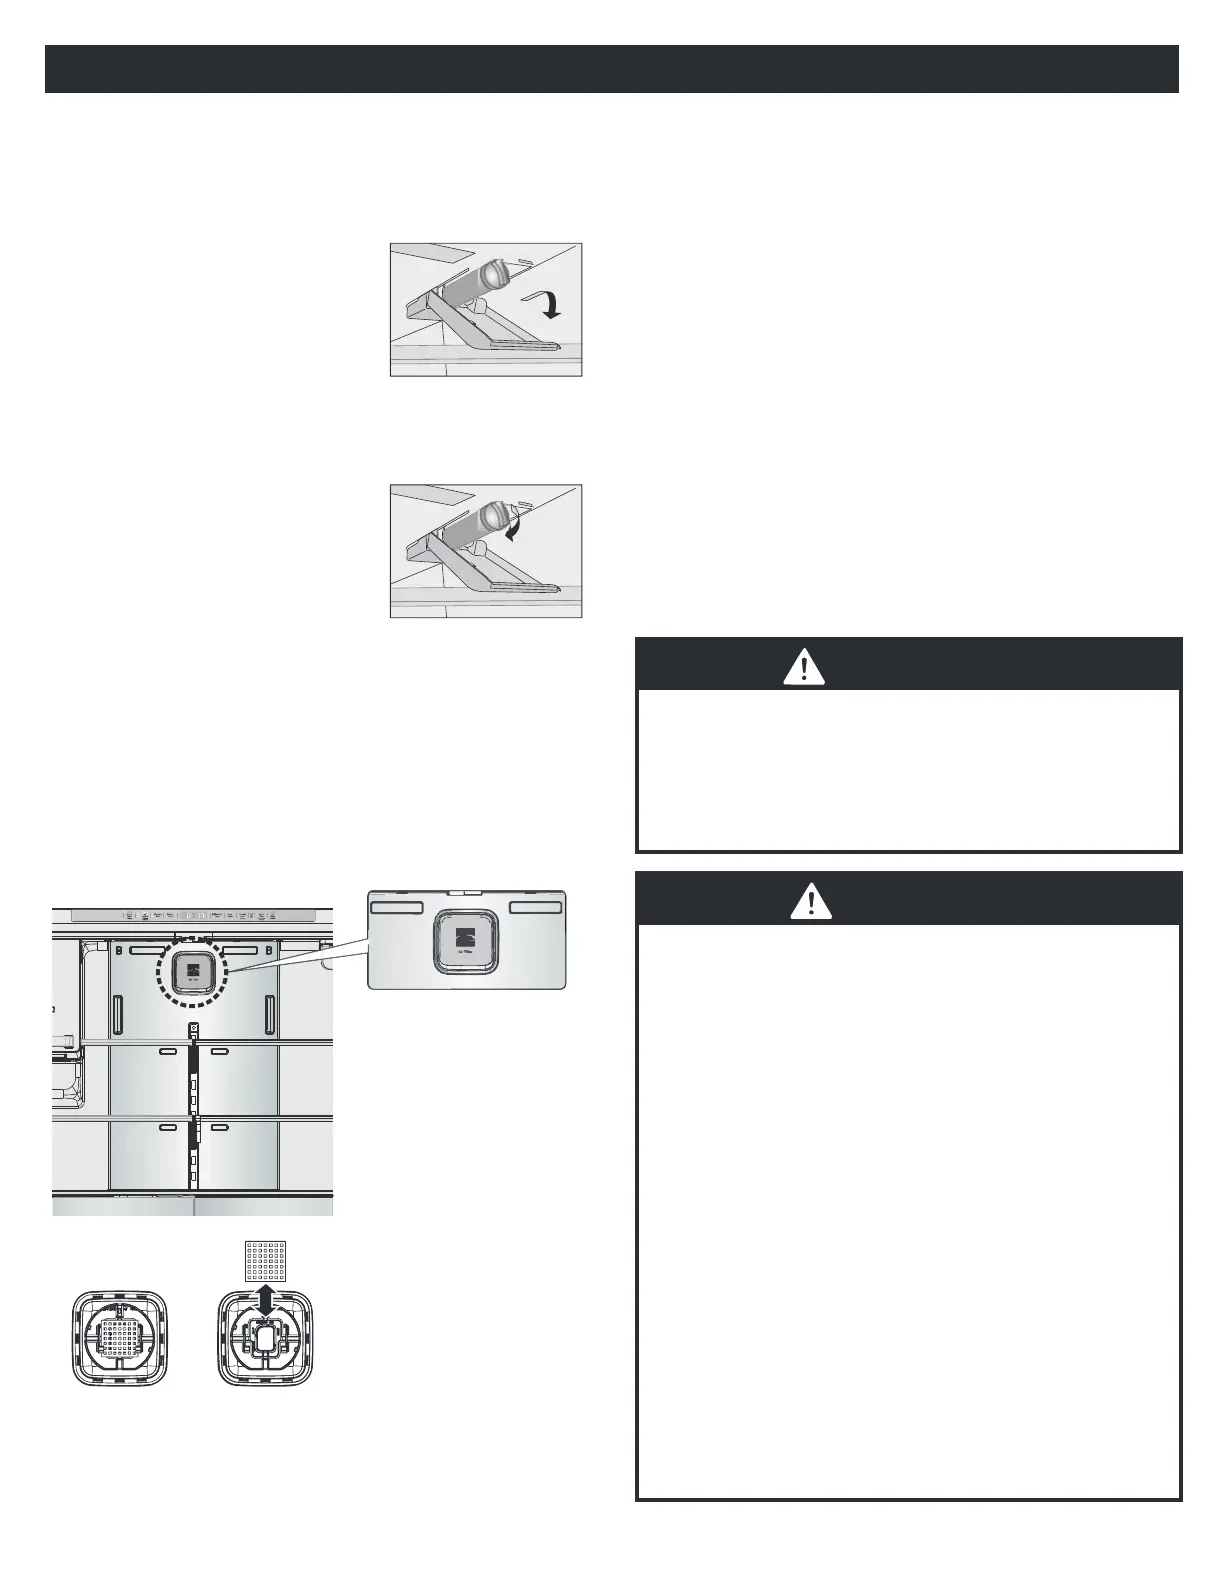
Air Filter
NOTE:
Air Filter should be changed every 6 months.
Replacing the water filter at same time as air filter is
recommended.
Information concerning the water fi lter
- After use, the water system is subject to low pressure.
Proceed with caution when removing the filter.
Di spenser wat er 1- 3 second s b ef ore wa t er fi lter change
to prevent water drops from falling.
-
Flush the water system if the appliance has not been
in use for a long period of time, or if the ice/ water has
an unpl easa nt t ast e or smel l . To do this, dispense water
through the water dispenser for several minutes.
If the unpleasant taste or smell remains, replace the fi lter.
-
To protect from frost, remove the filter cartridge if you
expect the temperature to drop below freezing.
- If pressure surges could occur in the water pipe, do not
install the water filter without a suitable surge eliminator.
Contact an installation expert if you are not sure
whether pressure surges could occur in the water pipe.
- Af ter installing a new filter : Discard any ice produced
in the first 24 hours after switching on.
- If no ice has been removed for a long period of time,
empty the ice cube bin and discard any ice produced
over the next 24 hours.
WA RN I N G
To red uce t he r i sk associ a t ed wi t h i ngest i on of cont ami na nt s:
Do not use with water that is microbiologically unsafe or of
unknown quality without adequate disinfection before and
af t er t he syst em. Sy st ems cer t i fied for cyst reduction may
be used on disinfected water that may contain filterable
cy st s. EPA Establishment Number 10350-MN-005
CAUTION
To reduce the risk associated with property damage
due to water leakage:
•
Read and follow
the Water Filter instructions before
installation and use of this system.
• Installation and use
MUST
comply with all state and
local plumbing codes.
•
Do not
i nst a l l i f wa t er pressure exceed s 125 psi
(862 kPa). Contact a plumbing professional if you
are uncertain of how to check your water pressure.
•
Do not
install where water hammer conditions may
occur. If water hammer conditions exist, you must
install a water hammer arrester. Contact a plumbing
professional if you are uncertain of how to check for
this condition.
•
Do not
i nst al l on hot wat er sup pl y l i nes.
The maximum operating water temperature of this
water fil t er syst em i s 10 0 ° F (38° C).
•
Protect water fi lter from freezing
. Do not operate
refrigerator in ambient conditions below 55°F
(12.7°C). Drain water filter when storing unit in
temperatures below 40°F (4.4°C).
• The disposable water filter must be replaced every
six months, at the rated capacity, or if a noticeable
reduction in flow rate occurs.
Slim IceMaker
CLOSEOPEN
ACCELA CHILL ACCELA CHILL
ACCELA CHILL
HOLD 3 SEC
ACCELA CHILL
HOLD 3 SEC
1.
Rotate filter cover
counterclockwise about 15
degrees to release from
underlying duct cover. Pull filter
cover toward you to remove.
2.
Slide used filter up out of back
of filter cover. Slide new filter
down into back of filter cover.
3.
Align filter cover at about
a 15 degree angle to duct
cover. Push filter cover down
onto duct cover and rotate
clockwise to secure.
4.
After changing the water filter
or air filter, be sure to press the
Water Filter or Air Filter button
for 3 seconds turn indicator
light off .
 Loading...