STEP3 : PREPARETHEVENtiNG BLOWER
Your microwave oven is shipped with the blower assembled for room venting (recirculafing).
You need to adjust the blower if you want wail vented or roof vented installation.
WARNING
ELECTRICAL SHOCK HAZARD! UNPLUG UNiT BEFORE WORKING ON iT+
DO NOT PULL OR STRETCH THE BLOWER WtRtNG! Pulling and stretching the blower wiring could result
in electrical shock.
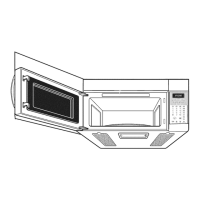
1. Remove any shipping materials and parts from inside
the microwave oven.
2. Cover the counter top or cooktop with a thick,
protective covering to protect it from damage and
dirt. See Figure 10.
NOTE: if you have a free-standing range, disconnect
it, move it onto a piece of cardboard or
hardboard and puil it away from the wail,
so that you can get closer to the upper
cabinet and back wail for easier measuring
and drilling.
3. Remove mounting plate 2 screws from the mounting
plate as shown and discard them. (See Figure 11.)
4. The mounting plate wiil also be used to locate and
mark the mounting holes on the rear wail.
5. Locate exhaust adaptor, grease filters and
hardware packet.
6. At this point, remove any adhesive tape
(if there is any), on the exhaust adaptor, the grease
filters and the power supply cord.
Figure 10
A thick, protective
covering
Mounting plate
-4
Mounting plate
screw (2 screws)
trol Panel Side
Figure 11
ROOM VENTED INSTALLATION:
Go to STEP 4, PREPARE THE WALL AND UPPER CABINET FOR INSTALLATION
located on page 1 3.
10
 Loading...