171
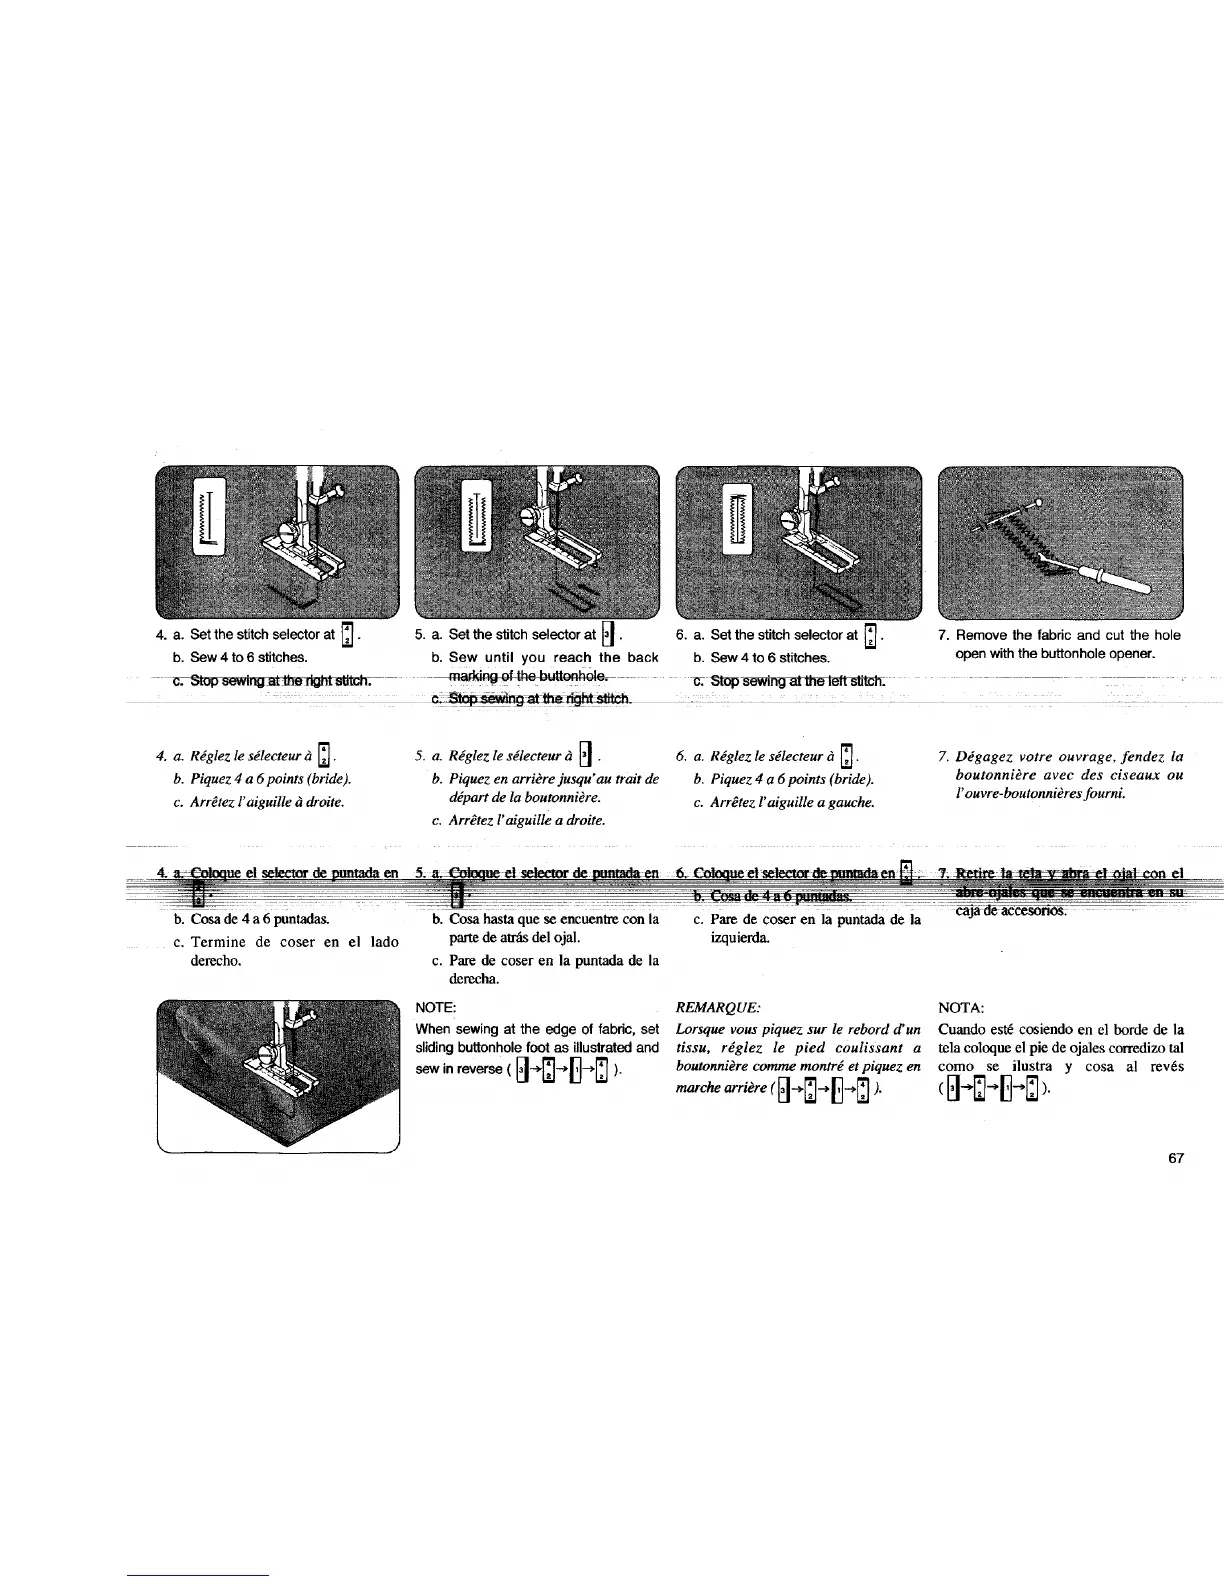
5. a. Set the stitch selector at 13|.
w
b. Sew until you reach the back
7. Remove the fabric and cut the hole
open with the buttonhole opener.
6. a. Set the stitch selector at I_l
b. Sew 4 to 6 stitches.
4.
Set the stitch selector at _.
a.
b. Sew 4 to 6 stitches.
4. a. Rdglez le s_lecteur d _ .
b. Piquez 4 a 6points (bride).
c. Arrdtez l' aiguilte d droite.
El
5. a. Rdgtez le s_lecteur d _1 .
b. Piquez en arri_re jusqu'au trait de
ddpart de la boutonniere.
c. Arr_tez l' aiguitle a droite.
6. a. R_glez le sdlecteur a _ .
I
b. Piquez 4 a 6 points (bride).
c. Arr_tez l' aiguille a gauche.
7. Ddgagez votre ouvrage, fendez la
boutonniere avec des ciseaux ou
l'ouvre-boutonnidres fourni.
b. Cosa de 4 a 6 puntadas.
c. Termine de coser en el lade
derecho.
parte de atr_ del ojal.
c. Pare de coser en la puntada de la
derecha.
NOTE:
When sewing at the edge of fabric, set
sliding buttonhole foot as illustrated and
sew in reverse ( _---*_]---*_]----*_ ).
izquierda.
REMARQUE:
Lorsque vous piquez sur le rebord d'un
tissu, r_glez le pied coulissant a
boutonnidre comm_ montrd et piquez en
marche arri_re (__ ).
NOTA:
Cuando est6 cosiendo en el borde de la
tela coloque el pie de ojales corredizo tal
como se ilustra y cosa al rev6s
67
 Loading...