EasyManuals Logo

Kioti NX6010 User Manual

Kioti NX6010
266 pages
To Next Page IconTo Next Page
To Previous Page IconTo Previous Page
Page #177 background imageLoading...
Page #177 background image
6
-
3
6
-
2
3-POINT HITCH IMPLEMENT OPERATIONNX4510/NX5010/NX5510/NX6010
6
6
-
3
6
-
2
3-POINT HITCH IMPLEMENT OPERATIONNX4510/NX5010/NX5510/NX6010
8. Separate the top link from its
bracket and turn it to adjust its
length so that it becomes close to
the upper bracket mounting hole
of the implement. Then, fit it to
the mounting hole, insert the lock
pins, and fix it with the snap pin.
Remove the implement support as
necessary.
(1) Top Link (2) Lock pin
(3) Snap Pin
6. Attach the ball assembly to the
implement.
(1) Lower Link (2)BallAssembly
7. When the lower link is lifted, it is
secured with "click" sound.
(1) Lower Link (2)BallAssembly
A40O614A
A40O615A
A40O616A
TE120(NX4510,5010,5510)CABIN,ROP3 3 2014-03-27 오후 3:22:23

Table of Contents

Questions and Answers:

Question and Answer IconNeed help?

Do you have a question about the Kioti NX6010 and is the answer not in the manual?
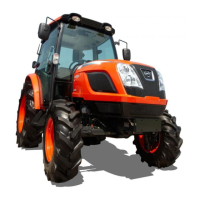
Kioti NX6010 Specifications

General IconGeneral
Engine Power60 hp
Number of Cylinders4
PTOIndependent
PTO Speed540 rpm
BrakesWet disc
Tire Size (Front)9.5-16
Tire Size (Rear)14.9-24
Engine TypeDiesel
TransmissionHST or Synchro Shuttle
3-Point HitchCategory I
SteeringPower steering

Related product manuals