7
Before using the projector, connect it to the charger and allow it to fully charge. Always use the original
charger that was provided to ensure proper charging.
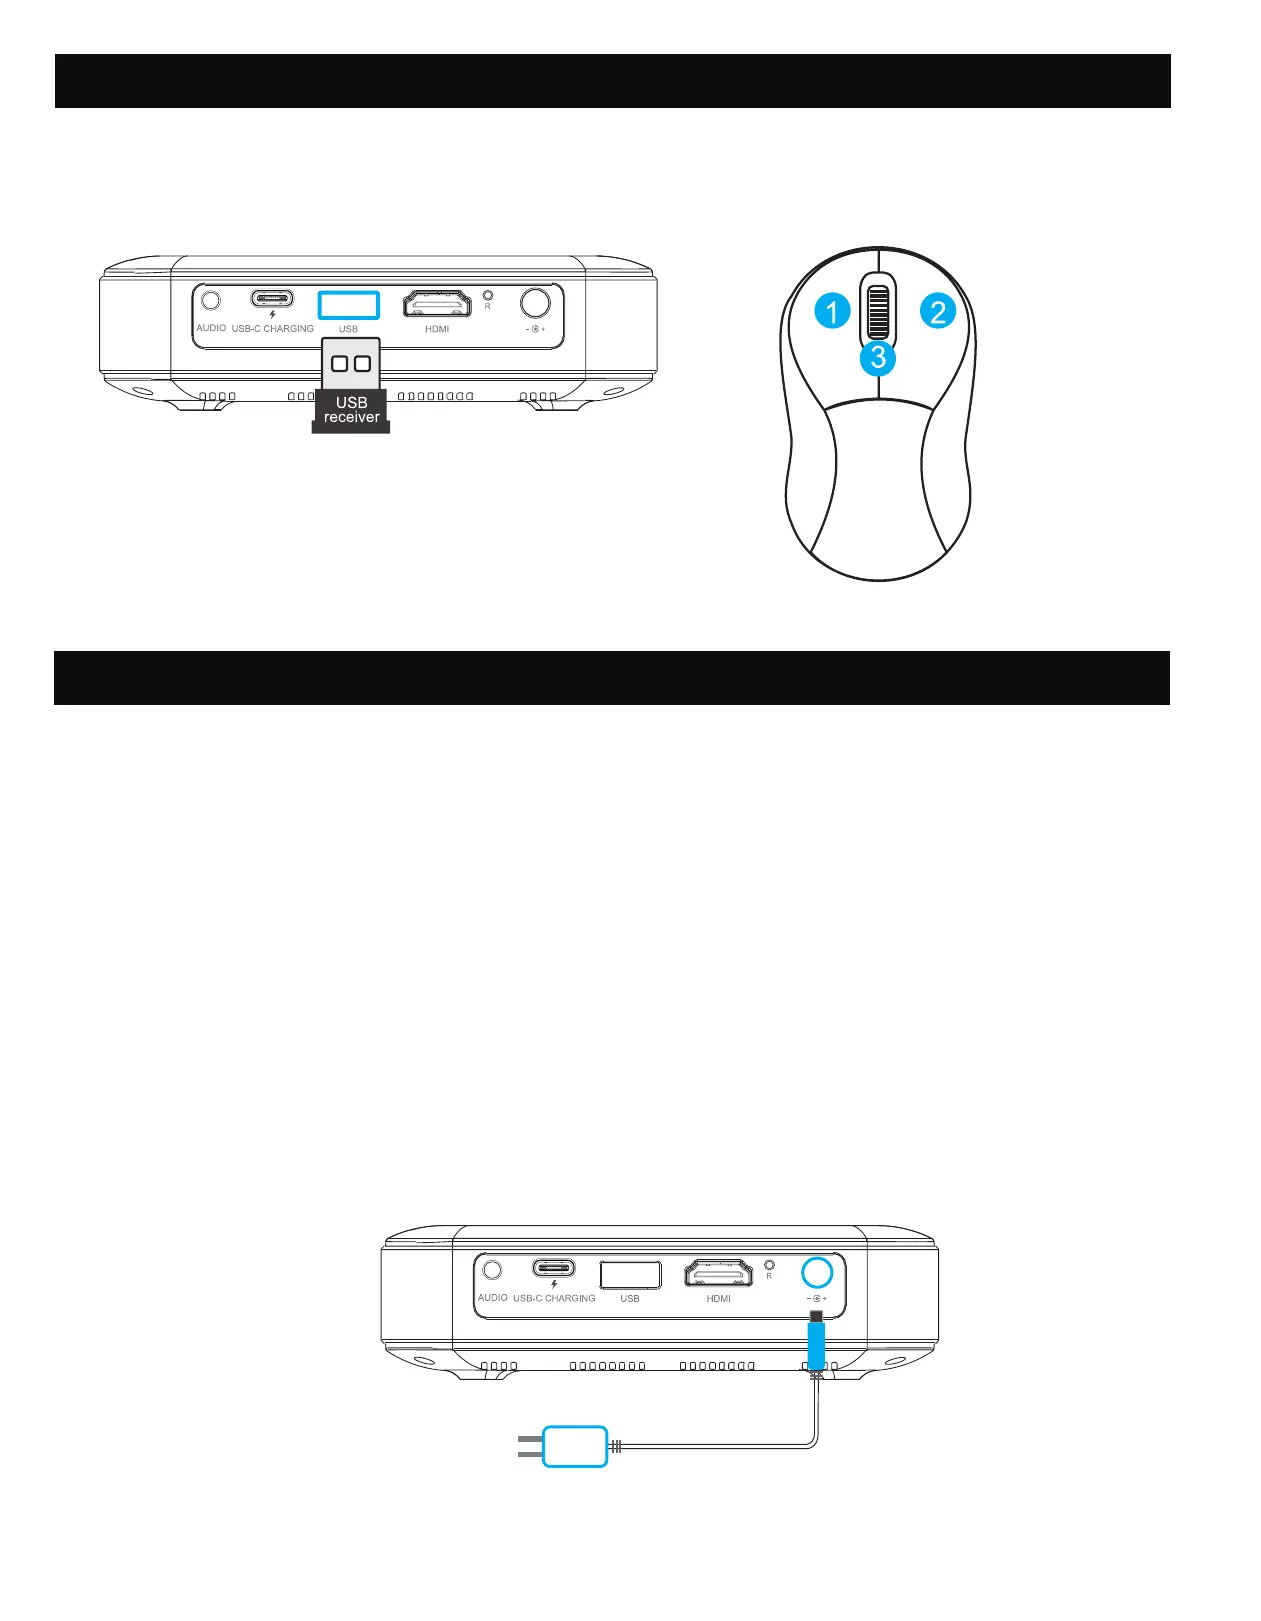
To charge the projector, connect the charging cable to the USBC charging port or connect the DC
adapter to the DC port.
If the red indicator LED light is lashing, you see a red battery icon in the upper right corner of the
screen, or you receive a Low Battery notiication on-screen, this means that the battery is low and you
should plug the projector in for it to recharge. While the projector is charging, the indicator LED will
be a solid red light. Once the process has completed, the indicator LED will change to a blinking white
light.
When the projector is powered on, you can connect the charging cable of your device to the USB port
of the projector, and it will operate as a mobile power bank to charge your electronic devices.
The power output is 5 V/1.0 A.
9. CHARGING THE PROJECTOR
8. USING A MOUSE
If you’d rather use a mouse instead of the provided remote control, this projector supports USB and
wireless mice, as well as USB and wireless keyboards.
1. Left: Conirm
2. Right: Return
3. Wheel: Page up/down
ADAPTER
15V/2A
 Loading...