11 EN
Composing Your Photobooth Layout
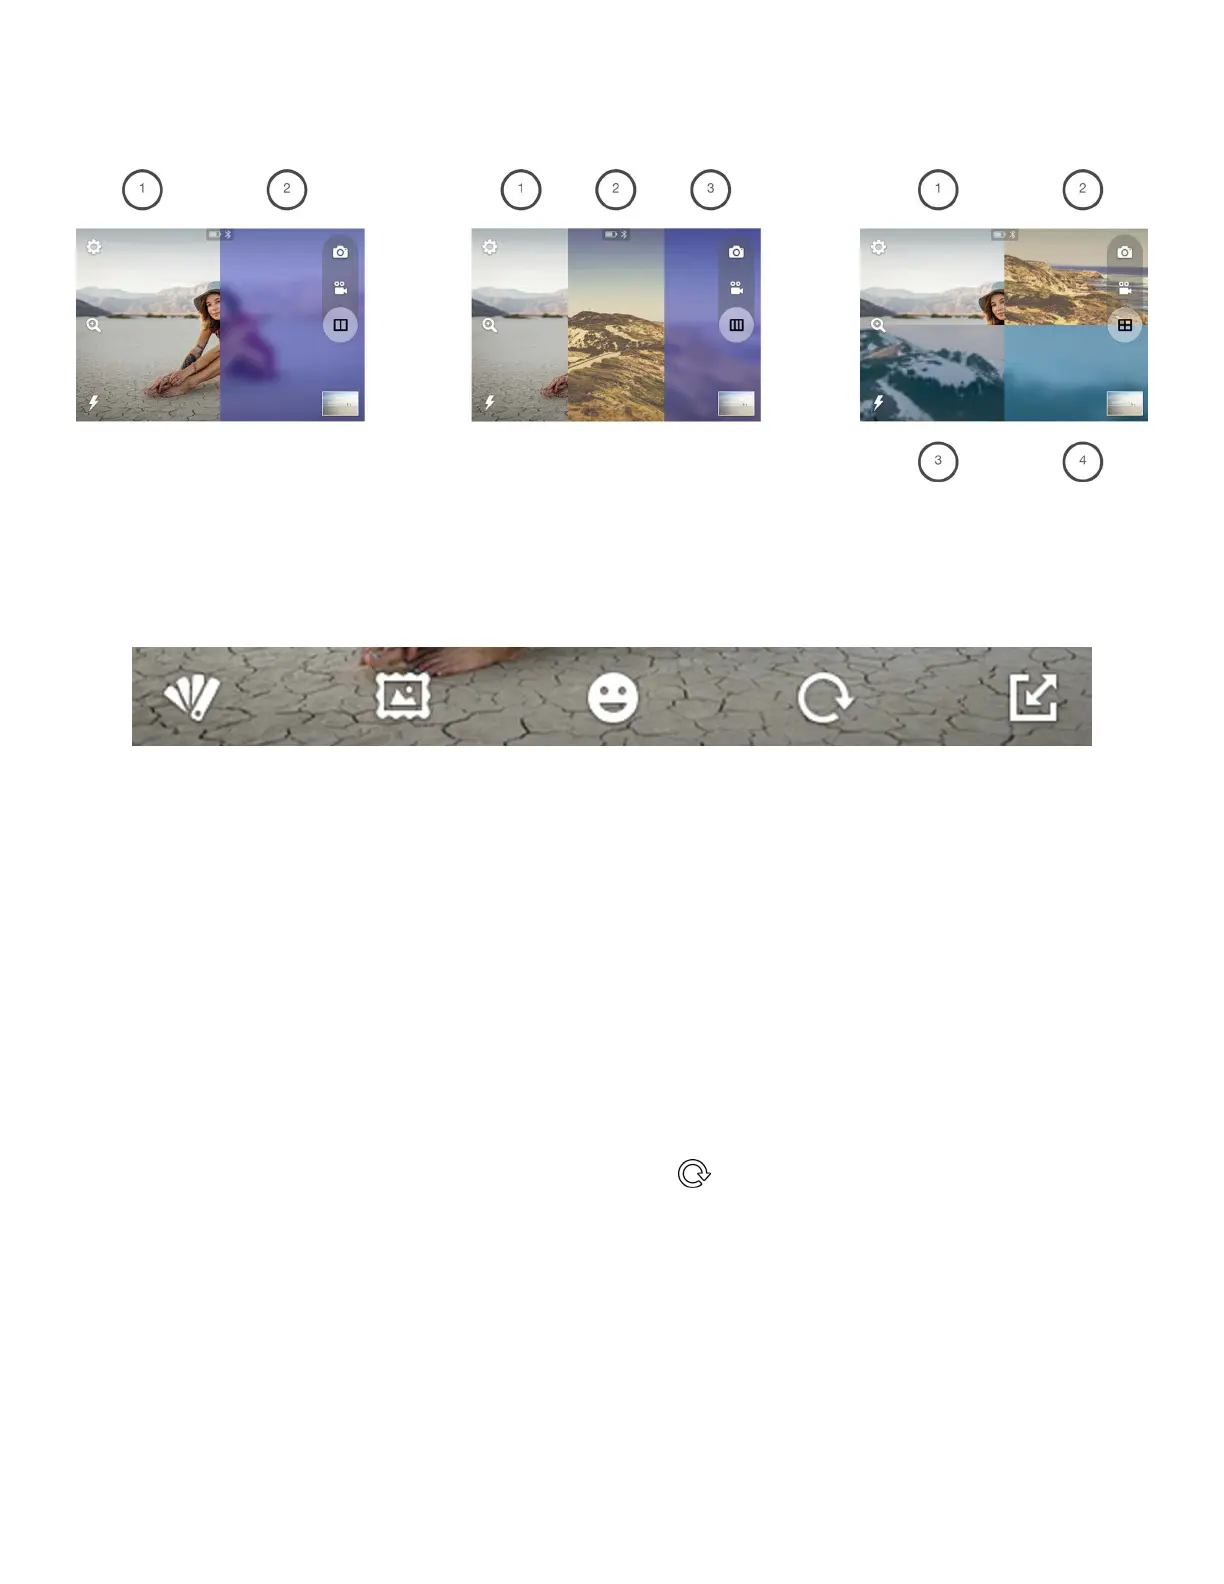
The left portion of the screen acts as the live viewinder until you press the shutter button. Your irst shot will then
appear on the left. The live viewinder portion will successively move, left to right, and then top to bottom, to the next
frame with each shot taken. (Note: You cannot change the order of which image appears in which frame.)
Borders and Filters
To select a border or ilter, press the border or ilter icon. A menu of ive (5) options will display above the Extras menu.
The camera can hold only ive (5) options at a time. The KODAK STEP Prints app (See section 12) oers additional
stickers and borders. You can swap ive (5) of these extras at a time with those on your camera.
After you’ve selected a border or ilter, the initial Extras menu will collapse and the selected border/ilter will display.
Tapping anywhere on the photo will collapse the menus, and you’ll be able to see the entire photo with the extra
applied. If you decide that you don’t want that particular selection, press the back button and you will be taken back to
the initial extras menu; your photo will not change. If you want to apply the selection, press the check mark. The edited
photo will automatically be saved in the gallery, along with your original unedited version. You will be taken back to the
initial extras menu and you will be able to select another extra to apply. You may apply as many as you’d like.
Stickers
When you select a sticker, it will display on the photo and the menus will collapse. You can choose to move the sticker
by dragging it or tapping elsewhere on the photo. You can also shrink or enlarge the sticker via the + and - icons on the
top corners, as well as rotate it 45 degrees at a time by tapping the
icons on the bottom corners. Select the check
mark or back arrow to apply or remove the sticker.
2-photo layout
Filters StickersBorders Rotate Resize
3-photo layout 4-photo layout
 Loading...