7 EN
Battery icon: The battery icon will appear full (all white) when the battery is fully charged. As the battery loses
charge, the battery icon will appear incrementally emptier. When the battery level reaches 35%, the icon will appear
mostly empty and turn red. When the battery level reaches 10%, the icon will become a lashing red outline.
D. Capture Modes
The camera features three (3) capture modes: still photo (including burst function), photobooth (3 layout
options using multiple images), and video recording . The camera icon (still photos) appears by default. Tap the
video icon or the photobooth icon to quickly switch modes.
E. Gallery
In the gallery you’ll be able to view all your captured photos, videos, and photobooth layouts. You can also edit
and print photos and access other options from the gallery. (See section 7 for details)
F. Extras
Tap the extras icon to open a menu for adding borders, digital stickers, and ilters to your photos. (See section 6
for full details) You can add extras before or after taking single shots. You can also add these extras to your completed
photobooth layout.
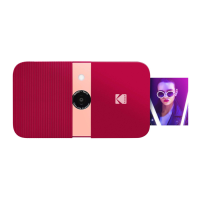
The built-in printer gives you high-quality, 2” x 3” full-color photos printed on special adhesive-backed paper that you
can share on the spot. You can choose to print your photos right after taking them, or later. (See section 8 for details)
Loading Photo Printing Paper
This camera uses only KODAK Photo Paper using ZINK® Zero Ink® Technology.
1. Open the paper compartment by sliding the latch located on the left side of the LCD screen. The screen will pop up.
2. Insert the entire pack of paper, making sure the blue ZINK® calibration sheet is on the bottom, barcode facing down.
Do not throw away the blue calibration sheet before the camera has been calibrated.
3. Close the paper compartment.
4. The blue ZINK® calibration sheet will be detected and ejected after you close the paper compartment door once
the camera is on, or after you take your irst picture.
Turn the camera on to begin setup. Follow the screen prompts to select your language, and the current date and time.
That’s it! You’re ready to snap and share!
Note: You can change these settings by tapping the device settings icon .
5. ABOUT THE PRINTER
6. FIRSTTIME SETUP
 Loading...

