TT-1625 7/17 17
5.4.2 Drill an appropriate size hole in box
GM85123 if a user-supplied conduit
connector is required. Install the user-
supplied connector.
Size the flexible conduit for the electrical
wiring from master RSA III to the controller
communications and power supply. The
flexible conduit size must allow for the
wiring of a RSA III slave, if used.
5.4.3 Attach the RSA III box to the wall with
user- supplied hardware. Protect the
RSA III front panel assembly from dust
and debris when drilling the mounting
holes.
5.4.4 R epeat step 3 for RSA III slaves, as
needed.
5.4.5 Proc eed to step 6, Wire the RSA III.
5.5 Flush mount RSA III initial installation with a
user-supplied Hoffman box.
5.5.1 Prepare the mounting site by creating an
opening in the wall for flush mounting the
RSA III using a user-supplied 203 x 203 x
102 mm (8 x 8 x 4 in.) Hoffman box (part
no. A-SG8X8X4) or equivalent.
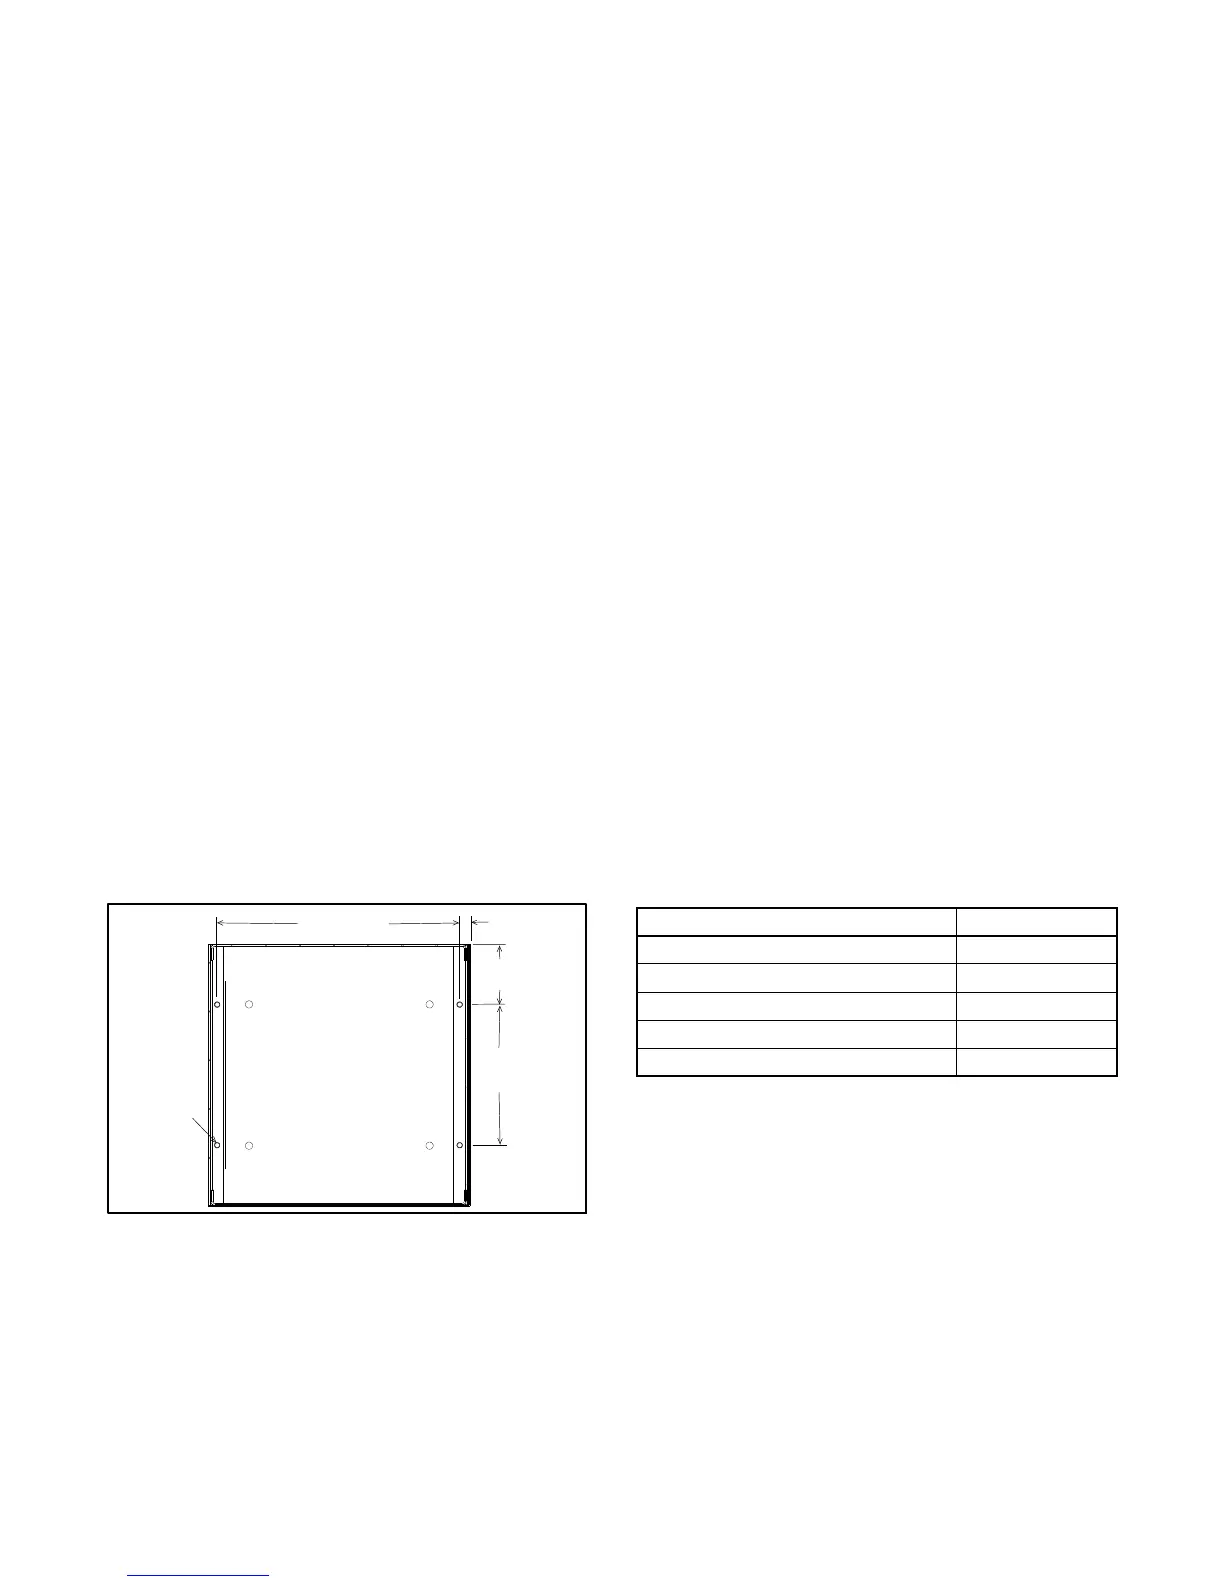
5.5.2 U se wall-mounting plate GM85126 as a
template and drill four 4.4 mm (0.17 in.)
diameter holes in the Hoffman box front
edge for mounting the RSA III front panel
assembly if not already done. See
Figure 18.
GM34433
109.52 mm
(4.312 in.)
188.93 mm
(7.438 in.)
47.6 mm
(1.87 in.)
5mm
(0.2 in.)
4.4 mm
(0.17 in.)
qty. 4
Figure 18 Drilling Mounting Holes in Hoffman Box for
RSA III Front Panel Assembly
5.5.3 Select a location on the box and install a
user-supplied conduit connector or
bushing. Temporarily install the RSA III
front panel assembly to be sure the hole
location with bushing or conduit connector
does not interfere with attaching the
RSA III front panel assembly.
Size the flexible conduit for the electrical wiring
from the master RSA III to the controller
communications and power supply. The
flexible conduit size must allow for the wiring of
RSA III slave, if used.
5.5.4 Attach the RSA III box to the wall with
user- supplied hardware. Protect the
RSA III front panel assembly from dust
and debris when drilling the mounting
holes.
5.5.5 R epeat step 3 for RSA III slaves, as
needed.
5.5.6 Proc eed to step 6, Wire the RSA III.
6. W ire the RSA III.
The installer must supply all leads. Observe the
following guidelines during installation:
D Isolate the RSA III leads from all other voltages.
D Use separate conduit.
D Use grounded metallic conduit for leads or use
shielded cable in nonmetallic conduit.
D Use color-coded wire for easy identification.
D Make leads long enough to allow for walls, ductwork,
and obstructions. Use Figure 19 to determine the
wire gauge for DC power and signal wires.
D Use Belden #9841 or equivalent (shielded twisted-
pair cable) for all communication wiring.
Note: When using R S-485 communication cable,
connect the “shield” wire at either end but not at
both ends.
Length, m (ft.) Wire Gauge
0--137 (0--450) 22
137--213 (450--700) 20
213--343 (700--1125) 18
343--549 (1125--1800) 16
549--853 (1800--2800) 14
Figure 19 Wire Specifications between RSA III and
Generator Set Controller for DC Power
 Loading...


