1070157-T01-E
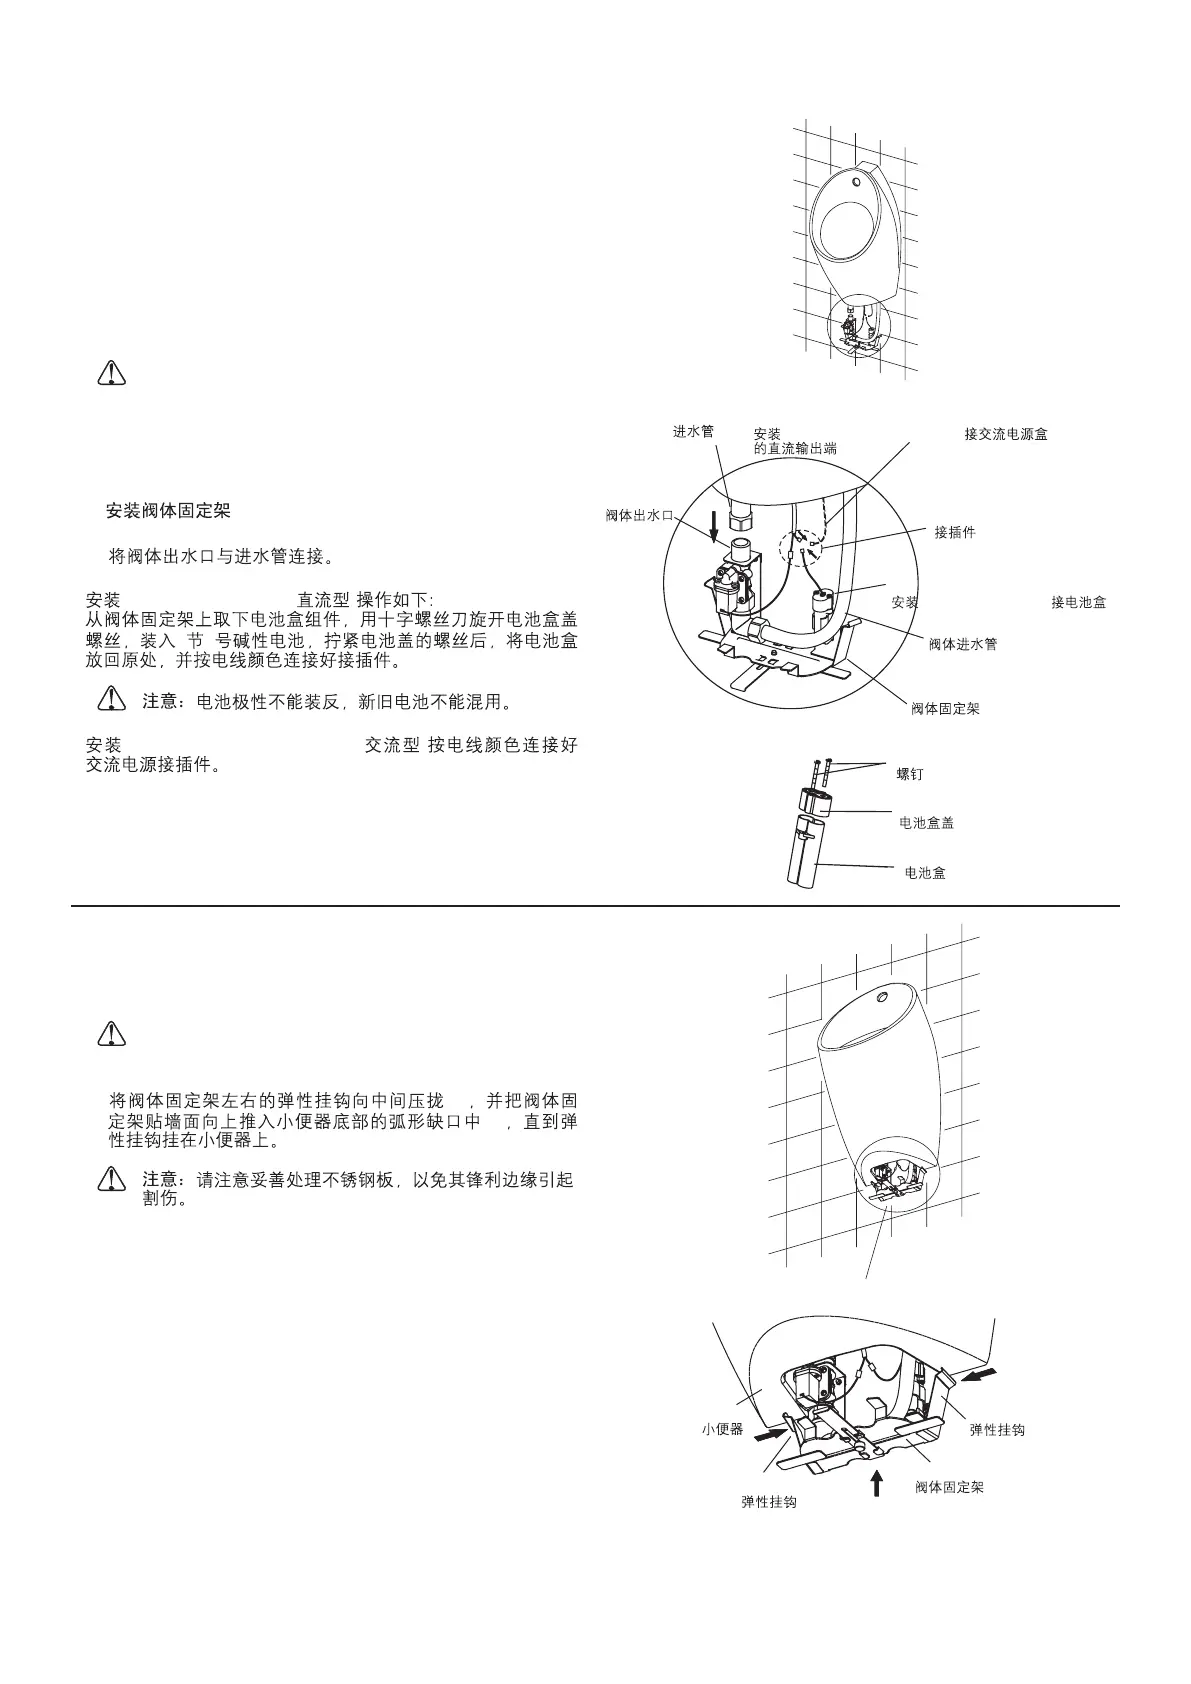
3. Install the bracket assy.
A.
Note:
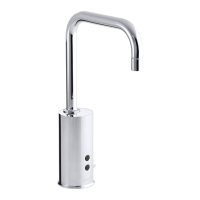
Connect the outlet of valve assy, with the inlet hose.
The way of 16320T-M/ (DC) installation is as below:
Take out the battery box from the bracket assy. Loose the
screws of the battery box assy with a screw driver. Put 2
"AAA" size alkline batteries and tighten the battery box's
cover with the screws. Replace the battery box. Connect the
wires with the same color wires.
Don't mistake the polarity of the batteries and
don't mix the new and used batteries together.
Installing 16320T-MC05/ (AC) must connect the
AC power unit with control box assy with the same color wires.
16321T-M
16321T-MC05
3.
A.
()
27
()
16320T-M/16321T-M
16320T-MC05/16321T-MC05
B.
Note:
B.
Press the two sides spring hooks of bracket of valve assy
close to the center(1). Press the bracket up along the wall
and push it into arc gap of the urinal base(2) until the
spring hooks hangs on the urinal.
Please carefully handle the stainless steel plate
for its sharp edge will cause possible handcut.
(1)
(2)
When installing 16320T-MC05/16321T-MC05,
connect DC output
16320T-MC05/16321T-MC05
Inlet Hose
Connector
When installing 16320T-M/
16321T-M, connect battery box
16320T-M/16321T-M
Inlet Hose of Valve Assy.
Bracket of Valve
Outlet
Screw M2.5X20
M2.5X20
Cover of Battery Box
Battery Box
Bracket of Valve Assy
Spring Hook
(1)
Spring Hook
(2)
(1)
Urinal
-8-
 Loading...