Kohler Co., Kohler, WI
6
113341-2-
BB
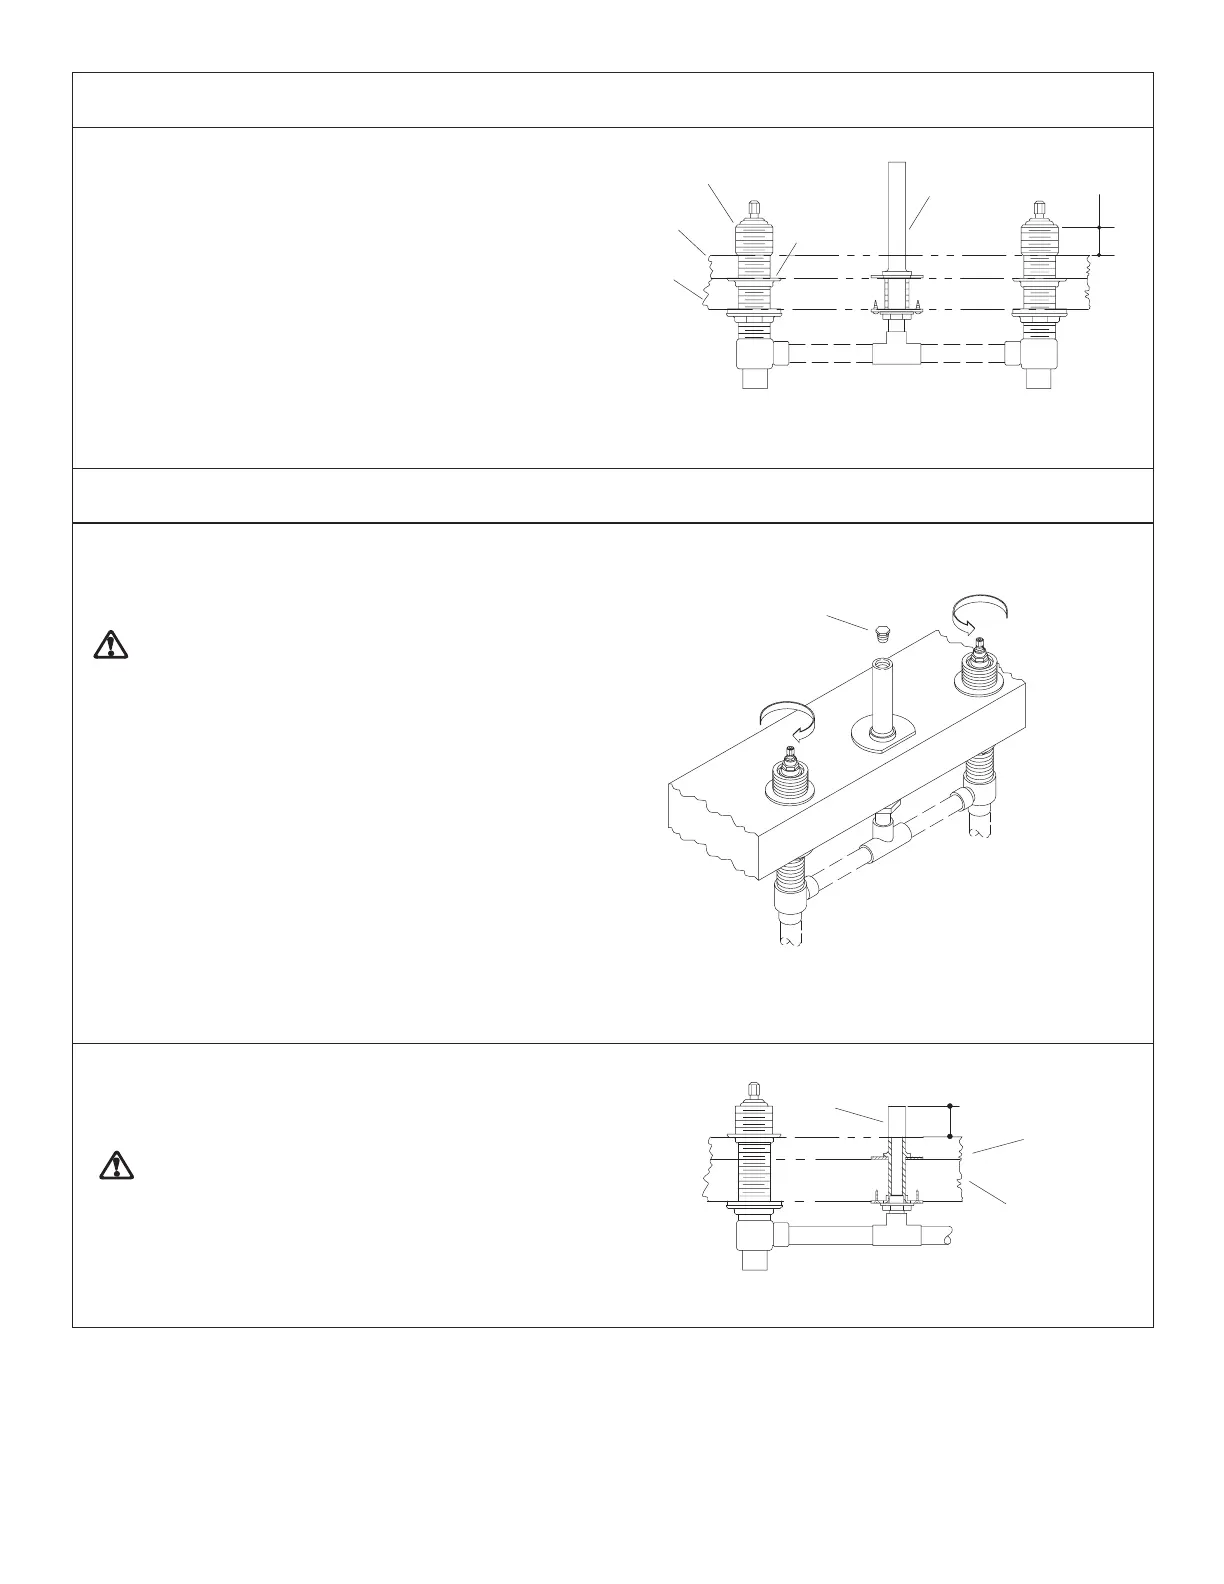
4. INSTALL TILE (IF APPLICABLE)
Verify that there will be a 1” (2.5cm) to 1-1/2” (3.8cm)
distance from the top of the sleeve to the top of the tile. If
not, do not install tile due to improper valve installation.
If proper clearance exists, install tile up to plaster guards
on valves and spout supply tube.
Fig. #13
Sleeve
Threaded
Collar
Rough
Deck
Tile
Spout
Supply
Tube
1” (2.5cm)
MIN. 1-1/2”
(3.8cm) MAX.
5. INSTALL SPOUT
Ensure valves are closed (cold fully counterclockwise, hot
fully clockwise).
Turn off main water supply.
WARNING: Risk of personal injury. Lines may be
pressurized. Do not lean over pipe plug when turning
or removing the plug.
Wrap a towel around the pipe plug to prevent water spray.
Water may purge from the supply tube when you remove
the plug.
Carefully remove pipe plug.
Fig. #14
3/8” Pipe Plug
CLOSE
COLD
CLOSE
HOT
Remove cardboard plaster guard from spout supply tube.
Cut off spout supply tube 1-1/4” (3.2cm) above the bath
rim, finished deck or tile.
CAUTION: Risk of product damage. Ensure all
burrs are removed from supply tube to prevent
damage to O-Ring seal inside the sleeve.
Fig. #15
1-1/4” (3.2cm)
Tile
Finish
Rough
Deck
Spout
Supply
Tube
 Loading...