7
113341-2-
BB
Kohler Co., Kohler, WI
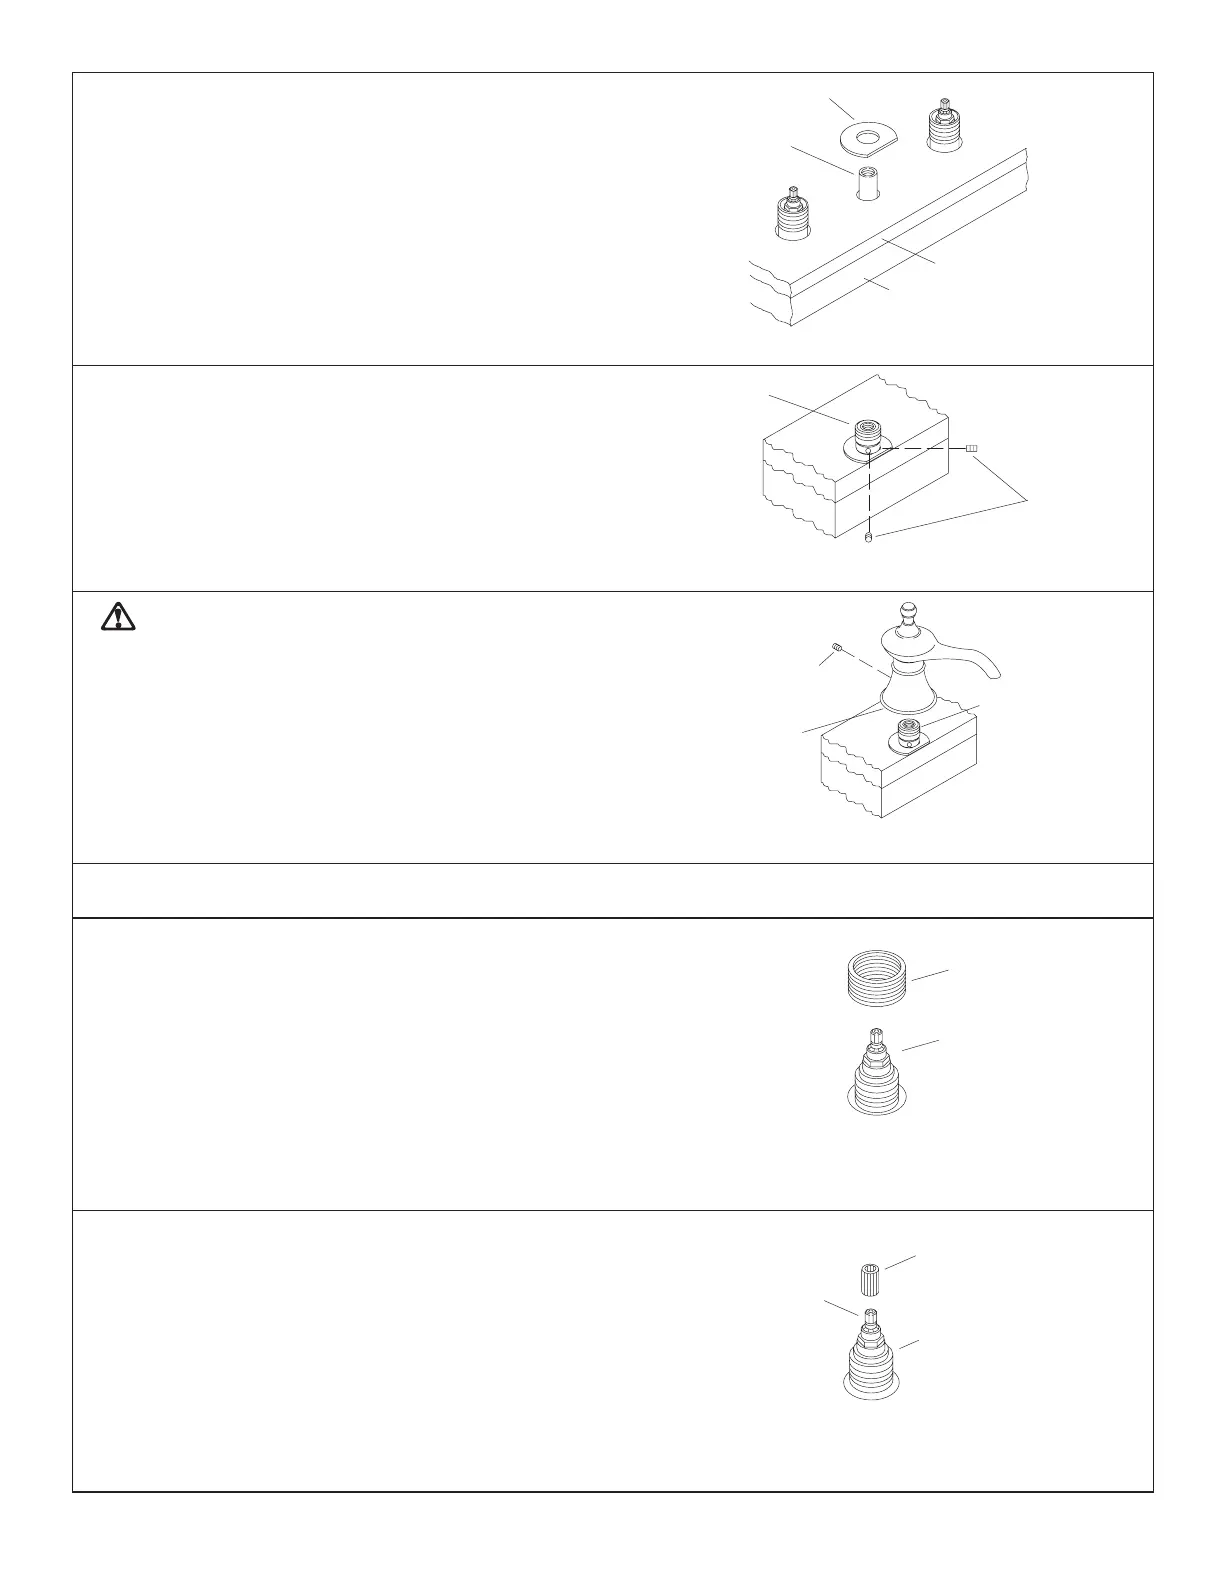
NOTE: Following step is applicable to a tile covered
rough deck installation only.
Slide brass washer, flat side facing forward, on spout
supply tube. Brass washer is furnished with spout.
NOTE: Washer is not needed for bath rim/finished deck
installation.
Fig. #16
Spout
Supply Tube
Rough Deck
Finished Deck
Brass Washer
Back off screws in sleeve, and with a twisting motion
install sleeve on spout supply tube until it contacts washer
surface.
Align sleeve so that screws are not facing directly forward
or backwards. Tighten screws.
Fig. #17
Screws
Sleeve
CAUTION: Risk of product damage. Use care
when installing spout assembly to prevent damage
to O-Ring seal on outside of sleeve.
Place ring of plumbers putty around underside of spout.
Install spout on sleeve by carefully pressing down until
spout base contacts deck, bath rim, or tile. Align spout as
desired and tighten screw.
Screw
Fig. #18
O-Ring
Plumbers
Putty
6. INSTALL HANDLES
Remove the plaster guard from the valve, and discard it.
Remove the threaded sleeve from the valve, and discard it.
Fig. #19
Sleeve
Valve
Press the stem extension onto the valve stem.
NOTE: A spline adapter is provided in addition to the
stem extension, and is the shorter of the two pieces. The
spline adapter will not be used in deck- and bath-mount
installations.
Fig. #20
Stem Extension
Valve Stem
Valve Body
 Loading...