7
ASSEMBLY / ASSEMBLAGE
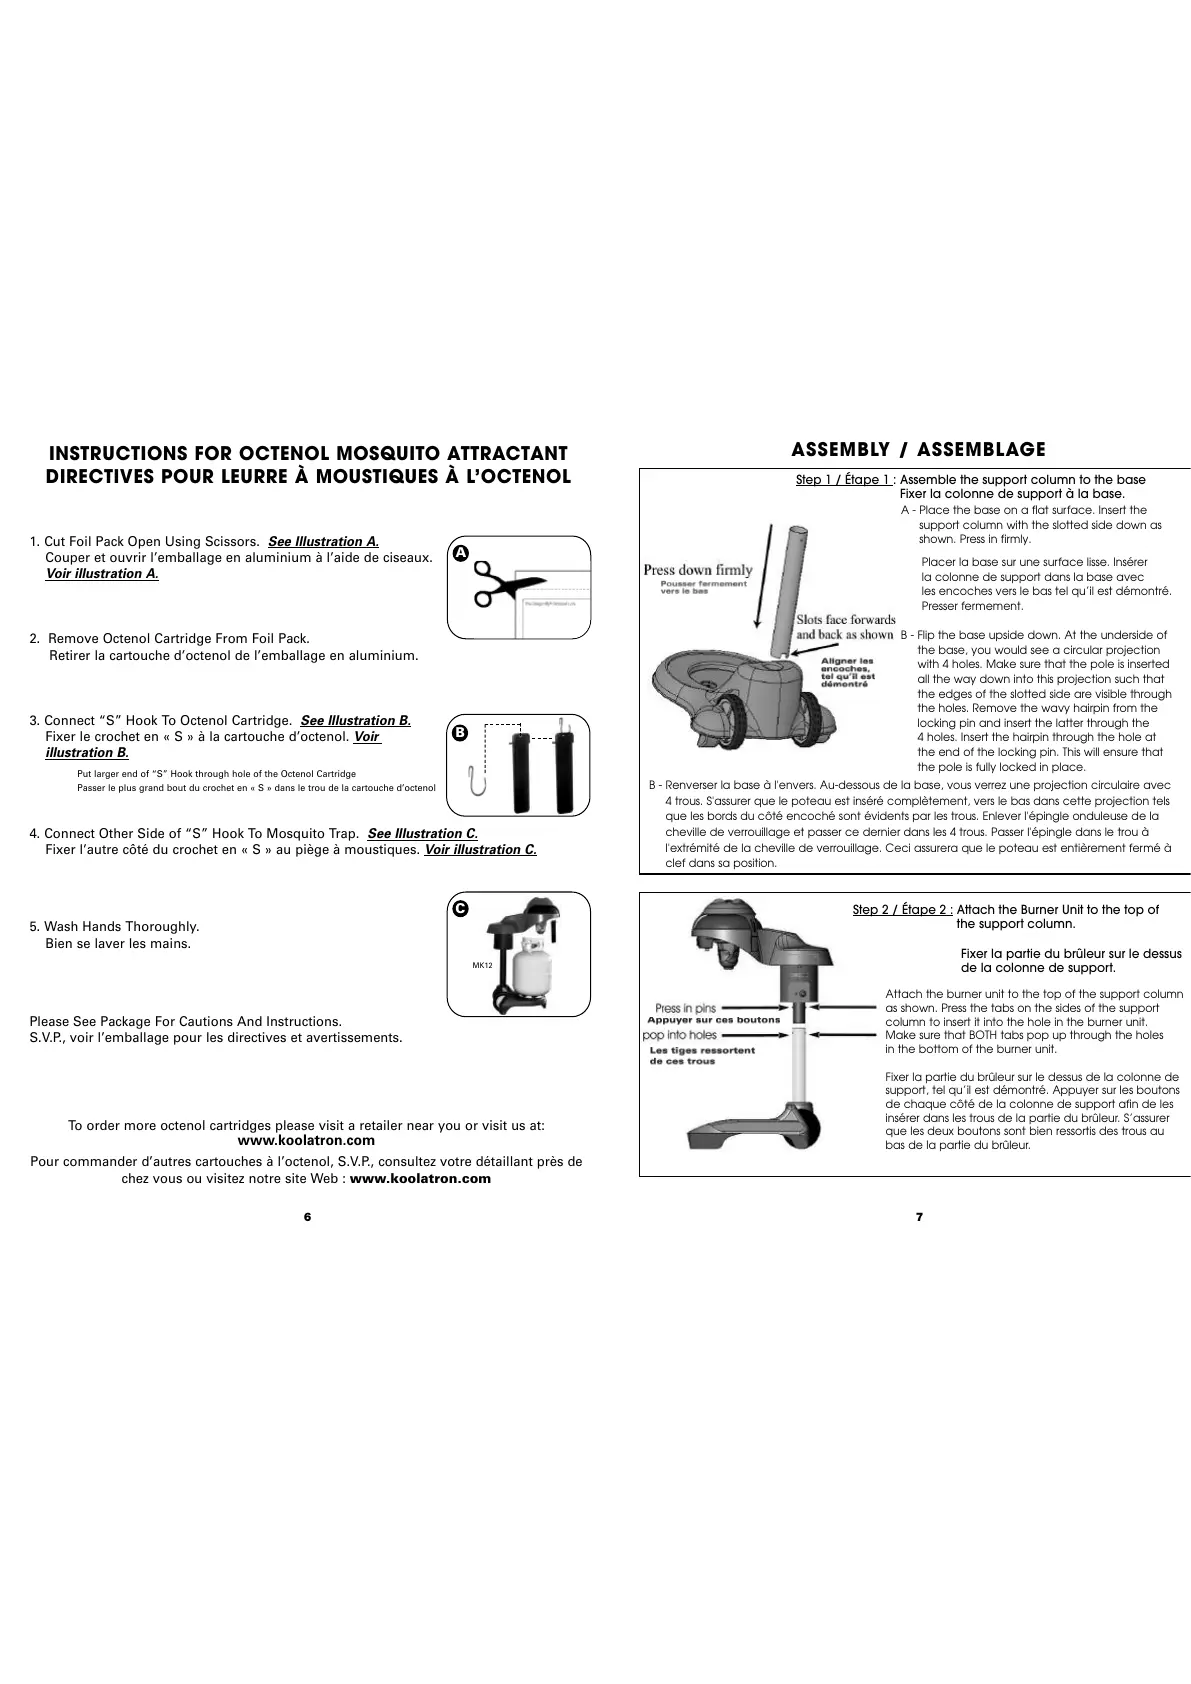
Step 1 / Étape 1 : Assemble the support column to the base
Fixer la colonne de support à la base.
Step 2 / Étape 2 :
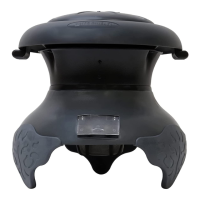
Attach the Burner Unit to the top of
the support column.
Fixer la partie du brûleur sur le dessus
de la colonne de support.
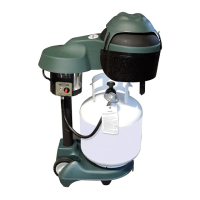
A - Place the base on a flat surface. Insert the
support column with the slotted side down as
shown. Press in firmly.
Placer la base sur une surface lisse. Insérer
la colonne de support dans la base avec
les encoches vers le bas tel qu’il est démontré.
Presser fermement.
B - Flip the base upside down. At the underside of
the base, you would see a circular projection
with 4 holes. Make sure that the pole is inserted
all the way down into this projection such that
the edges of the slotted side are visible through
the holes. Remove the wavy hairpin from the
locking pin and insert the latter through the
4 holes. Insert the hairpin through the hole at
the end of the locking pin. This will ensure that
the pole is fully locked in place.
B - Renverser la base à l'envers. Au-dessous de la base, vous verrez une projection circulaire avec
4 trous. S'assurer que le poteau est inséré complètement, vers le bas dans cette projection tels
que les bords du côté encoché sont évidents par les trous. Enlever l'épingle onduleuse de la
cheville de verrouillage et passer ce dernier dans les 4 trous. Passer l'épingle dans le trou à
l'extrémité de la cheville de verrouillage. Ceci assurera que le poteau est entièrement fermé à
clef dans sa position.
Attach the burner unit to the top of the support column
as shown. Press the tabs on the sides of the support
column to insert it into the hole in the burner unit.
Make sure that BOTH tabs pop up through the holes
in the bottom of the burner unit.
Fixer la partie du brûleur sur le dessus de la colonne de
support, tel qu’il est démontré. Appuyer sur les boutons
de chaque côté de la colonne de support afin de les
insérer dans les trous de la partie du brûleur. S’assurer
que les deux boutons sont bien ressortis des trous au
bas de la partie du brûleur.
6
INSTRUCTIONS FOR OCTENOL MOSQUITO ATTRACTANT
DIRECTIVES POUR LEURRE À MOUSTIQUES À L’OCTENOL
1. Cut Foil Pack Open Using Scissors. See Illustration A.
Couper et ouvrir l’emballage en aluminium à l’aide de ciseaux.
Voir illustration A.
2. Remove Octenol Cartridge From Foil Pack.
Retirer la cartouche d’octenol de l’emballage en aluminium.
3. Connect “S” Hook To Octenol Cartridge. See Illustration B.
Fixer le crochet en « S » à la cartouche d’octenol. Voir
illustration B.
4. Connect Other Side of “S” Hook To Mosquito Trap. See Illustration C.
Fixer l’autre côté du crochet en « S » au piège à moustiques. Voir illustration C.
5. Wash Hands Thoroughly.
Bien se laver les mains.
Please See Package For Cautions And Instructions.
S.V.P., voir l’emballage pour les directives et avertissements.
To order more octenol cartridges please visit a retailer near you or visit us at:
www.koolatron.com
Pour commander d’autres cartouches à l’octenol, S.V.P., consultez votre détaillant près de
chez vous ou visitez notre site Web : www.koolatron.com
A
B
C
Put larger end of “S” Hook through hole of the Octenol Cartridge
Passer le plus grand bout du crochet en « S » dans le trou de la cartouche d’octenol
MK12

 Loading...