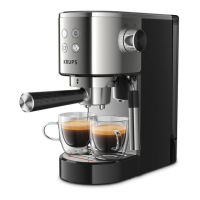
32
ENGLISH
MAKING ESPRESSO
IMPORTANT!
If the espresso function is used for the rst time, the appliance must be
cleaned as described in the “FIRST USE” paragraph.
IMPORTANT! To prevent splashes of hot water, check that the lter holder
has been tightened until it stops before preparing the coffee. Do not
remove the lter holder while the water is owing, as the appliance is still
under pressure.
With ground coffee
The type of coffee you choose will determine the strength and taste of your espresso: the
ner your ground coffee, the more intense your espresso will be.
1. Fill the water tank with drinking water (2) and ret it on the appliance, making sure that
it is correctly in place (3).
2. Connect the device to a mains socket (4).
3. Turn on the machine by pressing On button (C) (5), On button light switches on, and
espresso buttons lights ash white (6). The machine is pre-heating. When the
temperature reaches pre-set value, espresso buttons white light will keep on.
4. Add the ground coffee to the 1 cup or 2 cups lter (F1, F2) using the measuring spoon
(K, 1 spoon = 1 measure = 1 espresso) (15, 16), then pack it using the tamper (17),
turning it using a circular motion. Once packed, the coffee measure should not exceed
the MAX level. For best quality, pack the coffee effectively. Clean off any excess coffee
from around the lter holder (18).
5. Slot the lter holder into place then turn it to the right until it stops (19).
6. Place a cup or two cups under the lter holder.
7. Press 1 espresso button or 2 espresso button (20), according to the number of
cups you want to taste (15). Selected button white light will ash, the machine starts
to make coffee (21). When coffee is done, espresso buttons white light keep on. Your
coffee is ready.
8. Unlock the lter holder by turning it to the left (22) and remove it from the appliance.
Do not touch the lter as it will be hot. Empty the lter. Remove the lter from the lter
holder.
9. Wash the lter and lter holder under running water to remove the rest of the coffee
(23).
With coffee pods
The device is compatible with all common coffee pods (F3). Note: For larger coffee pods,
we recommend using the 1 cup lter. For espresso pods, use the pod lter.
1. Insert the lter for coffee pods into the lter holder.
2. Place the pod as centrally as possible in the lter holder. Follow the instructions on the
packaging of the coffee pods for correct placement of the pod in the lter holder.
3. In order to start the brewing process, prepare the device by carrying out steps 1–3
under “With ground coffee” and press the or button.
FIRST USE
OR IF THE MACHINE HAS NOT BEEN USED FOR A
LONG PERIOD
Keep the ground coffee in the fridge as this will lock in the avour for longer.
Do not ll your lter holder to the brim; use the measuring spoon (1 spoon for a 30ml espresso,
2 spoons for 2 x 30ml espressos). Clean off any excess coffee from around the lter holder.
If you have not used the appliance for more than 5 days, empty and rinse the water tank.
Always make sure the appliance is switched off before removing the tank to ll it or empty it.
Always ensure the appliance is positioned on a at and stable surface.
IMPORTANT! Do not place heating elements on the appliance.
IMPORTANT! The safety instructions are part of the appliance.
Please read them carefully before using your new appliance.
RINSING THE SYSTEMS BEFORE FIRST USE
To ensure your rst cup of coffee tastes great, we strongly recommend that you rinse the
espresso machine with hot water, as instructed below:
1. Remove the water tank (A) (1) and ll it (2). The water level should not exceed the
“MAX” mark on the tank and should contain at least 300 ml (= equivalent to 2 large
cups). Then place it back on the machine, ensuring that the cover is closed (3).
2. Connect the device to a mains socket (4).
3. Make sure the knob (L) is set to the preheat position (L1) .
4. Press On button (C) (5) on control panel (D). On button light switches on, and espresso
buttons lights ash white (6). The machine is pre-heating.
5. Place a lter (F2) (7) without coffee into the lter holder. Slot the lter holder into place
and turn it to the right until it stops (8).
6. Place two cups under the lter holder.
7. When the temperature reaches pre-set value, espresso buttons white light will keep on.
Press 2 espresso button (9), button ashes white. The machine starts to pour the
water (10). When it is over, espresso buttons white light keep on.
8. Press steam button (11). Espresso buttons white light off, steam button
orange light keep on, the machine is pre-heating.
9. Place the steam nozzle (G1) into a container lled with water (12).
10. Turn the knob (L) from preheat (L1) to steam position (L2) (13), steam button white
light ashes, the machine starts to make steam. Let the water heat for 20 seconds, then
turn the knob back to preheat position (L1) (14).

 Loading...
