60
PRIMER - COLD START
CONTROL LOCATIONS & FUNCTIONS
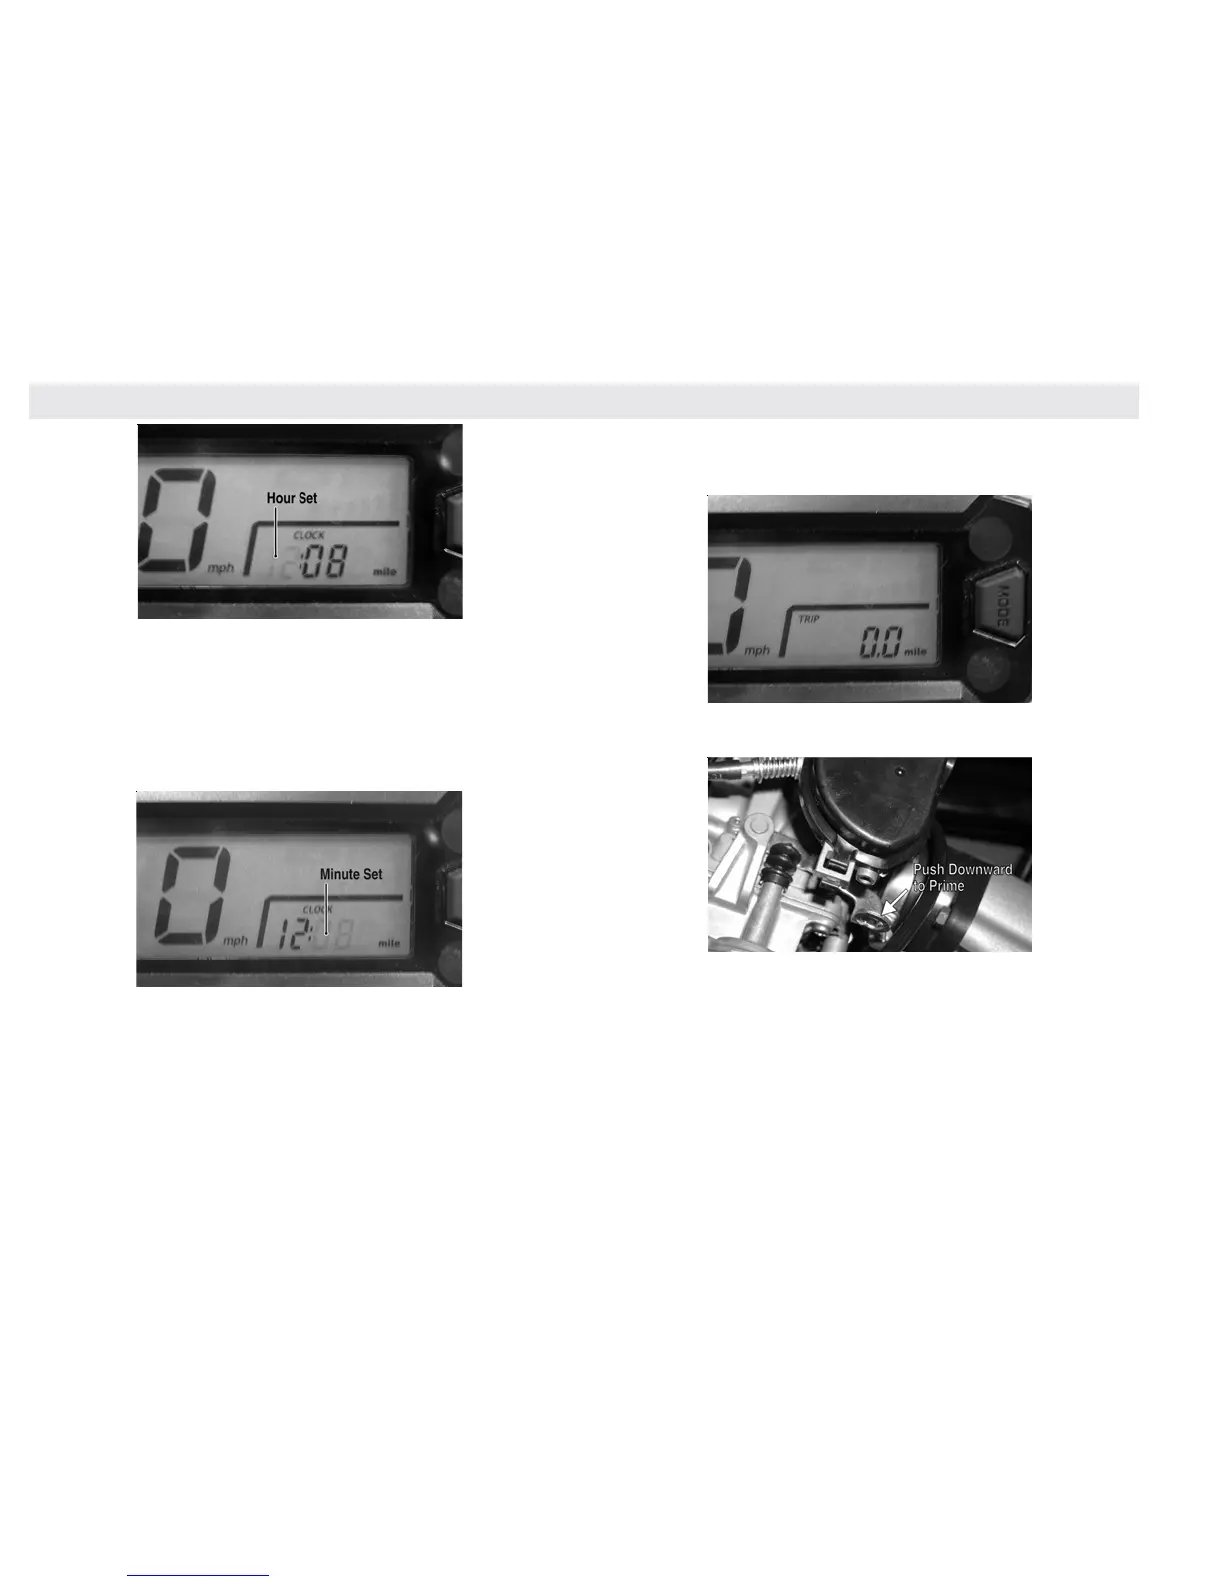
C. After you have selected the desired hour, press and release the Ad-
just/Set Button 1 to toggle the clock to the minute display (the minute
digits will flash), then press the Mode Button 2 to set the minutes.
After approximately ten seconds, the minute display will stop flashing
and the gauge will return to normal operation.
NOTE: The hour display will read from 1 to 24 and may be cycled
rapidly by holding the Mode Button
22
22
2 down for three seconds.
D. To reset the trip meter, press and hold the Mode Button 2 until TRIP
is displayed in the display; then press and hold the Adjust/Set Button
1 and Mode Button 2 until the trip meter reads O (zero).
NOTE: Power for the clock memory is supplied through the 15-amp
accessory fuse; the gauge verifies when the ATV's ignition is turned
ON. If the clock loses its memory power supply (failed fuse, etc.), the
gauge will "power-up," reset, and shut down repeatedly until clock
memory power supply is restored. Always check the 15-amp acces-
sory fuse first if this gauge begins to cycle through this "power-up"
sequence.
A primer pump is located on the carburetor. Depress and release
the lever several times prior to attempting to start a cold engine
(see page 29 of this manual).
FUEL/VENT HOSES
Replace the ATV's fuel hoses every two years. Damage from ag-
ing may not always be visible. Do not bend or obstruct the routing
of the carburetor/throttle body vent hose. Make certain that the
vent hose is securely connected to the carburetor/throttle body
and hose holder and the opposite end of the hose is always open.

 Loading...