7
2. Set-up
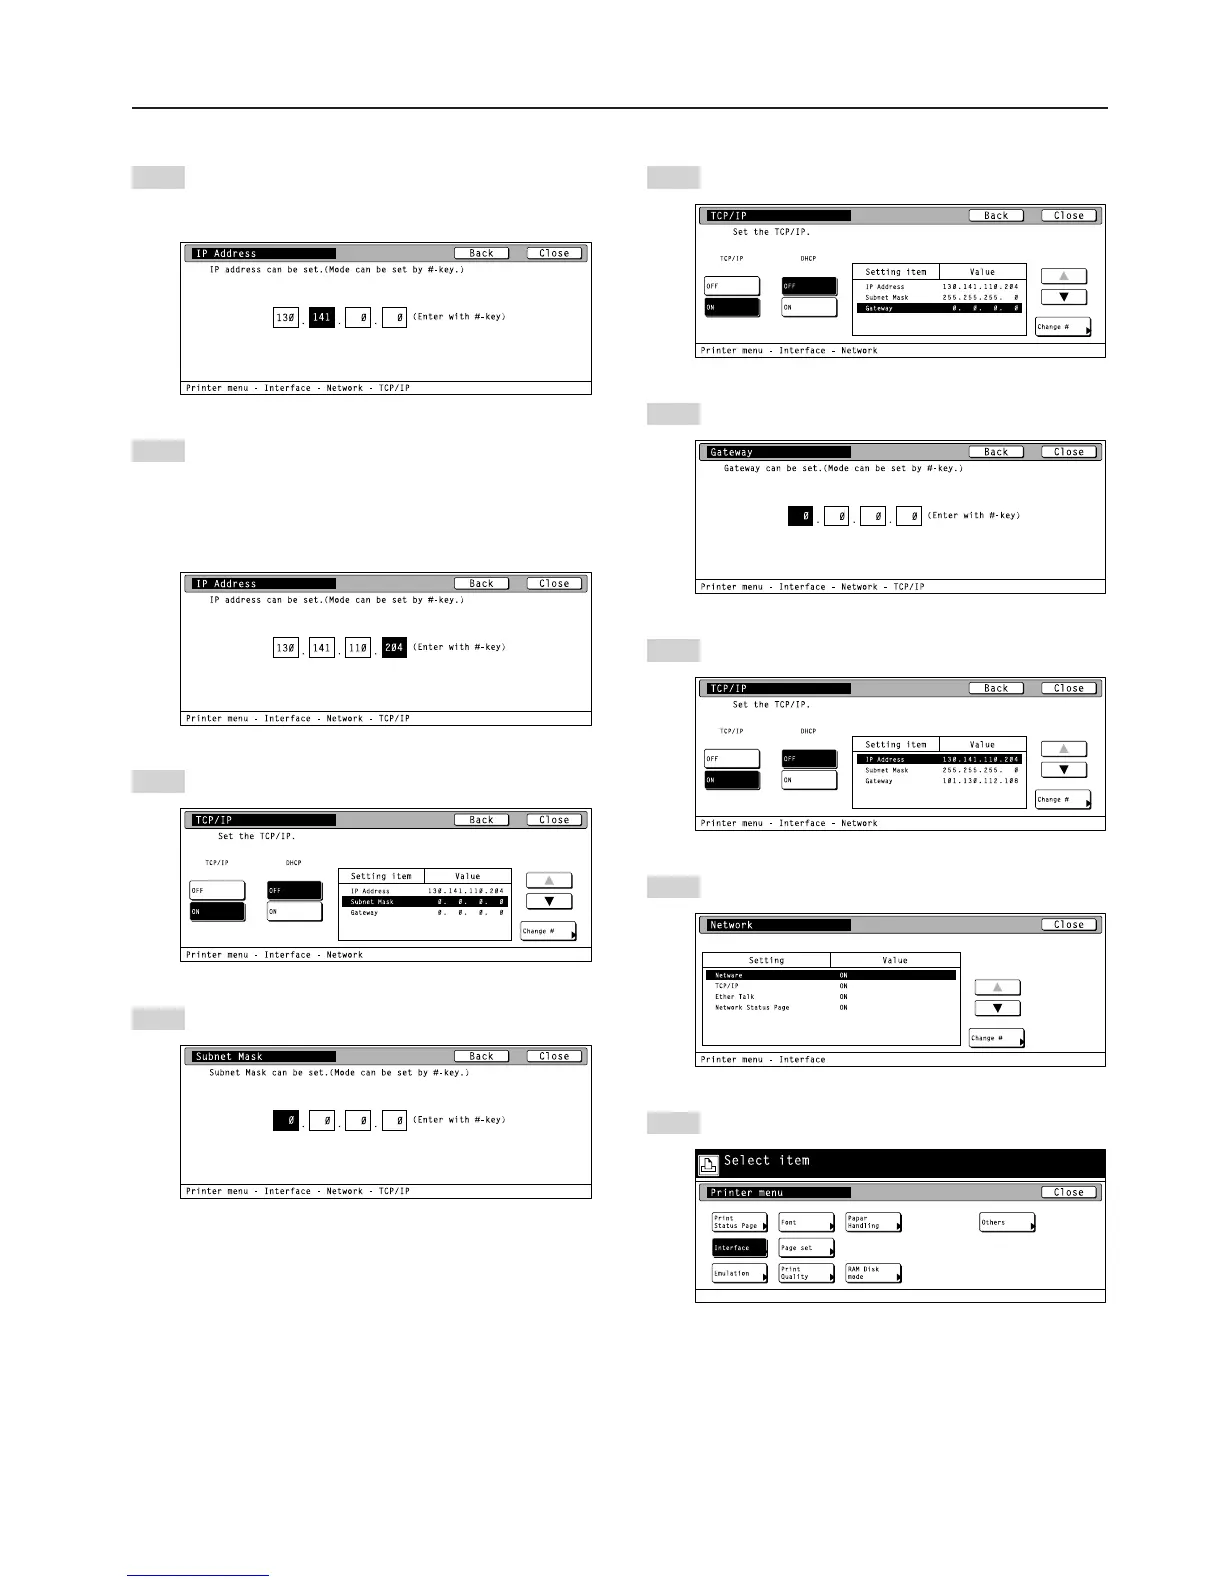
Use the “▲” and “▼” cursor keys to select “Gateway” and
touch the “Change” key.
Enter the Gateway address in the same way you entered
the IP address in steps 8 to 10.
When you are finished making all of the network settings,
touch the “Close” key.
Touch the “Close” key.
Touch the “Close” key. The printer will switch back to the
printer mode.
Enter the next 3 digits and press the sharp (#) key.
• To change an entered address, press the sharp (#) key to
select a 3-digit block and use the numeric keys to enter
the correct address.
Repeat the same procedure for the remaining blocks of the
address. Once the input of the IP address is completed,
touch the “Close” key. The display will return to the “TCP/IP”
screen.
• To cancel the entered address, touch the “Back” key. The
address that was shown before you entered a new
address will reappear.
Use the “▲” and “▼” cursor keys to select “Subnet Mask”
and touch the “Change” key.
Enter the Subnet Mask address in the same way you
entered the IP address in steps 8 to 10.
9
10
11
12
13
14
15
16
17
 Loading...